Intro
Many times you’ll want to customize specific elements like a page title, an author of the blog post, category or anything else visible on the WordPress theme. You might want to edit it globally (on the entire website) or only on specific pages.
Sometimes the theme you are using has an option to customize specific elements. But many times the elements you’d like to change or hide are just too specific that the theme authors could provide customization settings for all individual parts of the theme.
Fortunately, there is a way that everyone can learn how to customize specific parts of the website using some custom CSS code. If you’ve never done any programming, don’t be afraid – CSS is actually not a programming language, but a style sheet language. The difference is that with the programming languages like PHP, JavaScript or Python you are writing the logic of the program. With CSS, you declare how the website will look like (think colors, backgrounds, a layout of the website, fonts, sizes, spacings, visibility etc.).
WordPress allows for writing the custom CSS, regardless of the themes and plugins you are using. It has a special place dedicated to writing smaller code snippets of CSS in the Customizer -> Additional CSS.
We’ll focus on how to find the selector of any element on your website and use the CSS property to your requirements.
Table of Contents
- How CSS works – Anatomy of the CSS Rule
- How to find the right CSS selector
- Where to add custom CSS to WordPress
- What can be customized with custom CSS
- Customization on specific page or group of pages
- Customization only on mobile or desktop view
- Conclusion
How CSS works – Anatomy of the CSS Rule
I mentioned above the CSS selector and CSS property. What are these anyway? Here is a nice figure which explains the individual parts of the CSS rule:
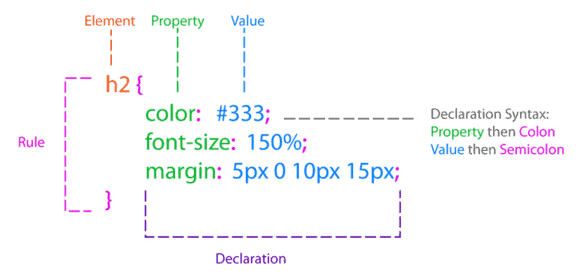
If at this point it is not clear yet to you how CSS works, this will be much more evident from the practical example below.
How to find the right CSS selector
The first thing about our job will be finding the correct CSS selector. The selector is part of the CSS rule which defines which element on the page we want to modify (or – in our case – hide).
The video below presents, how the website can be inspected and modified on-the-fly. This is perfect to test your requirements and then implement them into your website. Bear in mind that changes are not stored – they are only temporary – changes have to be saved in the section for custom CSS (we’ll talk about this in the next chapter).
The screenshots below were made using Google Chrome browser, so I suggest using it for this job. However, other browsers with the developer tools will work as well.
To find a selector:
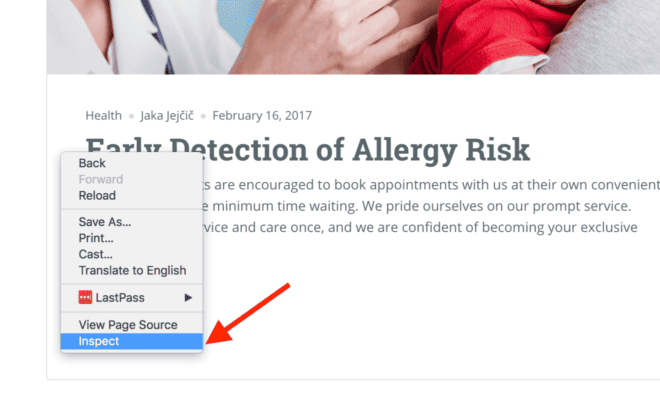
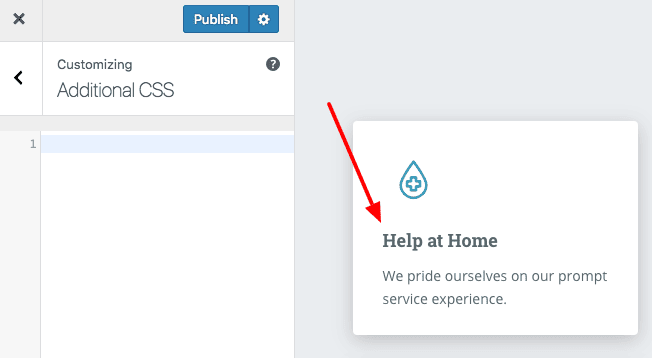
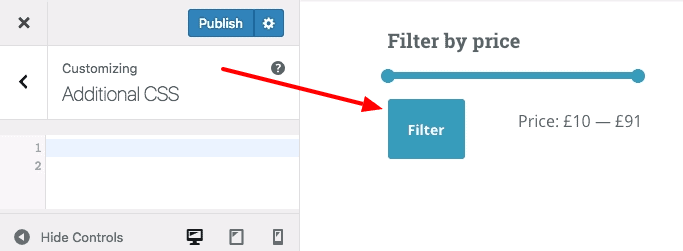
- On your website, right-click on the element you want to modify (or hide).
- From the menu that opens up select the Inspect:
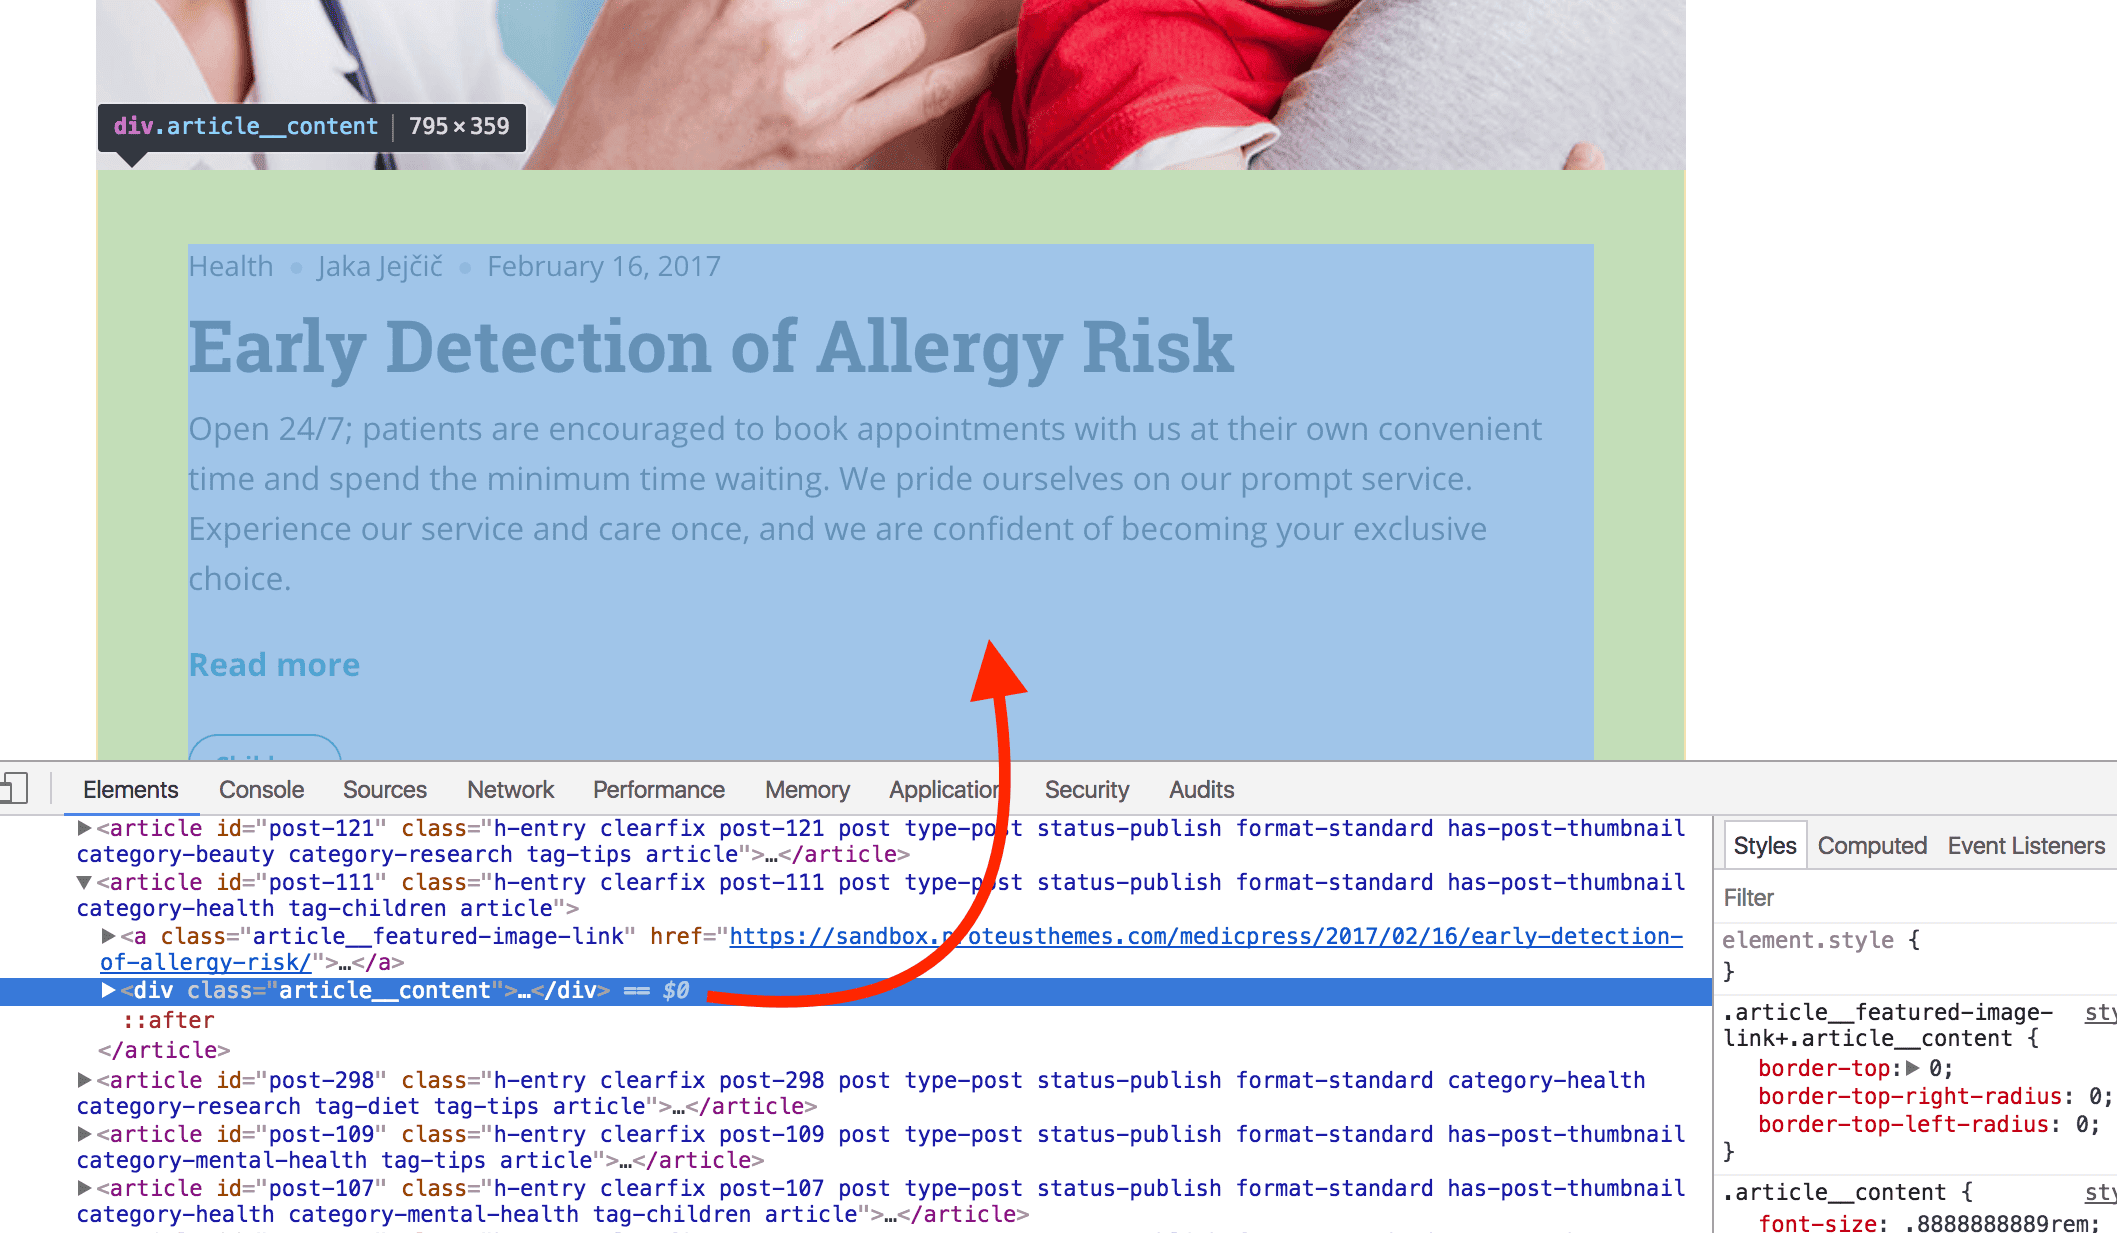
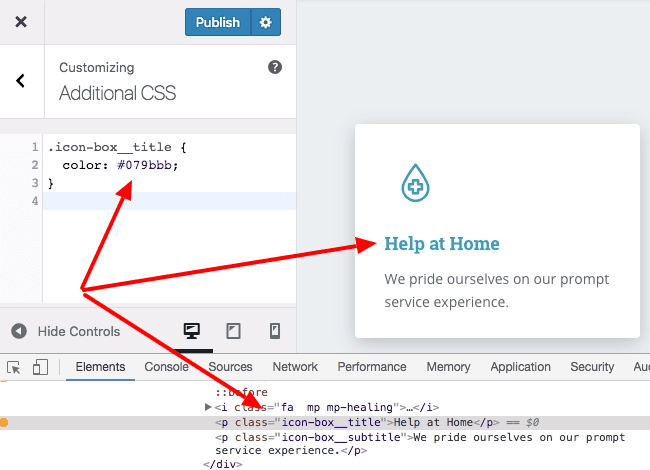
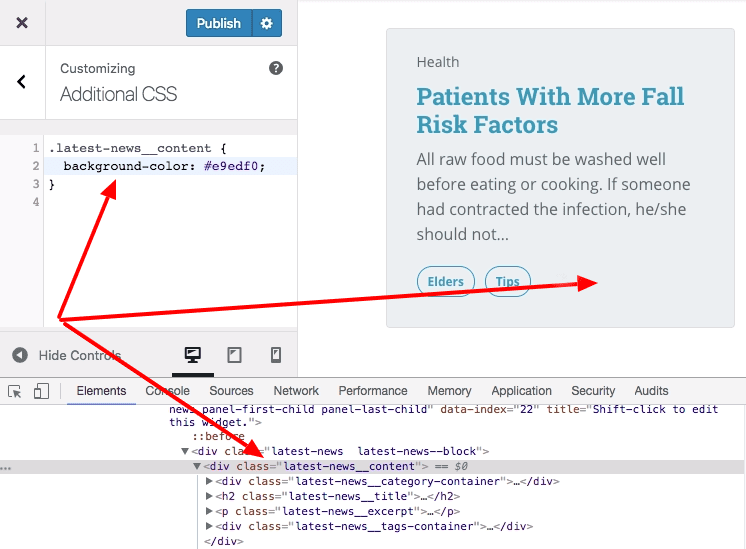
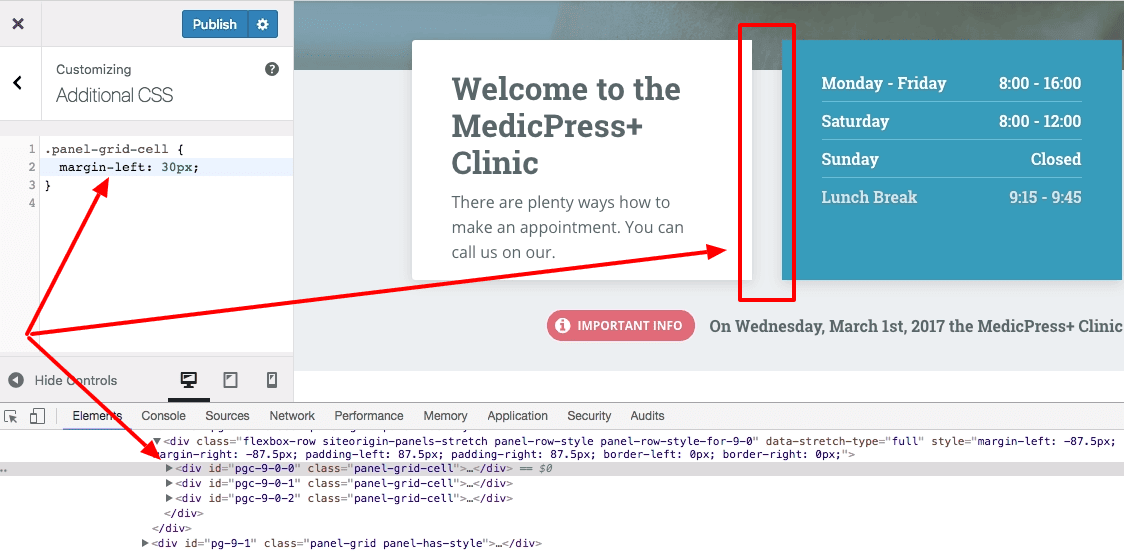
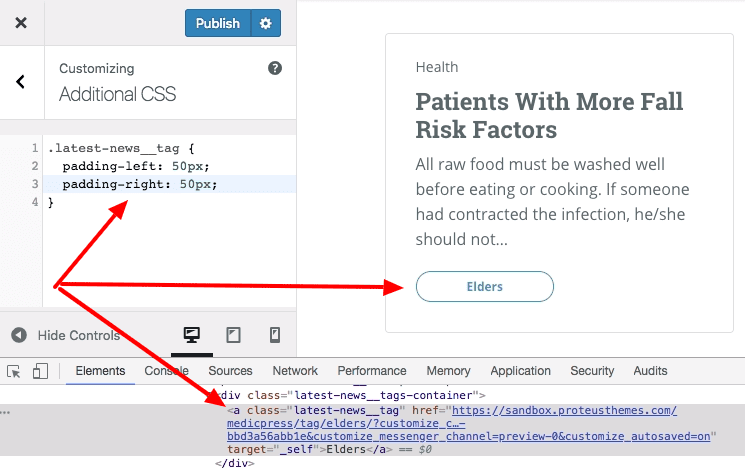
- The Chrome DevTools panel will open at the bottom of the website. Hovering with a mouse over the elements in the DevTools will highlight the individual elements on the page:
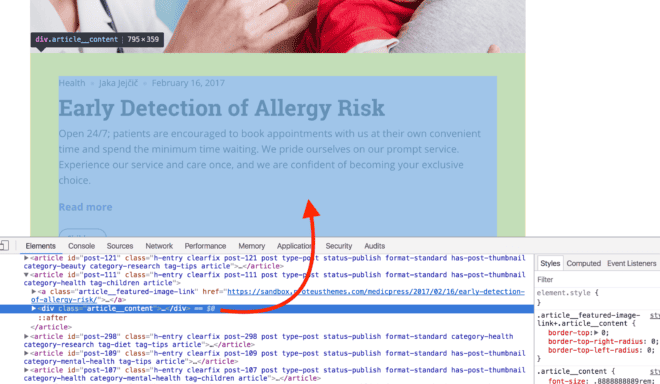
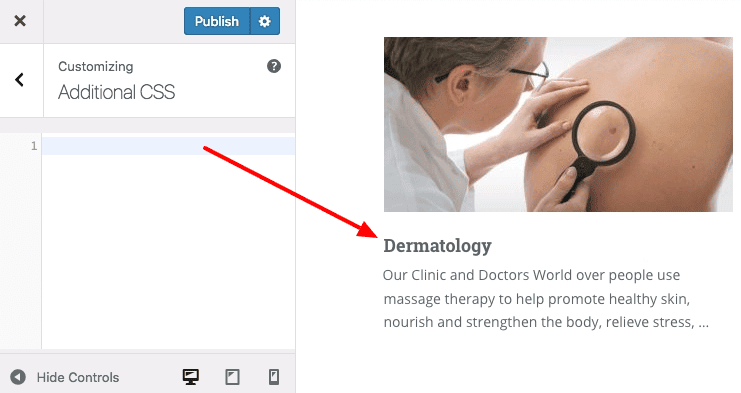
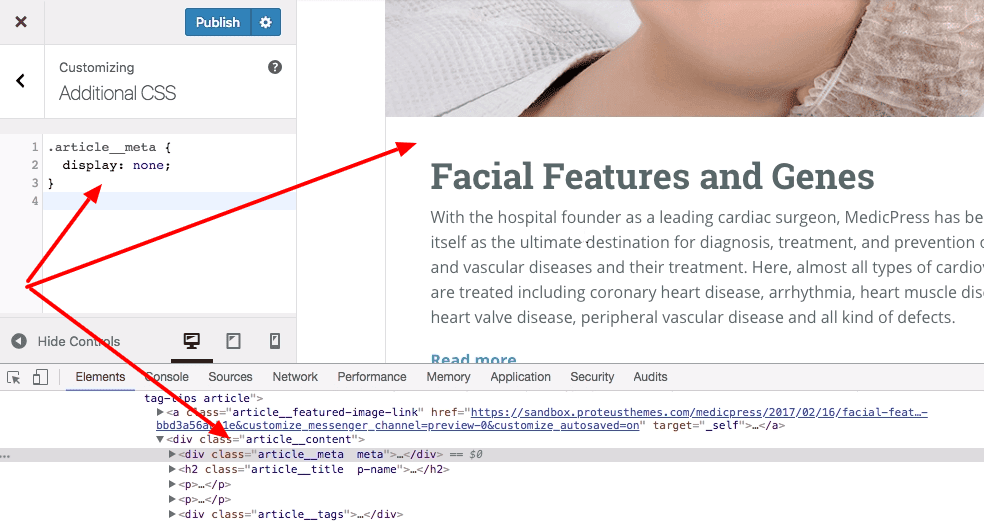
- Find the element you want to hide by hovering over the elements. The elements are nested and you can find more specific elements by clicking on the triangle arrow ►. Once you find it, click on it.
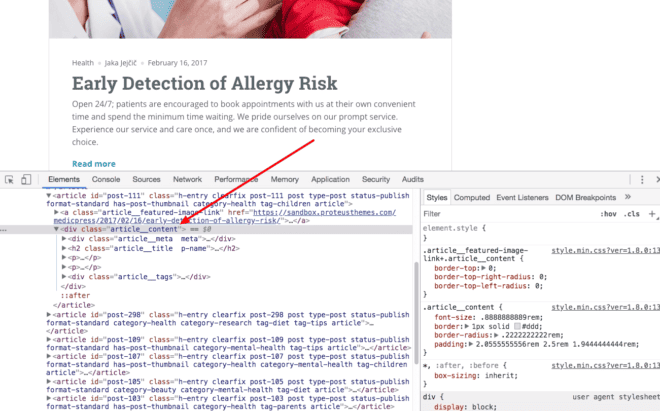
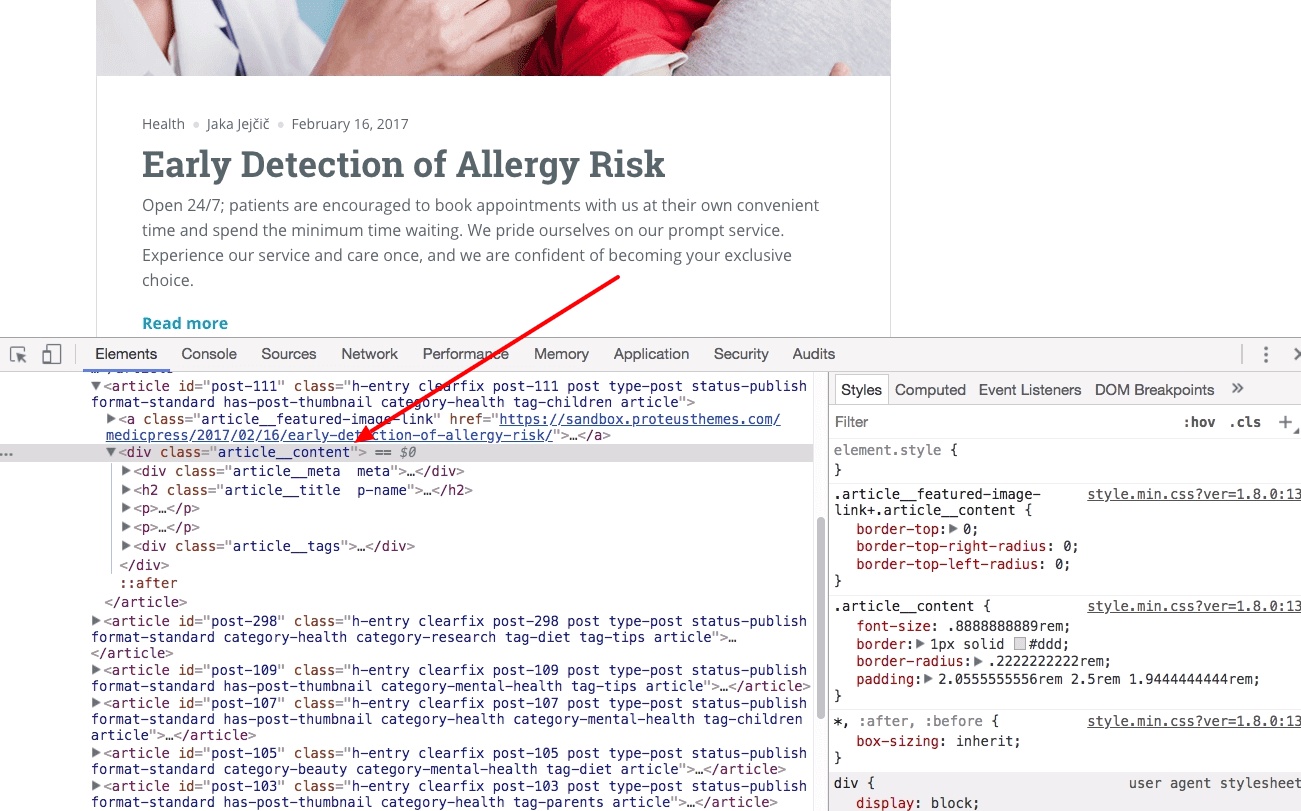
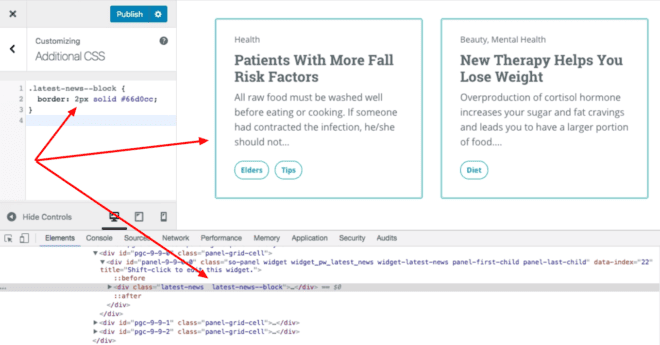
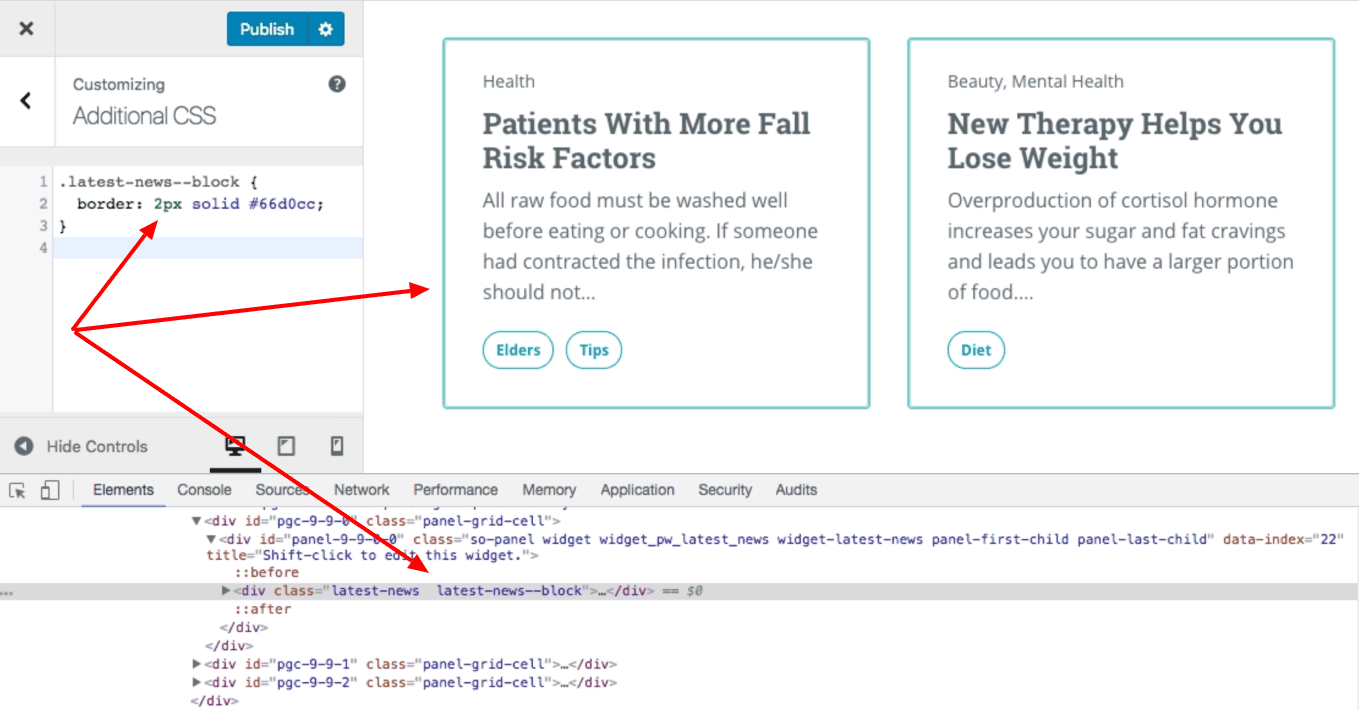
- On the right side of the DevTools, you will see the Styles tab open and there you will find all the existing CSS selectors that are targeting this element. Most probably, you are looking to copy the very first one:


Sometimes there are no existing styles for the element you want to target. In this case, you have to find a class on your own. If the element looks like <p class="some-css-class"> then you can target this element by class name. The CSS selector, in this case, would be .some-css-class.
Where to add custom CSS to WordPress
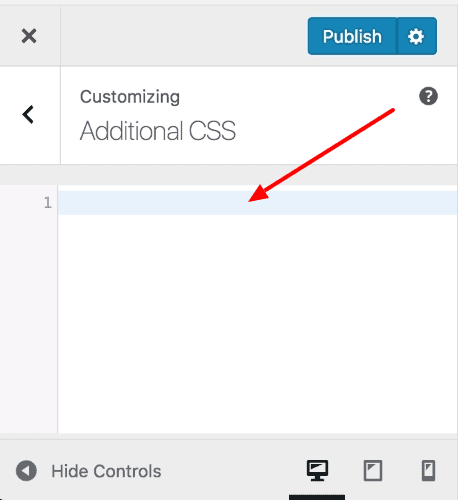
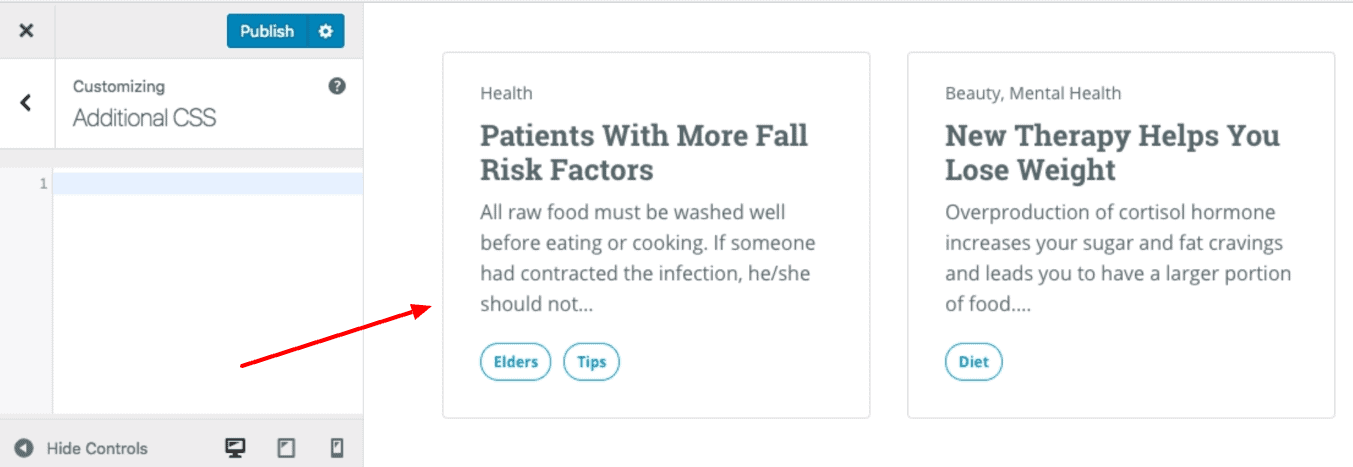
WordPress has built-in “Additional CSS” field in Customizer. All the custom CSS can be stored here. Code snippets can be used to override default CSS code.
If you add your custom CSS in the Additional CSS field you don’t need to worry about child themes. You won’t lose any CSS changes even after the theme updates.
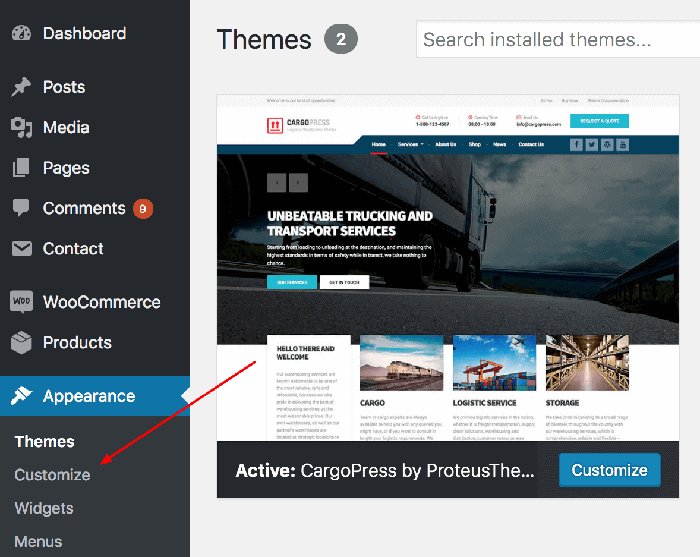
- Open wp-admin -> Customizer.
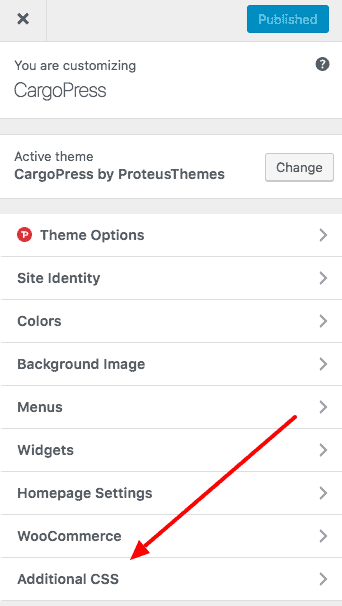
- There is “Additional CSS” button at the bottom.
- Custom CSS field appears and here we put the custom CSS according to the CSS syntax.
- Changes in Customizer are immediately visible on the website but to save these changes for the website they need to be Published.
What can be customized with custom CSS
There is a variety of properties in CSS that can be applied to your design. Explaining all is out of the scope of this article, so here are some most common properties that are usually customized.
Color
The propertycolor specifies the color of text or an element. Colors in CSS can be specified in many ways. Three most common values for colors are “color name”, “hexagonal value”, “RGB value” and “RGBA value”, where you can also define opacity of the color. Opacity is set as a decimal number in a range from 0 (zero) to 1 (one), where 0 (zero) is completely transparent and 1 (one) is completely opaque. Often we pick a color from a Color-picker, therefore, is no need to know the color values by heart.
Add color with the color name.
.paragraph {
  color: red;
}
We recommend using hexagonal value in most cases.
.title {
  color: #00ff00;
}
Add color with RGB value.
.content {
  color: rgb(0, 0, 255);
}
Add color with RGBA value. Perfect for setting text opacity.
.special {
  color: rgba(201, 76, 76, 0.3);
}- Before adding a custom color.
- After adding a custom color.
Background color
The propertybackground-color sets the background color of an element. The background of an element is the total size of the element, including padding (but not the margin).
.panel {
  background-color: #6100f2;
}- Before adding a custom background color.
- After adding a custom background color.
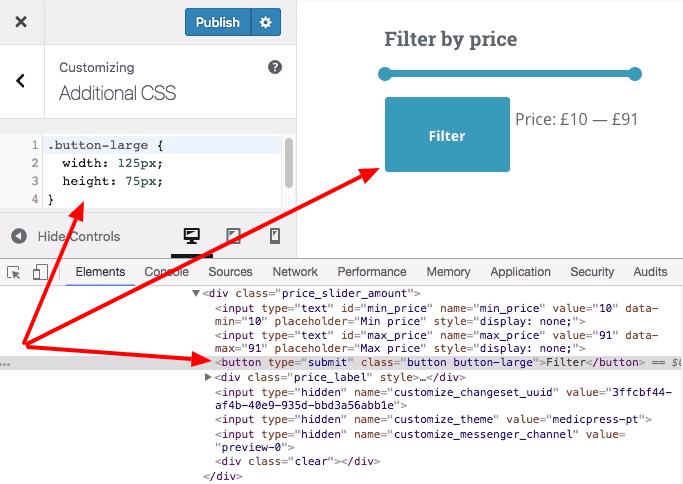
Dimensions (height and width)
The height and width properties are used to set the height and width of an element. The height and width can be set to auto (this is the default. Means that the browser calculates the height and width), or be specified in length values, like pixelspxcm, etc., or in percent % of the containing block.
.item-large {
  height: 200px;
  width: 50%;
}- Before adding custom dimensions.
- After adding custom dimensions.
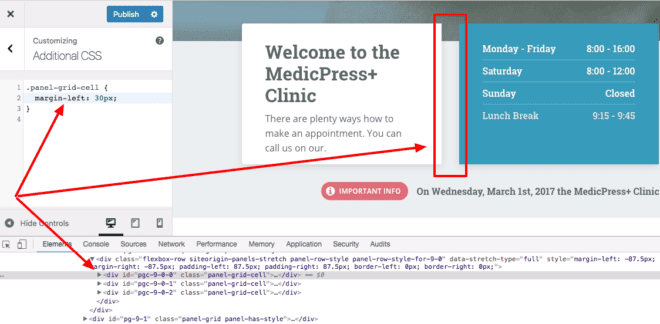
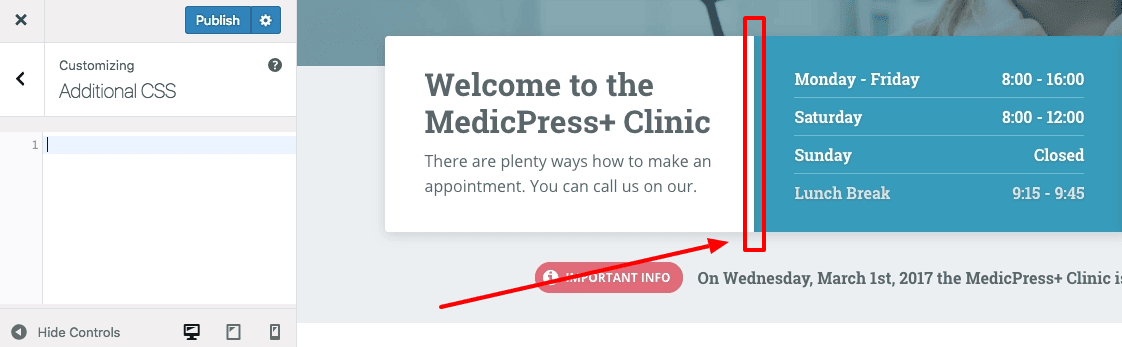
Margin
The CSS margin property is used to create space around elements, outside of any defined borders. With CSS, you have full control over the margins. There are properties for setting the margin for each side of an element (top, right, bottom, and left).
.panel {
  margin-top: 100px;
  margin-bottom: 100px;
  margin-right: 150px;
  margin-left: 80px;
}- Before adding a custom margin.

- After adding a custom margin.
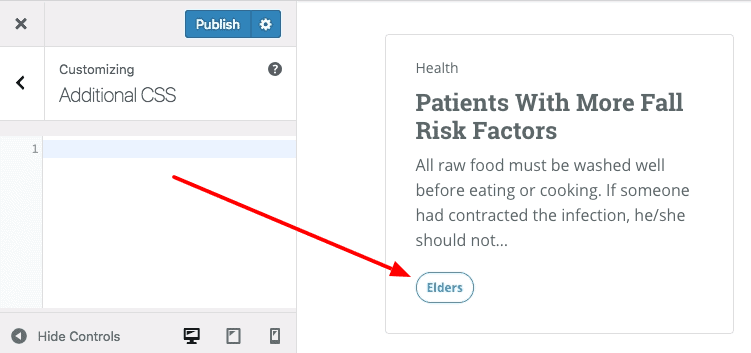
Padding
The padding properties are used to generate space around an element’s content, inside of any defined borders. With CSS, you have full control over the padding. There are properties for setting the padding for each side of an element (top, right, bottom, and left).
.tag-item {
  padding-top: 50px;
  padding-right: 30px;
  padding-bottom: 50px;
  padding-left: 80px;
}- Before adding a custom padding.
- After adding a custom padding.
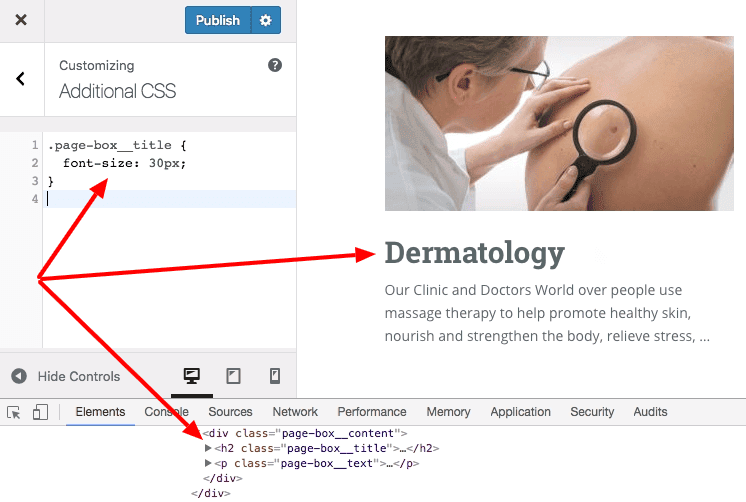
Font size
Set the font-size for different elements. Usually, we set the font size in pixels px or percent %.
.article-title {
  font-size: 15px;
}- Before adding a custom font size.
- After adding a custom font size.
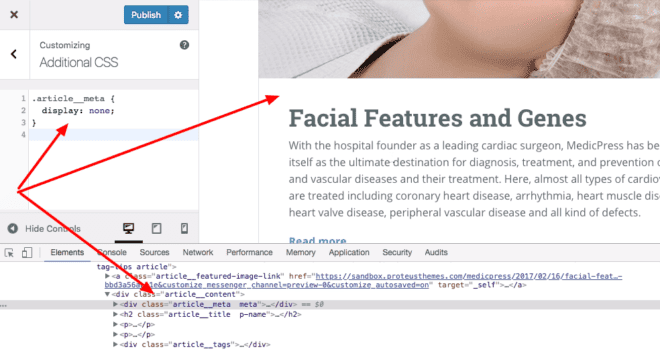
Show/Hide element
The display property specifies the display behavior of an element. Every element on a website is a rectangular box. The CSS display property determines how that rectangular box behaves. We can display box as block or we can hide it with none.
.hidden {
  display: none;
}
.shown {
display: block;
}- Before adding a custom display.
- After adding a custom display.

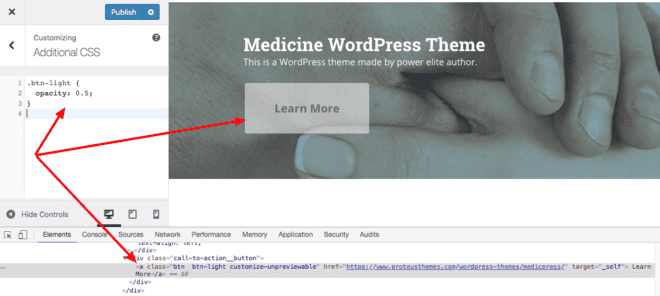
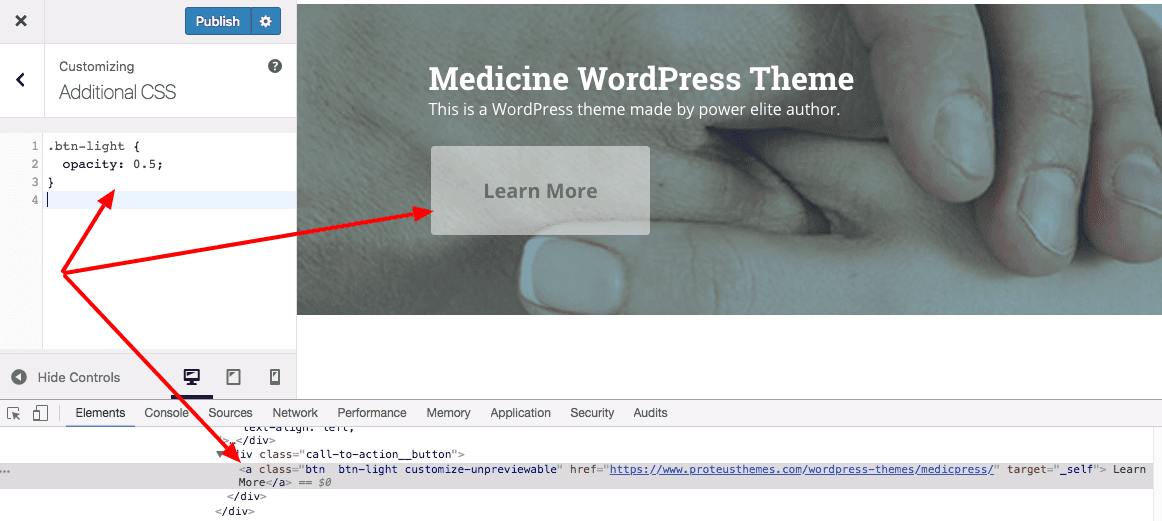
Opacity
We can set a level of opacity of an element. Property can be set as a decimal number in a range from 0 (zero) to 1 (one), where 0 (zero) is completely transparent and 1 (one) is completely opaque.
.light-item {
  opacity: 0.5;
}- Before adding a custom opacity.

- After adding a custom opacity.

Border
Set the style of the borders for different elements. We can define three properties: width (in pixels px), style (solid, double, dotted) and color (in hexagonal number). The border can be also disabled by setting the property to 0 (zero).
.box-panel {
  border: 5px solid red;
}- Before adding a custom border.
- After adding a custom border.
Customization on specific page or group of pages
In some cases, you don’t want to customize the element on all pages, but only on a specific page. Let’s say that we want to customize the breadcrumbs only on the Contact Us page of our theme: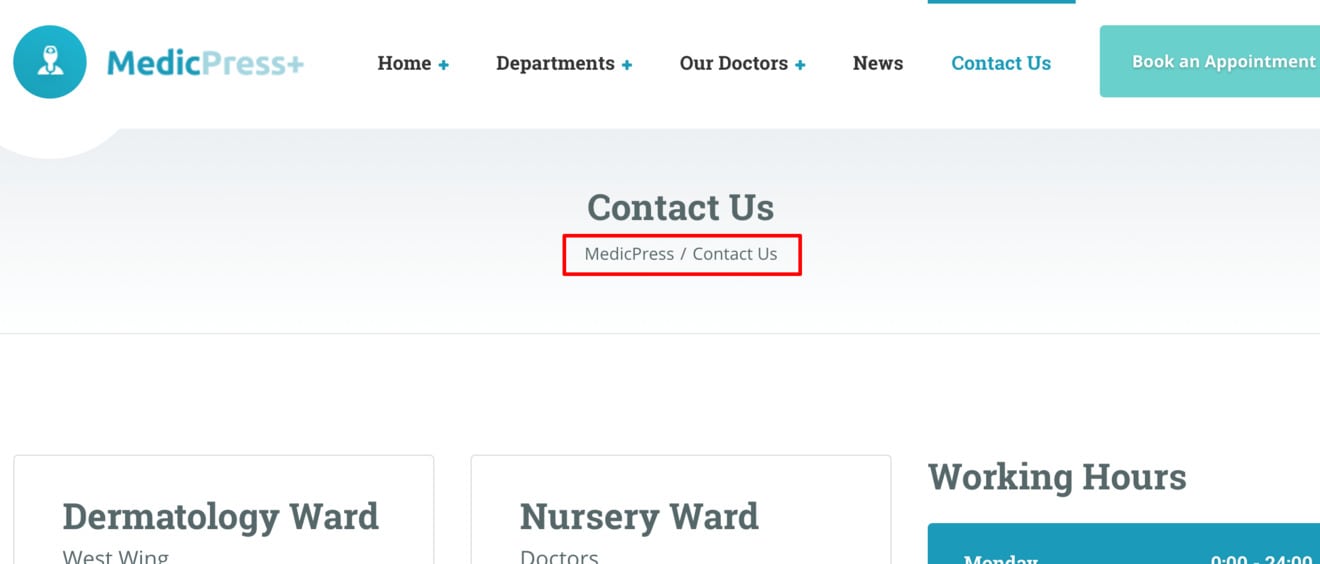
If we target the class .breadcrumbs, we would customize it on all pages. With CSS, we can also target nested elements of the parent element. We have to find the parent element with some unique class first. In WordPress, the <body> element has unique classes. For pages, that’s usually .page-id-<page ID> where <page ID> is a number which differs from page to page. Our entire CSS code for customizing breadcrumbs only on Contact Us page is this:
.page-id-114 .breadcrumbs {
  color: #0000FF;
}
Customization only on mobile or desktop view
Sometimes, you want to customize a specific element only on mobile or on the desktop view. To do that, we have to use the media queries. As scary as this sounds, it’s only a wrapper around our CSS rule which says at which screen width the CSS rule should work on the selected element.
Media queries are written as @media (min-width: 768px) { ... } or @media (max-width: 991px) { ... }. Inside the curly braces, you write the same CSS rule as described before.
The example below shows, how to set color only on mobile view of the website:
@media (max-width: 991px) {
  .breadcrumbs {
    color: #0000FF;
  }
}
Conclusion
In this article, we wanted to get you closer to CSS to better understand CSS customization: “Where to find the code for a title?”, “How to change the styling of the button?”. This should be a starting point that allows you to customize the theme according to your own needs and thus create a unique website.
If you don’t find the right selector or if you still have troubles, we are available for assistance, as we also offer paid customization. We tailor your website to suit your needs.
