Readable WordPress Theme Documentation
- Author: ProteusThemes
- Support: ProteusThemes Support
- But this theme: Readable - WordPress Theme
- Created: 2014-05-10
- Last modified: 2016-11-22
General
Thank you for purchasing the Readable WordPress Theme crafted by ProteusThemes.
Below you will find the documentation how to use the theme.
Setup
Installation
I assume you already have the fresh copy of WordPress installed on your server.
Download the theme zip file
The first thing you will need to do is to download the theme installation zip file.
If you bought the theme on our ProteusThemes Shop, you should have received an email with the list of themes you have access to. You can click on the theme link with file name ending: -installable.zip or you can login to your account, click on View Details and Downloads and download the installable zip file from there.
If you bought the theme on ThemeForest, then you have to download the installable WordPress files only zip file from the ThemeForest download section.
Install the theme
You can install the Readable theme in two different ways:
- Upload a zip file - preferred method
When you are logged in your WordPress dashboard go to Appearance » Themes » Add New » Upload Theme and select the zip filereadable.zipyou downloaded from our Shop or from the ThemeForest and click Install Now button. - FTP upload
Unzip the contents of thereadable.zipfile and upload the folder namedreadableto your server towp-uploads/themes/folder using a FTP client.
Once your theme is on the server, activate it by clicking the Activate button. Congratulations! Now the Readable WP Theme is fully installed.
Once the theme is activated you will be asked to install the required and suggested plugins. Without these plugins the theme might not work as expected.
Updates
I bought my theme on ProteusThemes shop.
If you bought the theme on our ProteusThemes Shop, you can register the theme and receive automatic updates. Go to Appearance » Theme Registration, input your license key for your theme and click on the Activate button. This will register your copy of the theme and you will get update notifications, when an update is available.
How do you get the license key? - Login to your account and you can copy the appropriate license key form the listed themes you purchased.
I bought my theme on ThemeForest.- you can setup the automatic updates just like in the ProteusThemes shop example above (using the ThemeForest purchase code instead of the license key), or
- you can update the theme manually: here are the steps on how to do that.
Customize the Appearance
You can fully customize the appearance of the Readable Theme. Go to the Appearance → Themes and click on the Customize button:
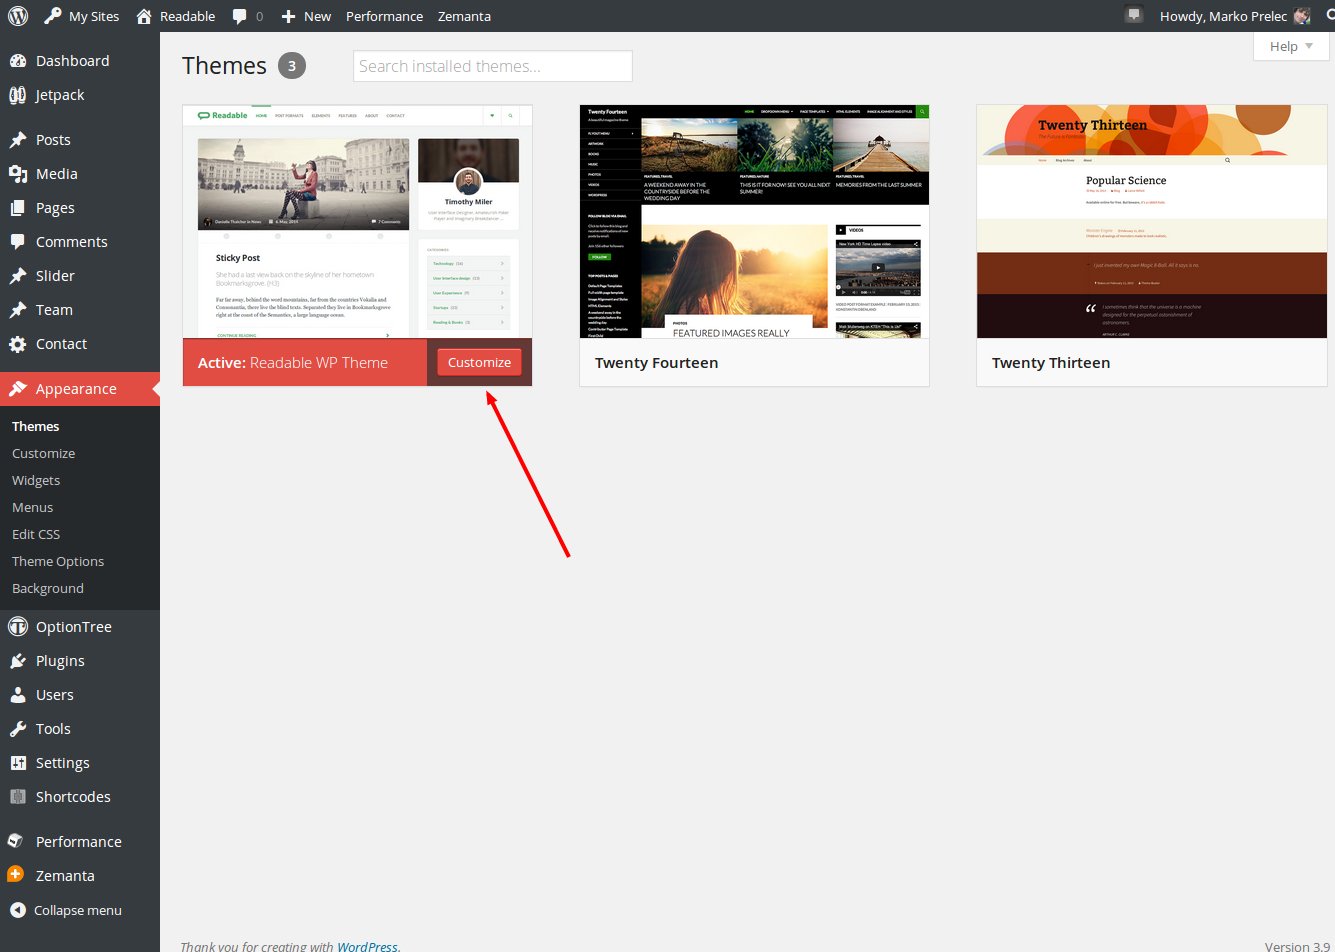
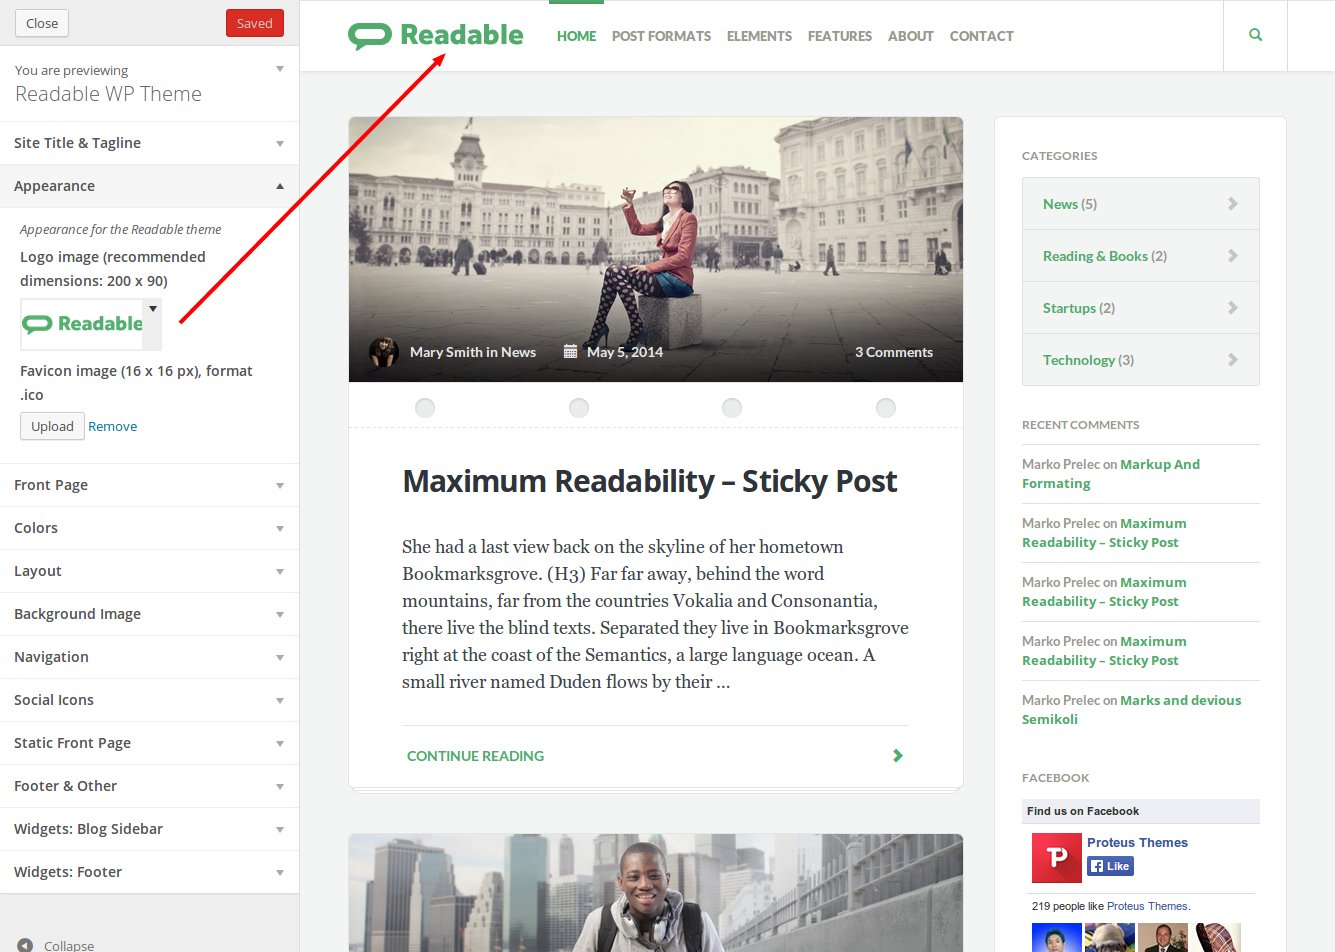
The new window appears and you can now customize the appearance of your theme - upload your custom logo, change the base color theme and much more:
Demo Content
You may want to import the demo content, just like on our preview site. Make sure you have the One Click Demo Import plugin activated. Then go to Appearance → Import demo data and click on the Import Demo Data button. This will automatically import the demo content and set a few settings (main menu and the front page). That's it, content is imported!
Alternative way to import the content
If you want to import the content manually, then you can do that by downloading the import file: readable-latest.xml.
If for some reason the above import file link is not working, then download the main theme zip file, which contains the documentation and extras folder (not the installable theme zip file):
- If you bought the theme on our ProteusThemes shop, you can login to your account and download the extras zip file, or
- if you bought the theme on Themeforest, you can download the All files & documentation zip from ThemeForest
Once the main theme zip file is downloaded you will find the demo-content.xml file in the extras/demo-content.xml folder.
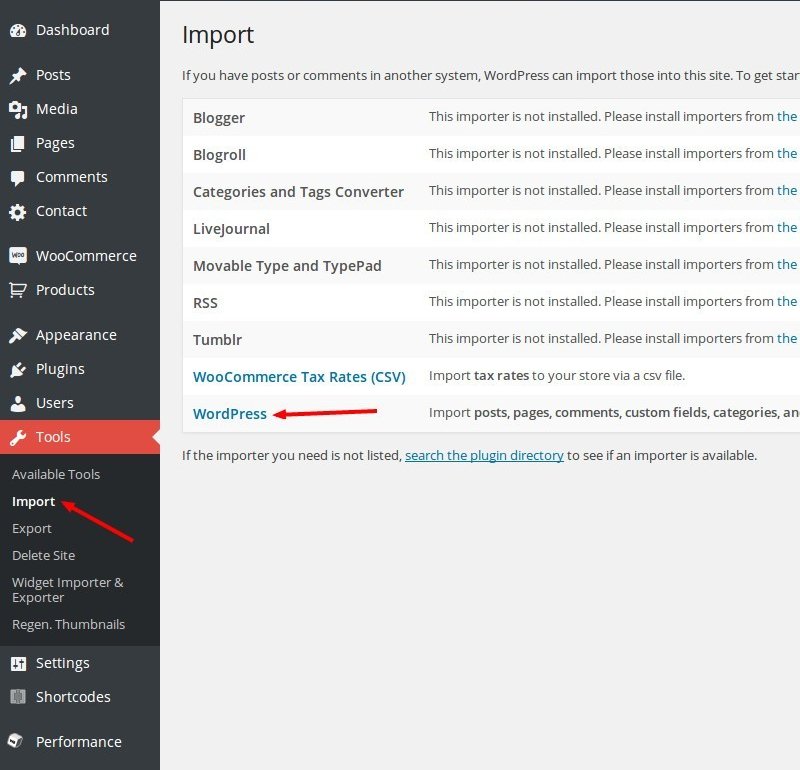
In your WP administration navigate to Tools → Import and select Wordpress. You will be asked to install the plugin. Install it and after that you will be able to import the demo file with all the demo pages, posts, settings, sliders ...
Note that this will not import the widgets, you have to place the widgets on your own.
WordPress Custom Pages
About Us page
Our About Us page is made in a very unique and useful way. Make new page and choose Template "About us page".
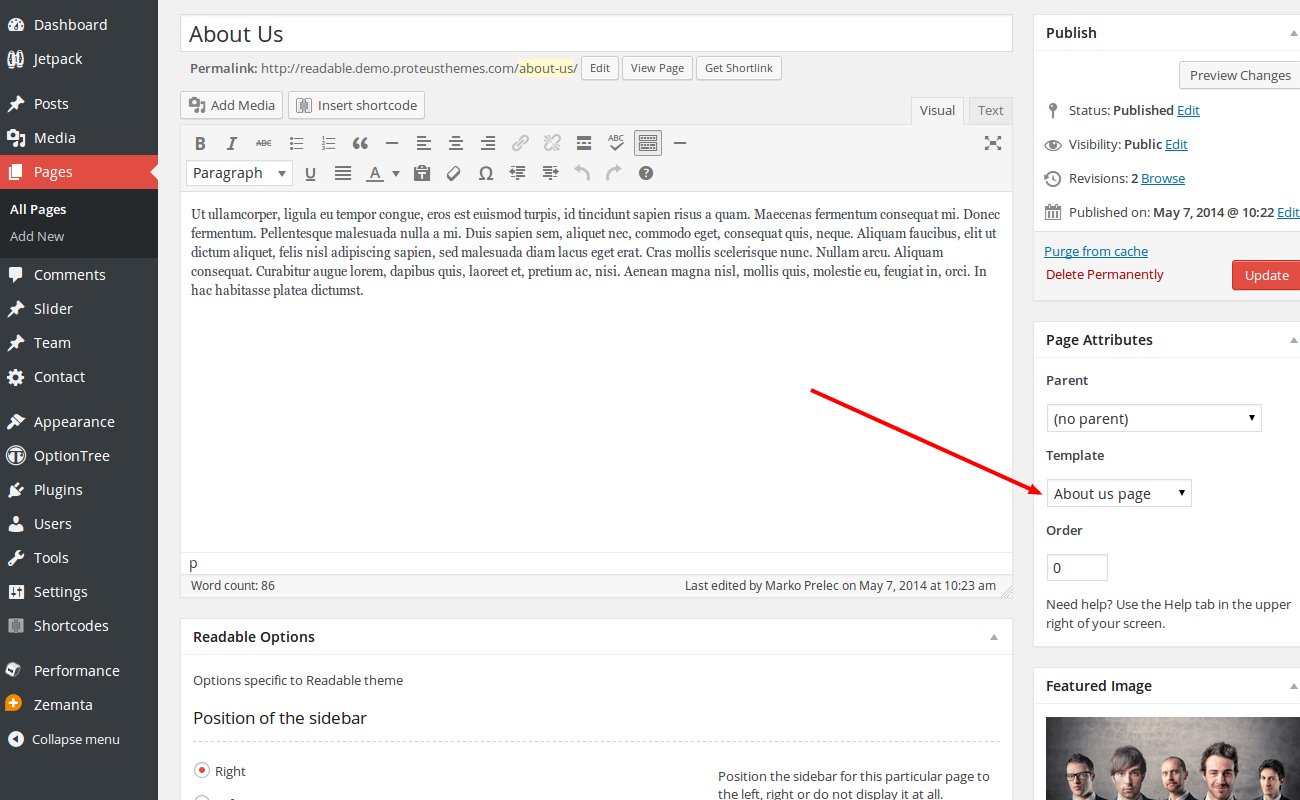
This page will automatically take your WordPress User information and add it to the About Us page.
For avatars you will need to use Gravatar service.
That's it. It is that simple.
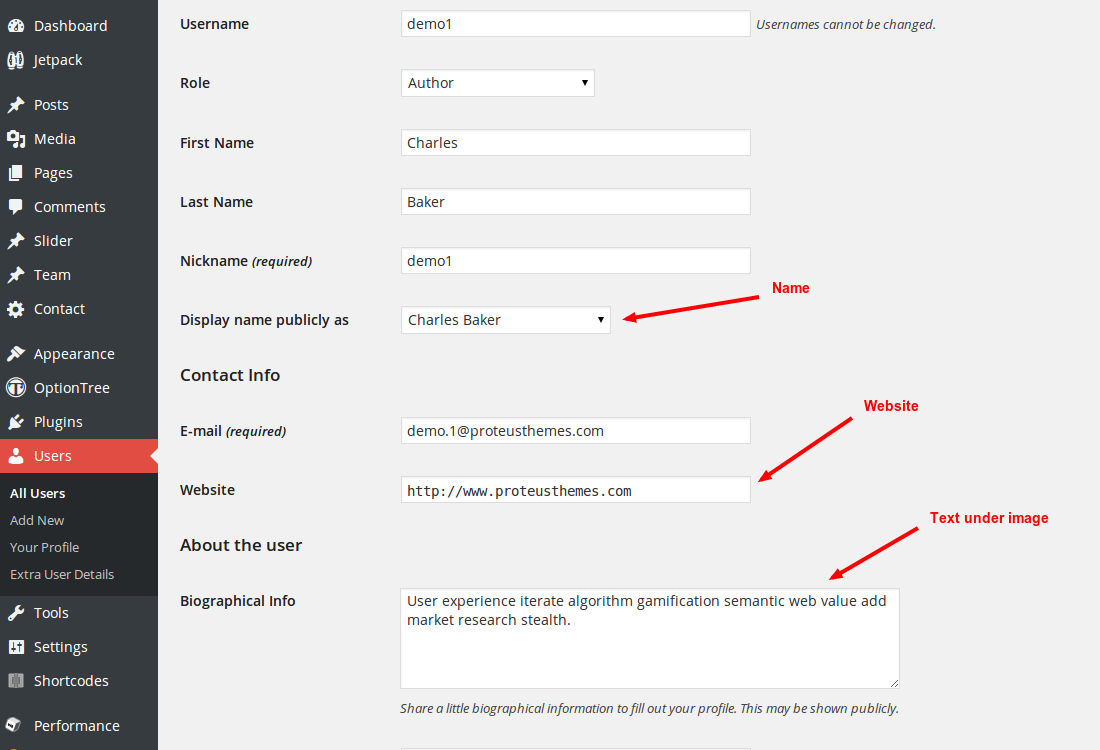
Add Social Icons in About Us page
We will use Extra User Details plugin for that. Once the plugin is installed we get a new "Extra User Details" link in "Users" menu.

We click on it and we add new fields. Meta Key is a class name to our Zocial icon. (All Zocial icons class names can be found here: http://weloveiconfonts.com/ at the bottom of the page). The second field is name of the Services. These are the only two important things. When you add all social networks you want, we go back to user profile page:

We can see we just added new fields for every WordPress user on our site. All you must do now, is to add links to your social profiles and Update profile. Icons will be automatically added to your About Us page.
WordPress Plugins
Just after the theme activation you will be asked to install the required and recommended plugins which work together with the theme.
We recommend that you install them all (required and recommended) to use all the features the Readable offers.
WooCommerce
Readable WP is WooCommerce ready.
Once the WooCommerce is activated you will see this notice:
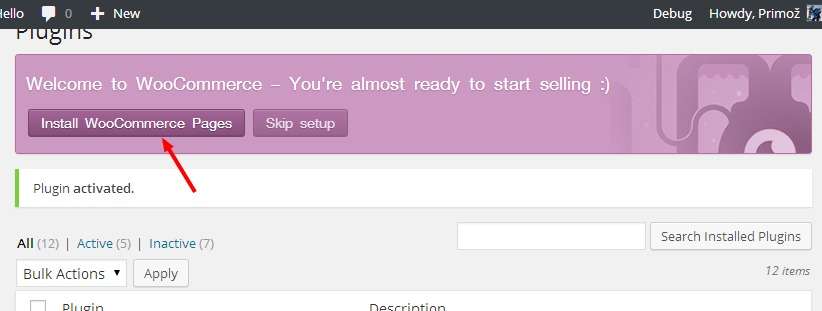
Click the button to skip the pages install if you imported the demo content for Readable before. Then select the right pages in the WooCommerce → Settings → Pages:

The next step is to configure the plugin settings in the WooCommerce → Settings. There are number of tabs at the top, you should configure them to fit your needs.
That's all, your WooCommerce shop is now ready!
All further information and documentation for the WooCommerce you can find on official website.
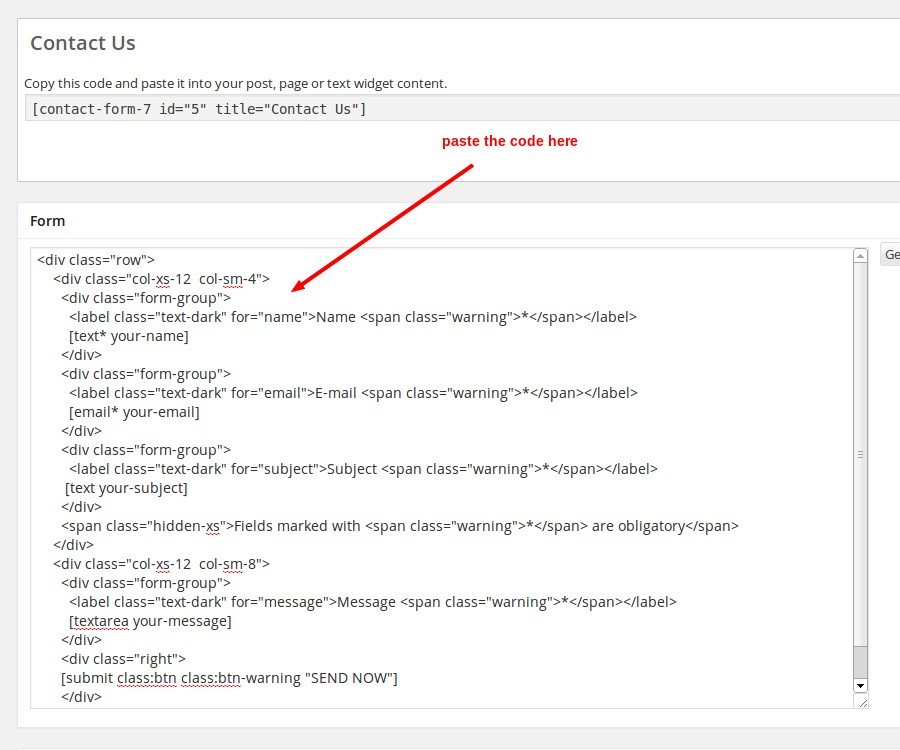
Contact Form 7
The form on Contact Us page is made using the Contact Form 7 WP Plugin: http://wordpress.org/extend/plugins/contact-form-7/.
You can use the contact form builder to build the form to collect the data you need. For the same appearance as on the demo you can paste the following code below to the Form: field of the plugin:
Form
<div class="row">
  <div class="col-xs-6">
    [text* your-name placeholder "Your Name *"]
  </div>
  <div class="col-xs-6">
    [email* your-email placeholder "E-mail Address *"]
  </div>
  <div class="col-xs-12">
   [textarea your-message placeholder "Your Message *"]
   [submit "Send Message"] <span class="contact__obligatory">Fields marked with * are obligatory</span>
  </div>
</div>
Message body:
From: [your-name] <[your-email]>
Subject: [your-subject]

Message Body:
[your-message]

--
This e-mail was sent from a contact form on Readable (http://readable.demo.proteusthemes.com)
After that just place the plugin's shortcode to your contact us page.
Disqus Comment System
We support two kind of comments in our theme. Native WordPress comments and Disqus Comment System.
For Disqus comments you will need to create Disqus account and follow these instructions https://disqus.com/admin/wordpress/.
Once you finish all the steps in the instructions, Disqus comments will automaticly replace native WordPress comments.
If you don't like Disqus comments and want to get back native WordPress comments just disable Disqus plugin and that's it.
Sharing with Jetpack
Jetpack is an official WordPress.com plugin. In this case we will use just a Sharing plugin inside the Jetpack. In Jetpack settings find Sharing feature and Activate it.
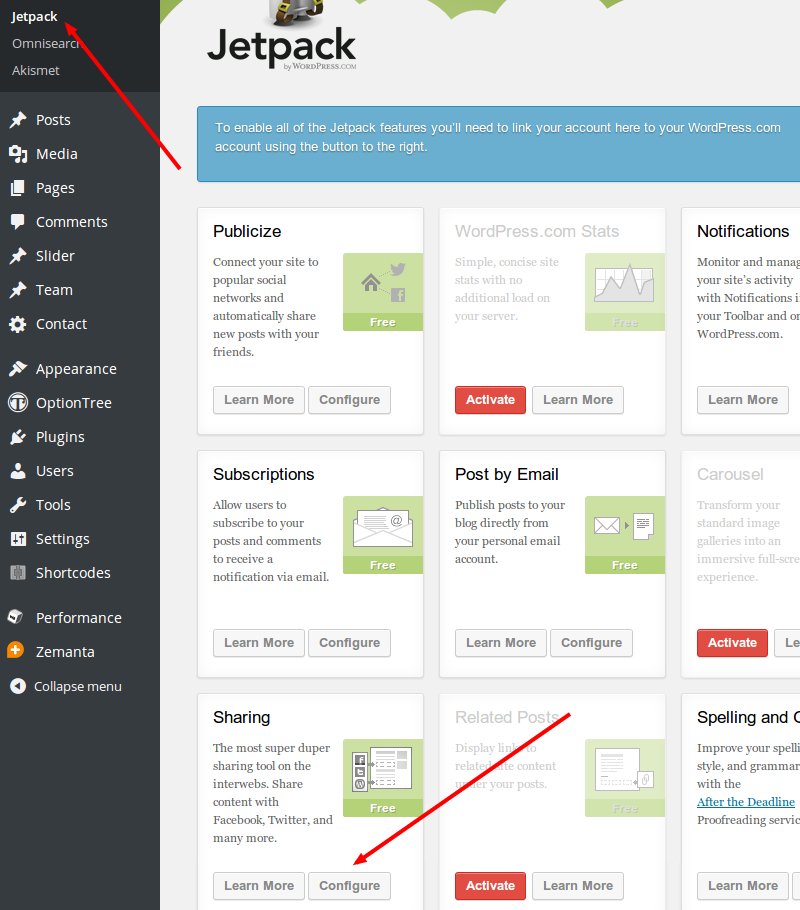
Once Sharing is activated, you will find more options under tab "Settings" -> "Sharing".
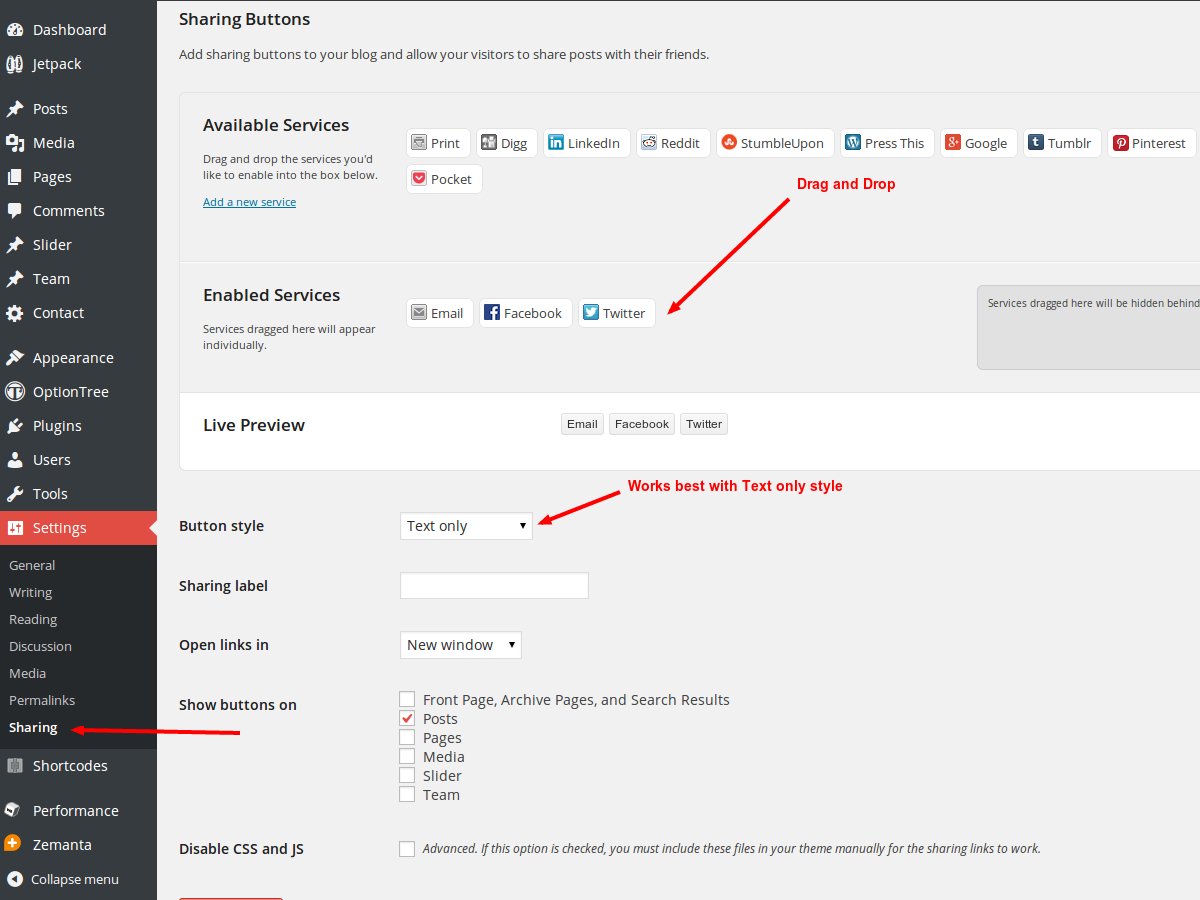
Now you just Drag and Drop Services you want to show on your webpage and chose Button style. Save settings and sharing icons will appear under the posts.
Widgets
There are several widgets you can use with the Readable WP Theme:
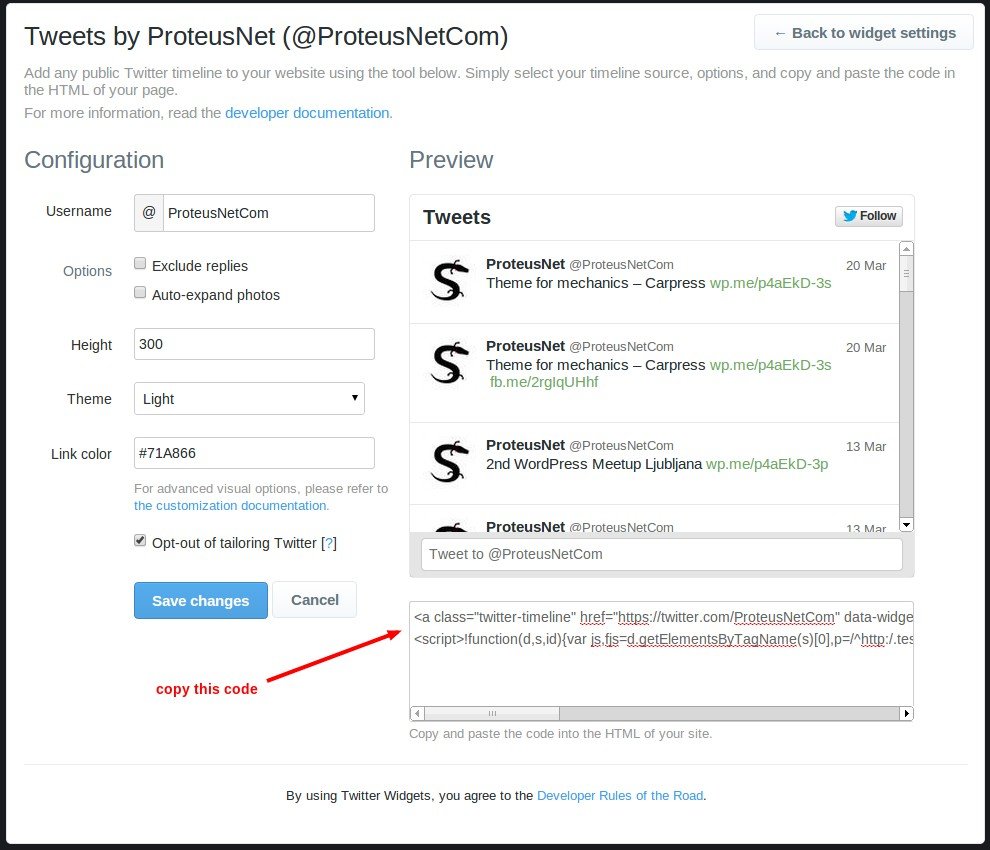
Twitter Widget
On demo page we use Emebedded timelines (https://dev.twitter.com/docs/embedded-timelines) which can be generated in the Twitter Widgets and the JS code provided can be copied directly to the regular Text Widget:
When you copy the HTML/JS code just paste it to the regular Text Widget:
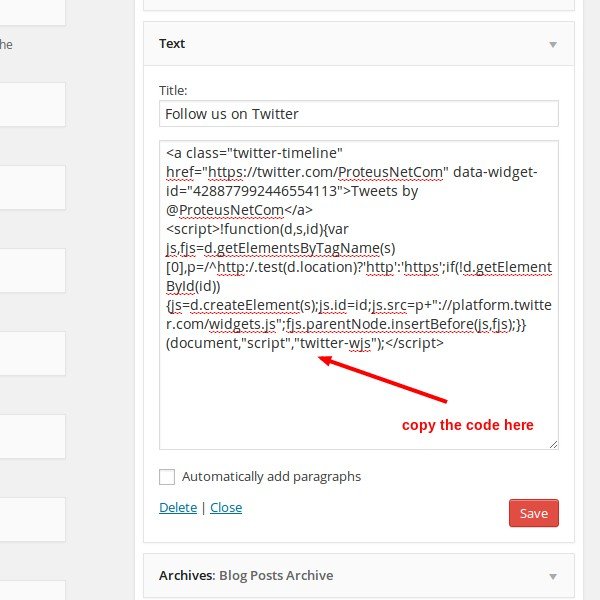
And that's all!
Facebook Widget
Facebook widget is made on Facebook Developers webpage - https://developers.facebook.com/docs/plugins/like-box-for-pages
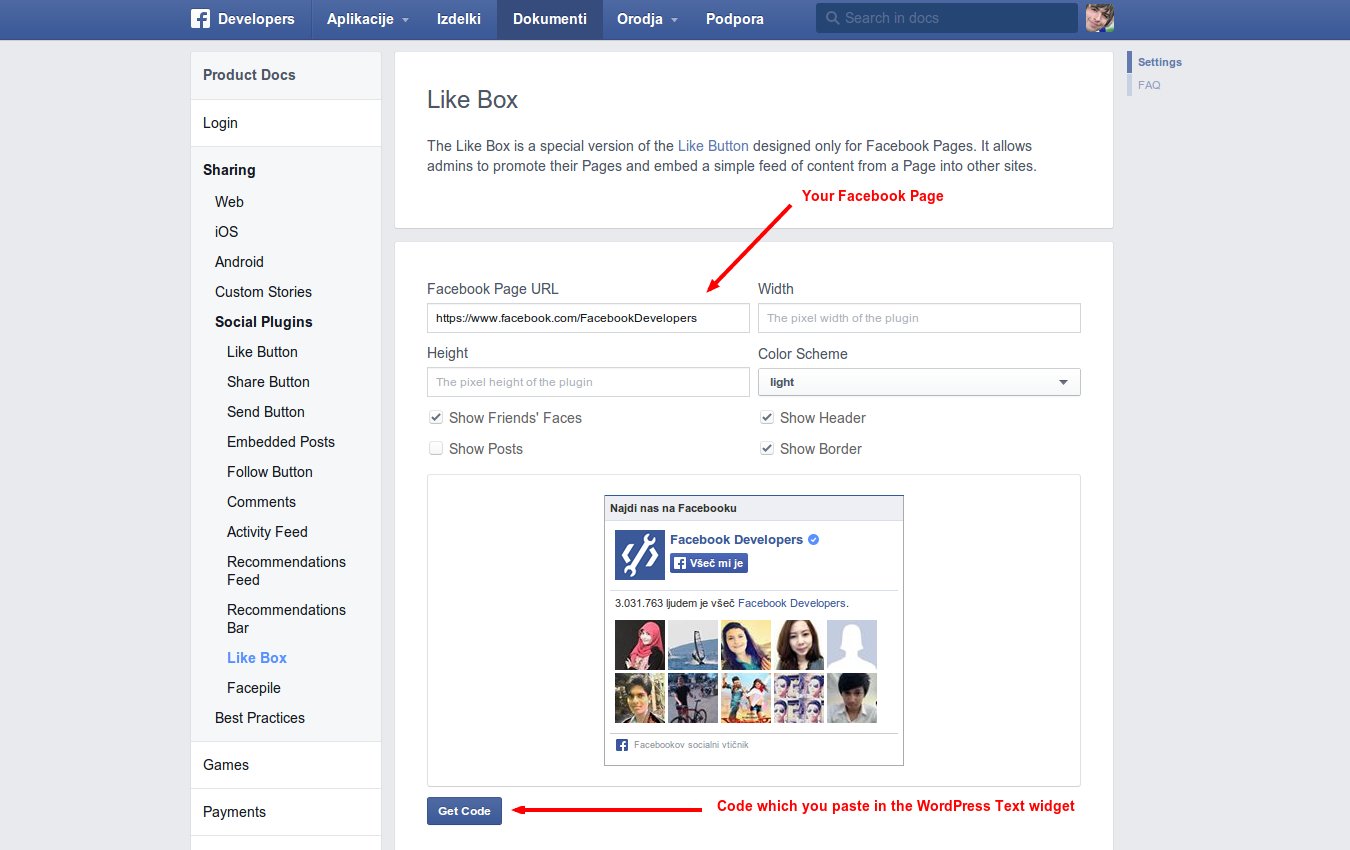
Add your Facebook Page URL which you want to show in Like Box. You can also play with some other options provided by Facebook. When you are happy with results, click on the "Get Code" button.
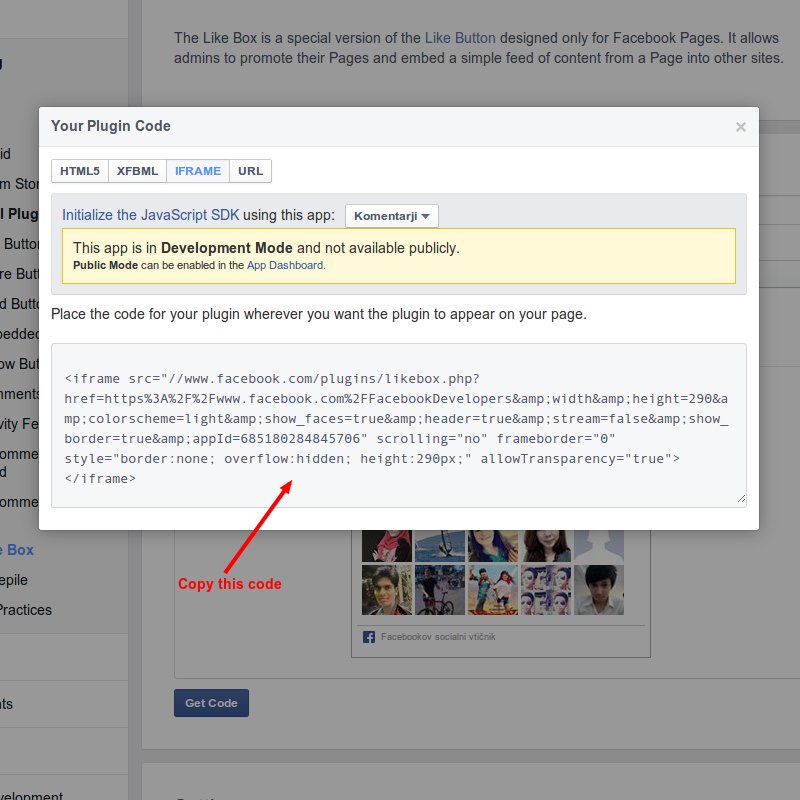
Here you can chose betwen few options. For our theme we use "iframe" code. Paste that code in to the regulat Text Widget and we are done.
Make Facebook Widget responsive
We also prepared solution for responsive Facebook Widget. First you will need all the same steps as before to get code for Gacebook widget.
Add your code inside of that <div id="likebox-wrapper"> div. Look for example below if you want that responsive Facebook Widget also works in IE.
<div id="likebox-wrapper">
  <!--[if IE]>
    Your iframe code
  <![endif]-->
  <!--[if !IE]>-->
    Your same iframe code with allowTransparency="true" removed
  <!--<![endif]-->
</div>
Shortcodes
ProteusThemes Shortcodes
Buttons
For adding buttons you must use the button shortcode which looks like this: [button]Your Text[/button]
There are 5 options with different attributes - style, href, target, fullwidth and class.
Text: You can change the text of the button.
Example: [button]New Text[/button]
Style: You can choose between a few styles - primary, secondary, danger, success, info or default.
Example: [button style="primary"]Your Text[/button]
Href: You can add URL to the button.
Example: [button href="http://www.proteusthemes.com"]Your Text[/button]
Target: You can choose if you want to open the link in the same - "_self" or new - "_blank" window.
Example: [button target="_blank"]Your Text[/button]
Full width: You can stretch your button to full width.
Example: [button fullwidth="true"]Your Text[/button]
Class: You can add extra custom classes to the button.
Example: [button class="btn-lg extra-custom-class"]Your Text[/button]
Shortcodes Ultimate
You can use the Shortcodes Ultimate plugin with our Readable theme.
Social Icons
You can insert social icons of practically any service using the [zocial] shortcode, example: [zocial service="twitter" target="_blank" href="http://www.proteusthemes.com"].
The options for the social icons:
- service
- href
-
Link to your page
- target
-
Possible values:
- _blank
- _parent
- _self
How to Translate Readable to Other Languages
WPML
Readable WP officially supports WPML. Head over to the WPML website, buy the subscription, then download and install the following plugins:
- WPML Multilingual CMS
- WPML String Translation
- WPML Translation Management
After that the WPML wizard will guide you to properly configure the multilingual site.
For reference: the widgets and theme options can be only translated using the String Translation.
Manual translation
Readable WP Theme is translation ready out of the box. The translation .pot file is located in the theme's languages folder. There is already the example of the translation to Slovene: sl_SI.po and sl_SI.mo files.
First you need to change your entire language of WP installation to your language. This can be done in file wp-config.php in the root of your WP installation and then in wp-admin Dasboard → Updates you will notice that you can update the WP in your language.
Second, navigate to the folder of the Readable theme (wp-content/themes/readable/) and in the folder translations (of the theme) you will find file readable.pot. Load this file (as the catalog) in the PoEdit and start translating. When done, save the .po file in the folder translations (there is sl_SI.po already there as an example) and name it the same as the defined WPLANG constant in the file wp-config.php. And that's it, refresh and your translation should work now.
References:
Miscellaneous
Custom Changes
If you need advanced cusomizations on the theme, we are available for that as well.
Just let us know your needs to: info@proteusthemes.com
For your general orientation: our pricelist.
Changelog
Changelog of the theme is available on here.
Bonuses / Plugins / Tools used
- Shortcodes Ultimate WordPress plugin
- Contact Form 7 WordPress plugin
- Bootstrap JS - JS functions for Twitter Bootstrap
- Compass, SASS and Grunt
Google Fonts
There are two custom fonts from Google Fonts used in the Readable WordPress theme:
Icon Fonts
There are two icons fonts used for maximum quality of the icons in the Readable:
- Glyphicons - multipurpose icons
- Zocial - social icons
Source design PSD files
You will find all our PSD files on our webpage:
You can even download all PSDs from our others themes for FREE!
Images used for theme preview
The following licensed images used for the demo page comes blurred with the Readable, because of the licenses:
- http://depositphotos.com/portfolio-1008939.html – All our pictures are from the same author: olly18
All the other images are licensed as public domain and can be found on unsplash.com.
The size of the images in the demo site is 1138 x 493 px. We recommend resizing the images to this size, before uploading them to your site, for the best results.