Dining Restaurant WP Theme Documentation
- Author: ProteusThemes
- Support: ProteusThemes Support
- Theme on ThemeForest: Dining Restaurant
- Created: 2014-07-15
- Last modified: 2016-10-12
I assume you already have the fresh copy of WordPress installed on your server.
You can install the Dining Restaurant WP Theme the three different ways:
restaurant.zip you downloaded from the ThemeForest and click Install Now button.
restaurant.zip file and upload the folder named restaurant to your server to wp-content/themes/ folder using FTP client.Once your theme is on the server, activate it by clicking the Activate button below the preview image:
Congratulations! Now the Dining Restaurant WP Theme is installed.
You still need to install/activate the required and recommended plugins - you can do this by visiting Appearance » Install Plugins inside wp-admin.
From version v1.2.0 you can import the demo content from our site (with blurred licensed images) with a single click of a button.
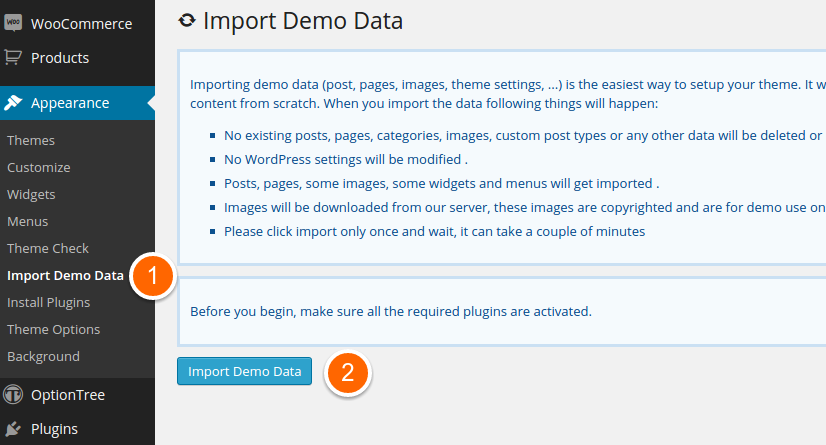
If you want to import the demo content XML the old-fashined way, you can still find the XML file in the folder of the theme: restaurant/utils/radium-one-click-demo-install/demo-files/content.xml.
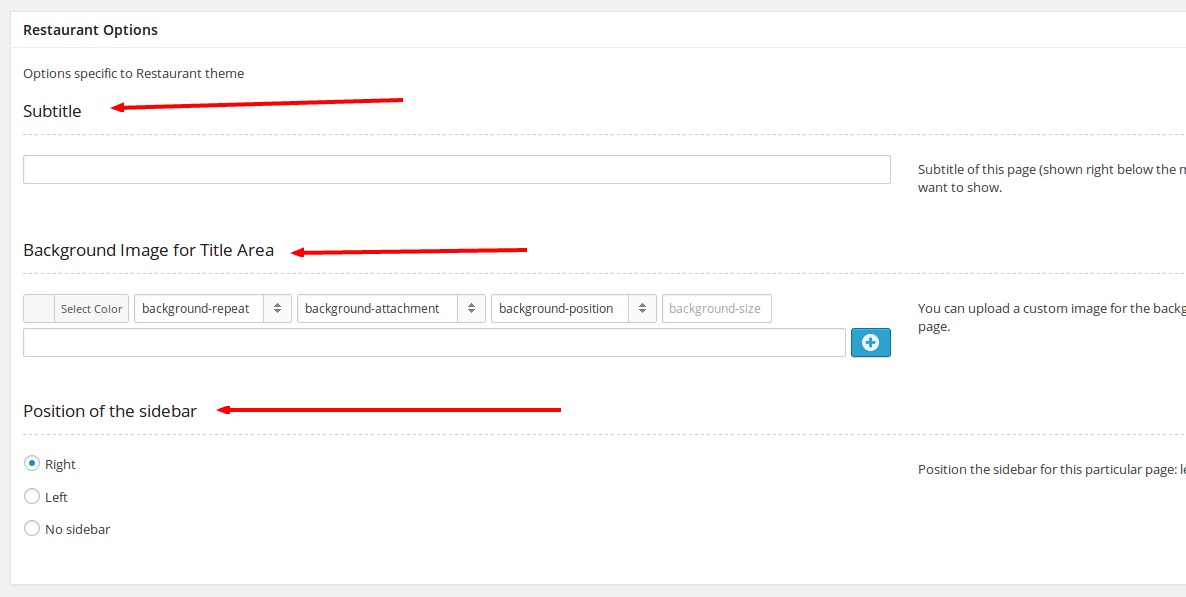
The theme uses Option Three plugin with custom options which you can customize in Appearance → Theme Options:
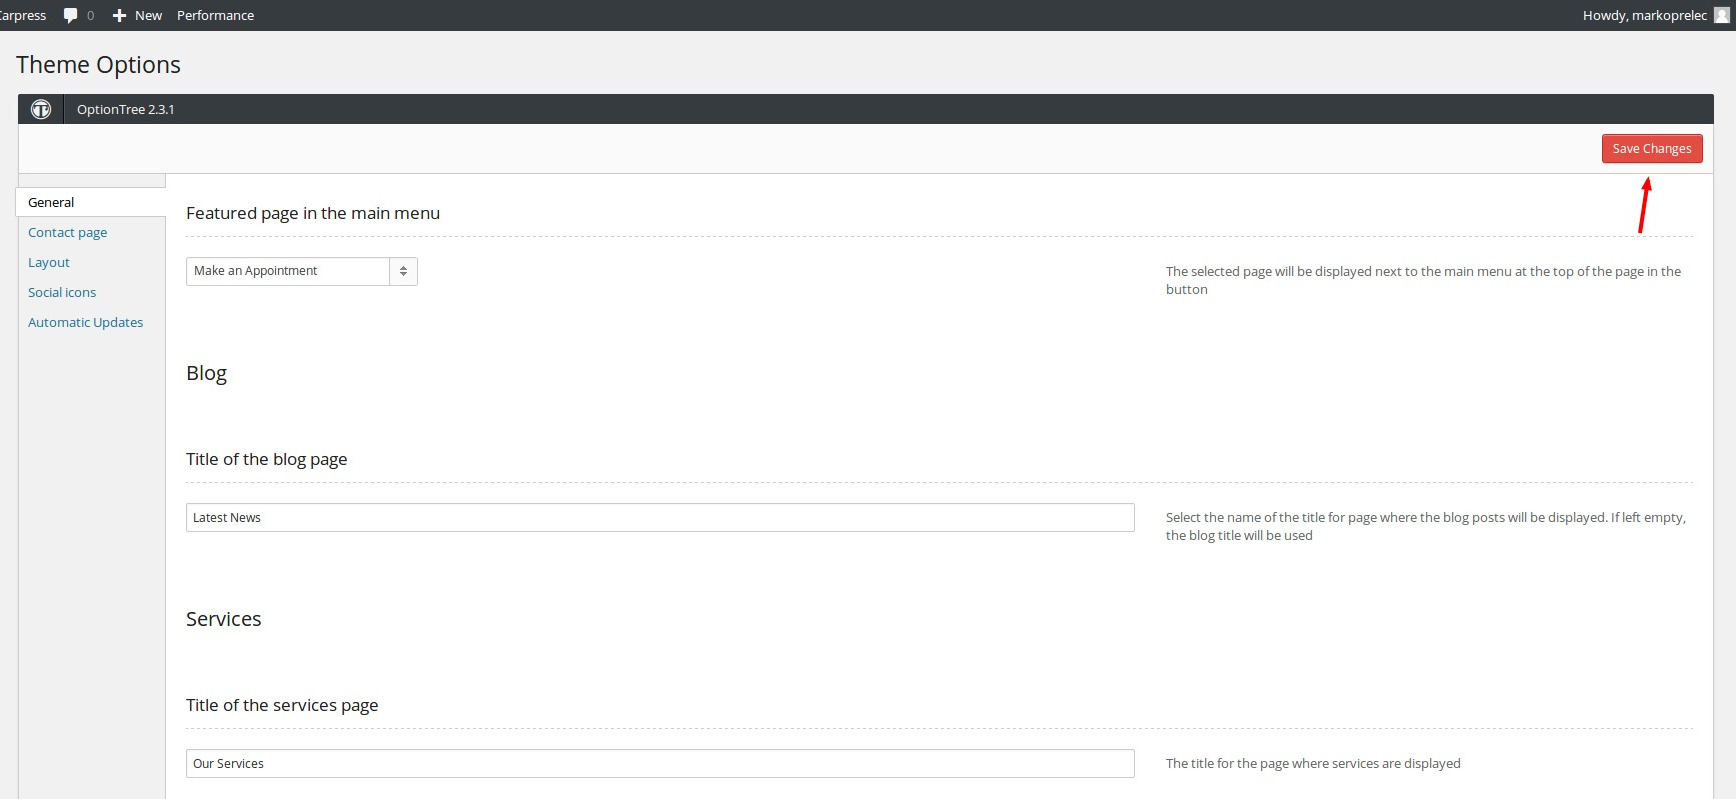
When you change any of your settings, make sure you save the changes clicking on the Save Changes button on the top or at the bottom of the page.
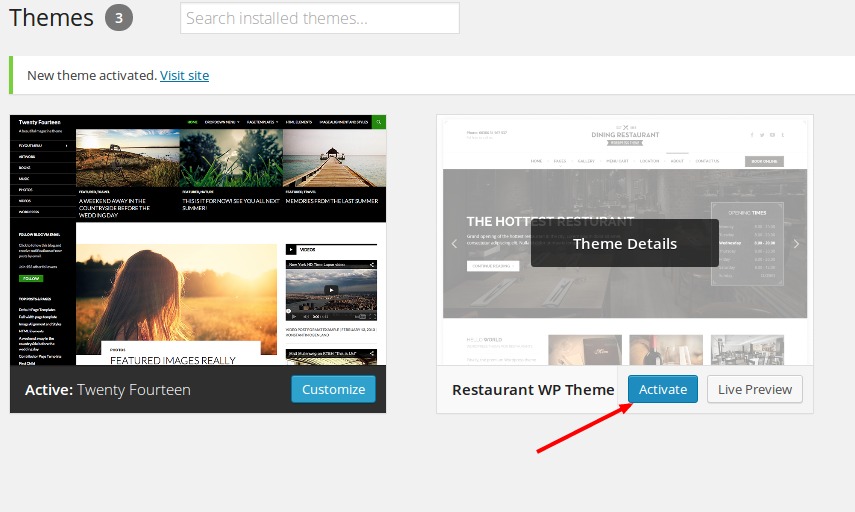
You can fully customize the appearance of the Dining Restaurant Theme. Go to the Appearance → Themes and click on the Customize button:
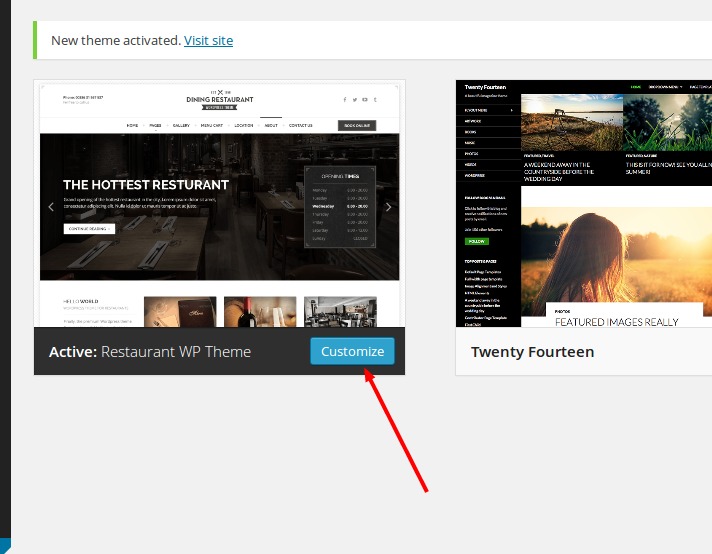
The new window appears and you can now customize the appearance of your theme - upload your custom logo, change the base color theme and color for theme buttons.
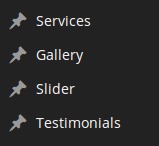
The theme comes with 3 different custom post types installed:
http://www.yourdomain.com/serviceshttp://www.yourdomain.com/galleryEvery post type has its own features. Let's take a look at them:
The WP build-in page post types benefit two features:
This post type is used to add slides to the front page with slider.
The optimal image sizes for the slider are 1860 (width) x 550 (height) px. If the uploaded image is larger, the WP automatically resizes it.
The image used must be uploaded as the Featured Image.
More settings for the slider (interval, text background color and opacity) can be found in the Appearance → Customize → Slider.
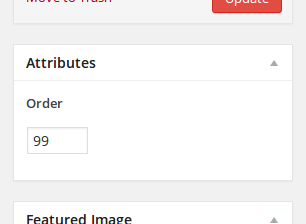
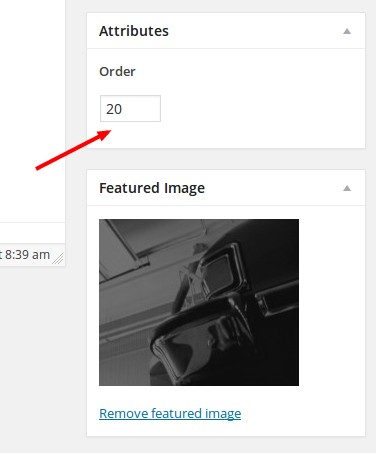
The order of the services is controlled by the Order under Attributes:
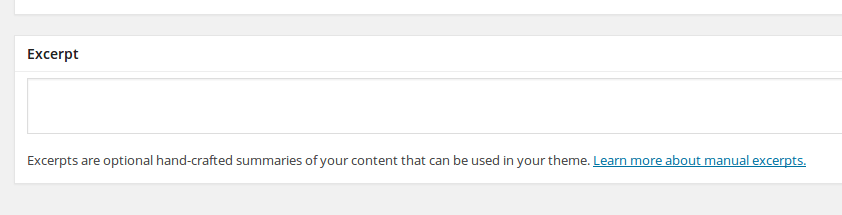
The text displayed on the front page can be altered using the Excerpt textarea:
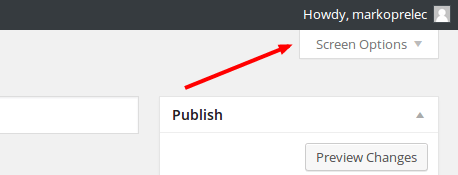
Note that you need to display some meta boxed using the button Screen Options at the top of the admin panel:
Everything is done using the WP build-in gallery builder, when adding a new media.
The Order attribute will be used to order the testimonials (see screenshot for Services above). Lower numbers will display faster.
There are several widgets you can use with the Dining Restaurant WP Theme:
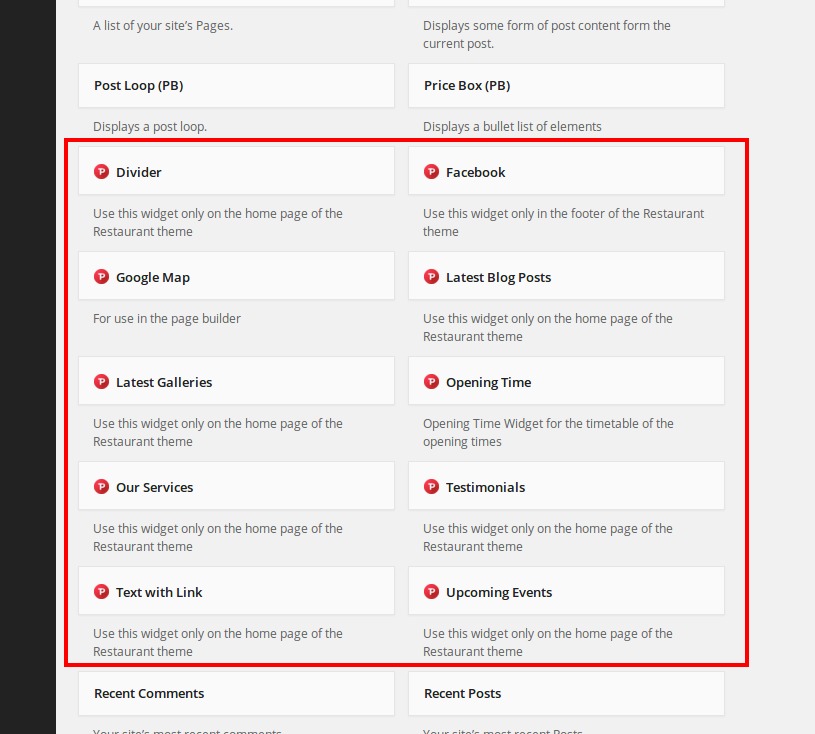
There are 7 different sidebars associated with the theme, so you can easily decide how the different layout types will look like.
All the widgets can have the subtitle too. In the "Title" field just add the double forward slash // and the text after the double slash will be used as the subtitle. Example: Widget main title // This is a subtitle.
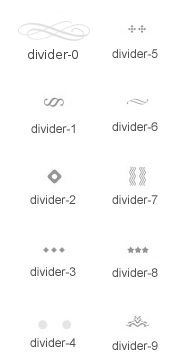
Ted different color dividers come with the theme. The default one you select in the Theme Options, but you can always use any of them in the content.
The [divider] accepts one parameter, the type:
Example:
[divider type="divider-1"]
The [light] shortcode is available as well for the titles. It doesn't except any parameters, it just adds the <span class="light"></span> around the wrapped content. Example:
[light]This[/accordion] is awesome titleWill be transformed to this HTML:
<span class="light">This</span> is awesome title
The effect of this shortcode is visible only on the bold text, for example titles.
Dining Restaurant supports basic WooCommerce integration.
Once the WooCommerce is activated you will see this notice:
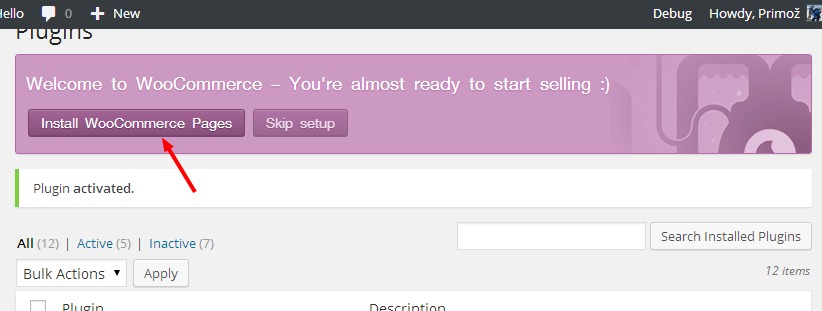
Click the button to install the WooCommerce Pages. That will install pages for you like Shop, My Account, Cart etc. After that is done, you will see in the Pages the installed pages:

You don't need to edit these pages anymore.
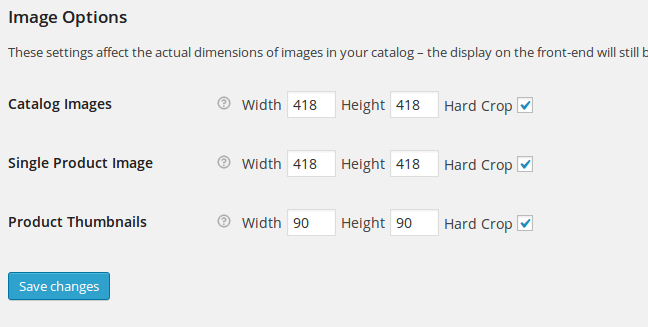
The next step is to configure the plugin settings in the WooCommerce → Settings. There are number of tabs at the top, you should configure them to fit your needs. Most importantly, in the tab Products we recommend to use these settings for the Image Options:
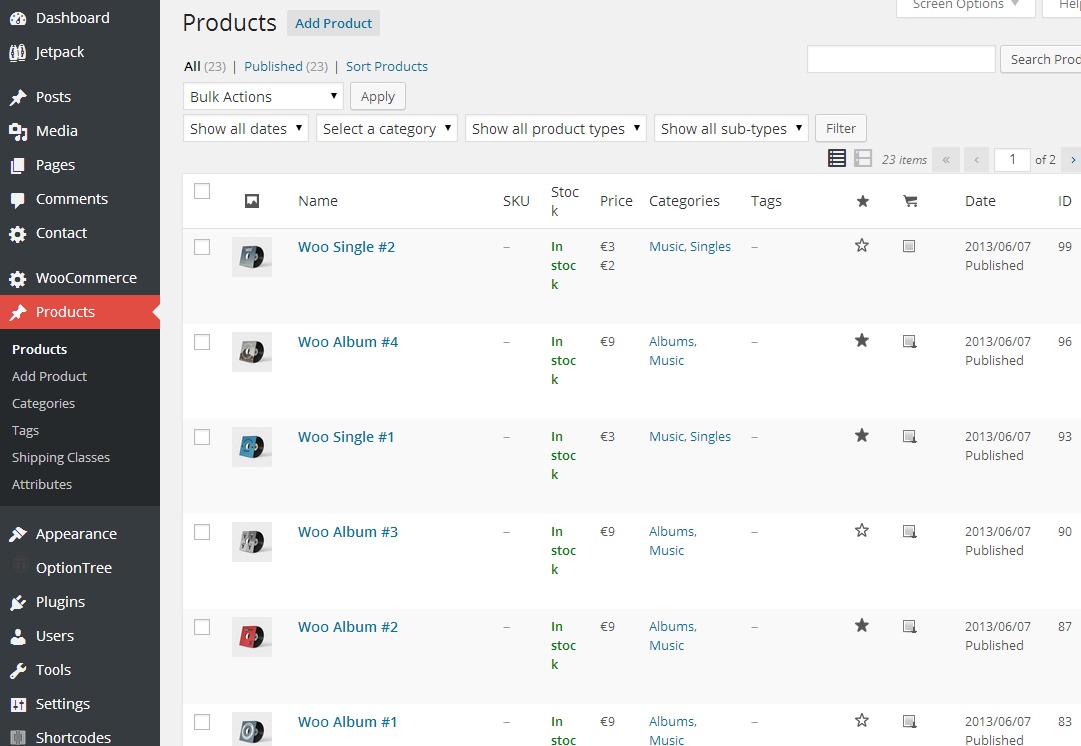
Next, you can install the demo products by the WooCommerce. Go to the Tools → Import → WordPress and import the demo XML file which can be found in the folder where the WooCommerce was installed on your server. Usually this is in the wp-content/plugins/woocommerce. Find the file dummy_data.xml there and upload it to the server. Also check that all the images should be downloaded.
When you're done, you should see the products:
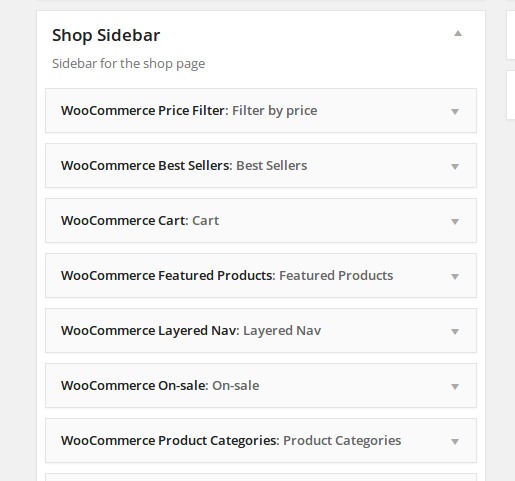
When you are done with the settings, go to the Appearance → Widgets.
Drag & Drop the WooCommerce widgets that start with "WooCommerce " to the sidebar called Shop Sidebar.
That's all, your WooCommerce shop is now ready!
All further information and documentation for the WooCommerce you can find on official website.
The theme comes with the Slider Revolution WP Plugin which is used for the front page templates.
Read the original docs for more information.
Once you prepare the slider, just grab the alias of the slider and copy / paste it to the page meta box which uses the slider revolution.
Dining restaurant supports events management using the 3rd party plugin Events Maker.
You can add single or recurring events if you install, activate the plugin and then navigate to the events:

For using various events on the front page, we also created a special widget called ProteusThemes: Upcoming Events.
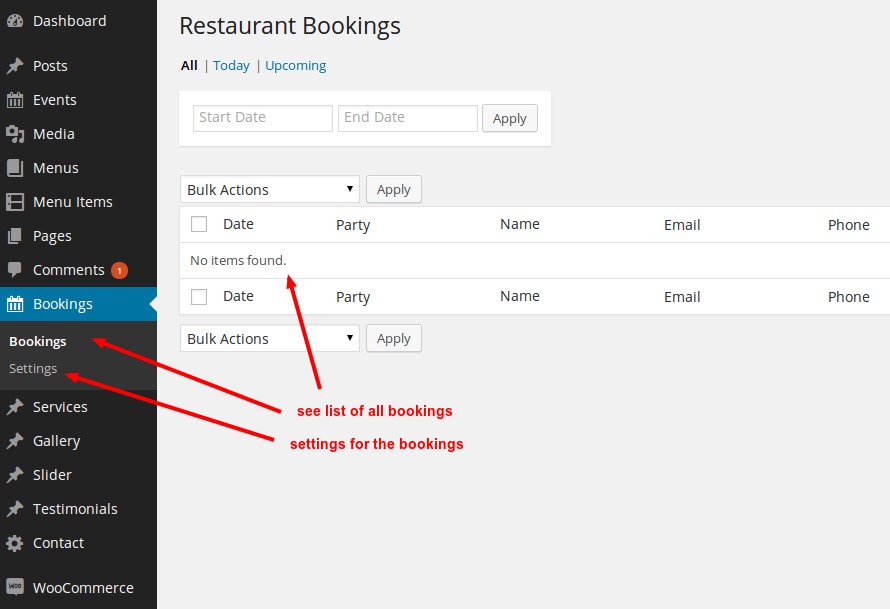
Dining restaurant supports reservations using the 3rd party plugin Restaurant Reservations.
You can add single or recurring events if you install, activate the plugin and then navigate to the Bookings:
All further information and documentation for the Restaurant Reservations plugin you can find on your server where the plugin is installed: wp-content/plugins/restaurant-reservations/docs/index.html.
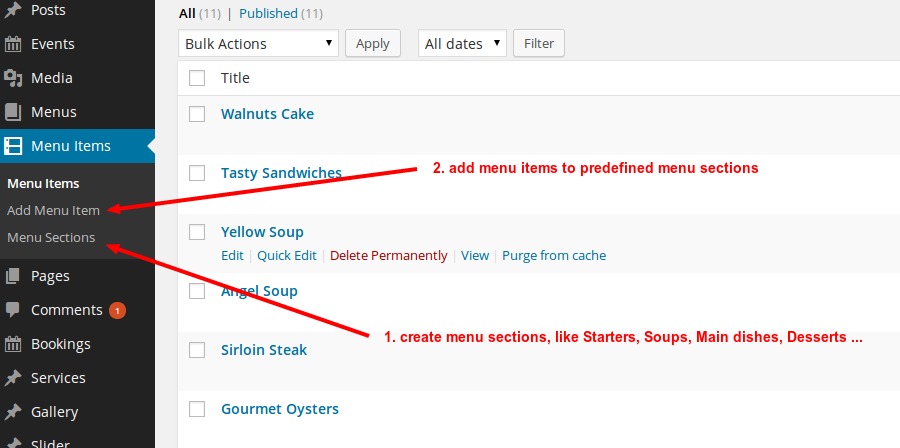
Dining restaurant supports adding your food and dring menu using the 3rd party plugin Food and Drink Menu.
You can add single or multiple menus to your website using the provided shortcodes. First go to the Menus and add a new menu:

Then head to the Menu Items and first define sections and then add menu items to these sections:
All further information and documentation for the Food and Drink Menu plugin you can find on your server where the plugin is installed: wp-content/plugins/food-and-drink-menu/docs/index.html.
The Contact Us form and Make an Appointment form on the website are made live using the Contact Form 7 WP Plugin: http://wordpress.org/extend/plugins/contact-form-7/.
Here is the code for the Contact Form 7 WP plugin for a contact us page:
Form:
<div class="form-group">
  <div class="row">
    <div class="col-xs-4">
      Your Name (required):
      [text* your-name class:form-control]
    </div>
    <div class="col-xs-4">
      Your Email (required):
      [email* your-email class:form-control]
    </div>
    <div class="col-xs-4">
      Your Phone:
      [tel your-phone class:form-control]
    </div>
  </div>
</div>
<div class="form-group">
  <div class="row">
    <div class="col-xs-12">
      Your message:
      [textarea x5 your-message class:form-control]
    </div>
  </div>
</div>
<div class="form-group">
  <div class="row">
    <div class="col-xs-12">[submit class:btn class:btn-theme "Send"]</div>
  </div>
</div>
Message body:
From: [your-name] <[your-email]>
Tel: [your-phone]

Message Body:
[your-message]

--
This e-mail was sent from a contact form on Restaurant
After that just place the plugin's shortcode to your contact us page.
Download and activate the FancyBox for WordPress: http://wordpress.org/plugins/fancybox-for-wordpress/. And that's all.
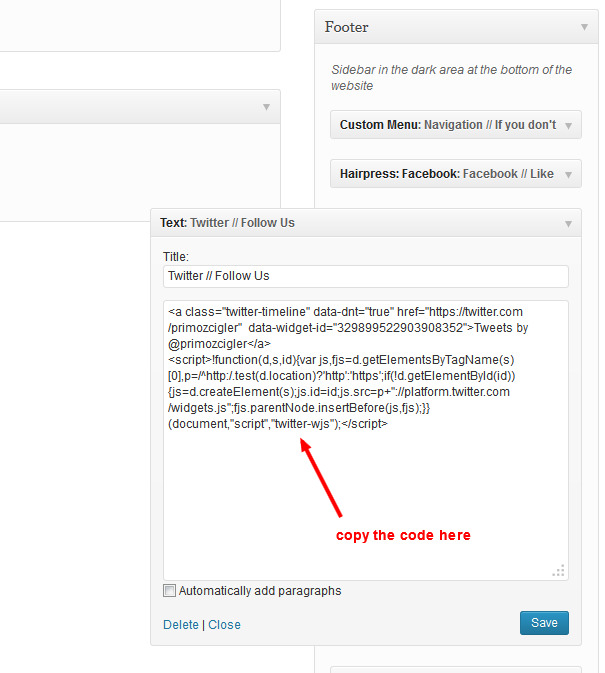
On demo page we use Emebedded timelines (https://dev.twitter.com/docs/embedded-timelines) which can be generated in the Twitter Widgets and the JS code provided can be copied directly to the regular Text Widget:
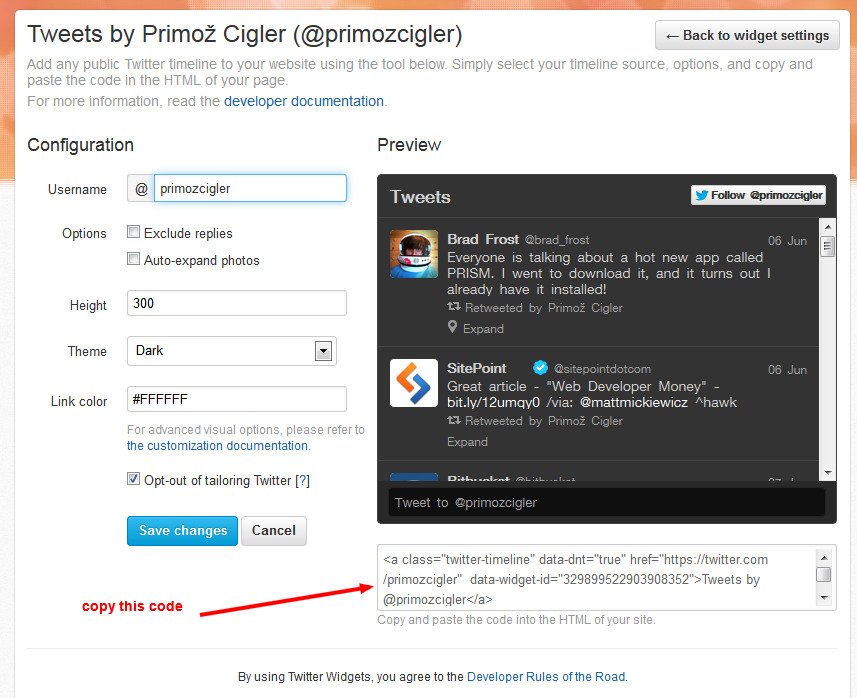
When you copy the HTML/JS code just paste it to the regular Text Widget:
And that's all!
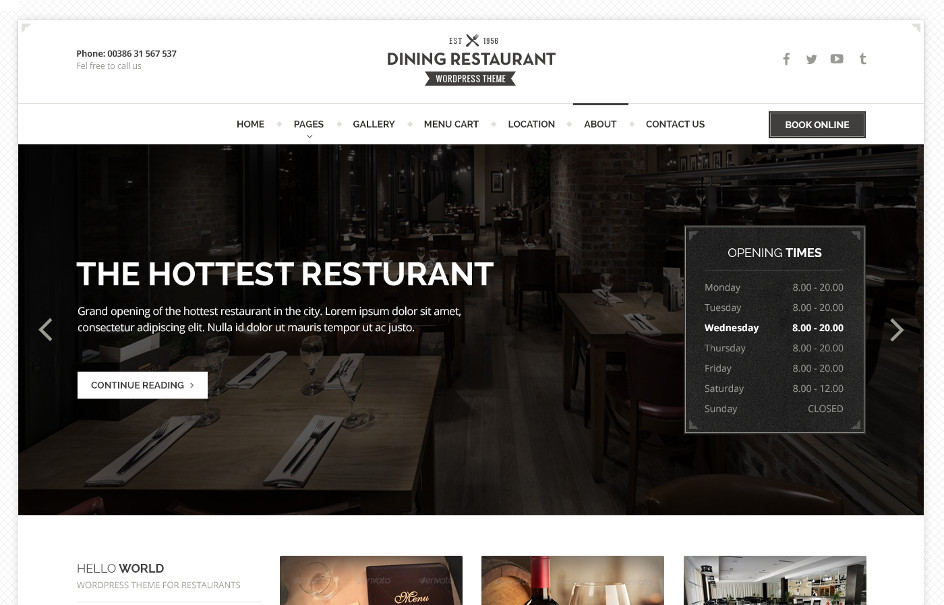
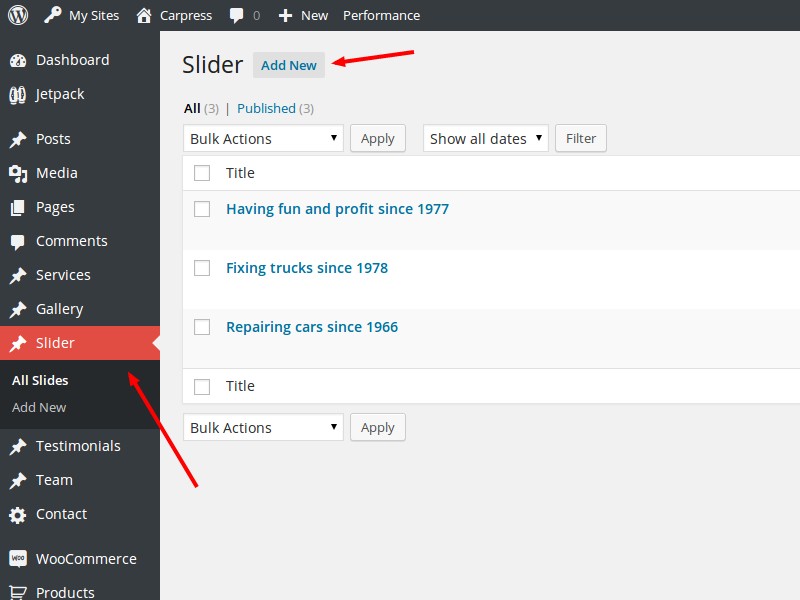
Dining Restaurant has very simple but powerful slider. For adding new slide just click on the Slider and Add New button.
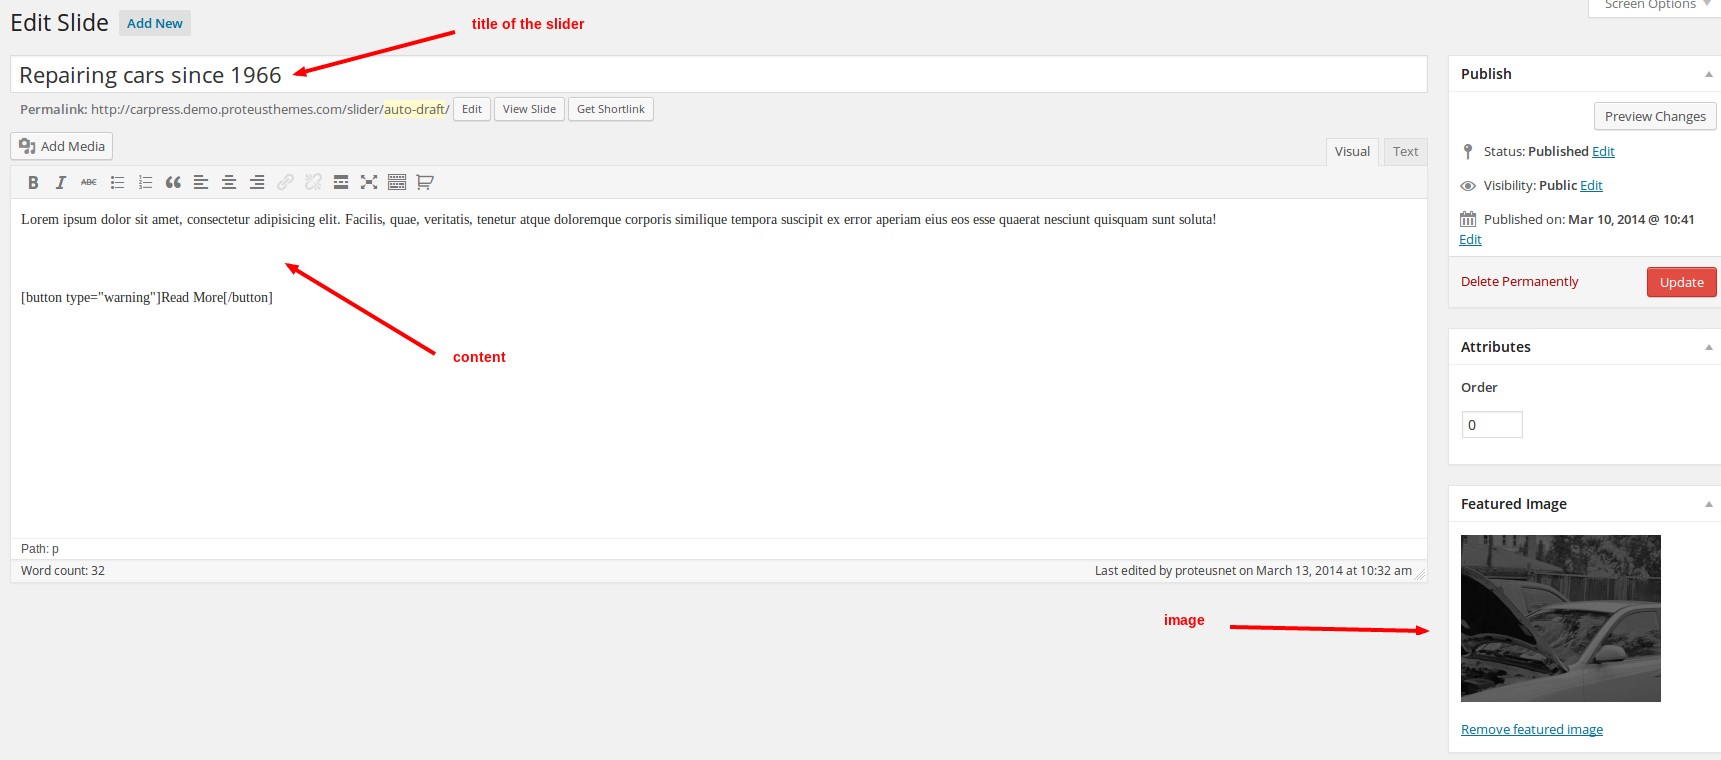
Here you can add title for slider, some content and slider image. When you're happy with resoults click on the Update button and slider is already showing your slide.
You can add as many slides as you want. To keep all that slides organized you can manage them with order of numbers.
Few more settings can be found in customizer under Front Page & Banners. Here you can change the speed of carousel (slider) interval, background color of the content in slider and opacity of that background.
Dining Restaurant WP officially supports WPML. Head over to the WPML website, buy the subscription, then download and install the following plugins:
After that the WPML wizard will guide you to properly configure the multilingual site.
For reference: the widgets and theme options can be only translated using the String Translation.
We have an article with the video how to translate our themes published on this link.
The images available for template preview aren't included in the theme because of the licences, but you can buy them at photodune.net:
If you need advanced cusomizations on the theme, we are available for that as well.
Just let us know your needs to:
For your general orientation: our pricelist.
Changelog of the theme is available on ThemeForest.