Introduction & Installation
Introduction
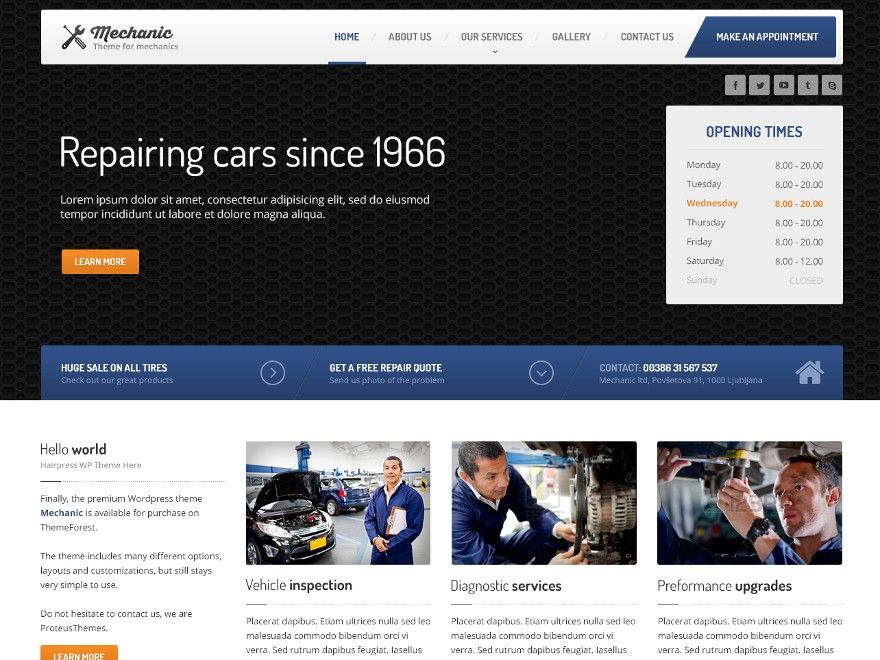
Carpress is premium Wordpress Theme for mechanic workshops, car repairs, handymen or any similar local business website. It is very easy to setup and use. Available only on ThemeForest!
Installation
I assume you already have a fresh copy of WordPress installed on your server.
Download the theme zip file
The first thing you will need to do is to download the theme installation zip file.
If you bought the theme on ThemeForest, then you have to download the installable WordPress files only zip file from the ThemeForest download section.
Install the theme
You can install the Carpress WP Theme in two different ways:
- Upload a zip file - preferred method
When you are logged in your WordPress dashboard go to Appearance → Themes → Add New → Upload Theme and select the theme installation zip file you downloaded from our Shop or from the ThemeForest and click Install Now button. - FTP upload
Unzip the contents of the theme installation zip file and upload the extracted folder to your server towp-uploads/themes/folder using a FTP client.
Once your theme is on the server, activate it by clicking the Activate button below the preview image in Appearance → Themes
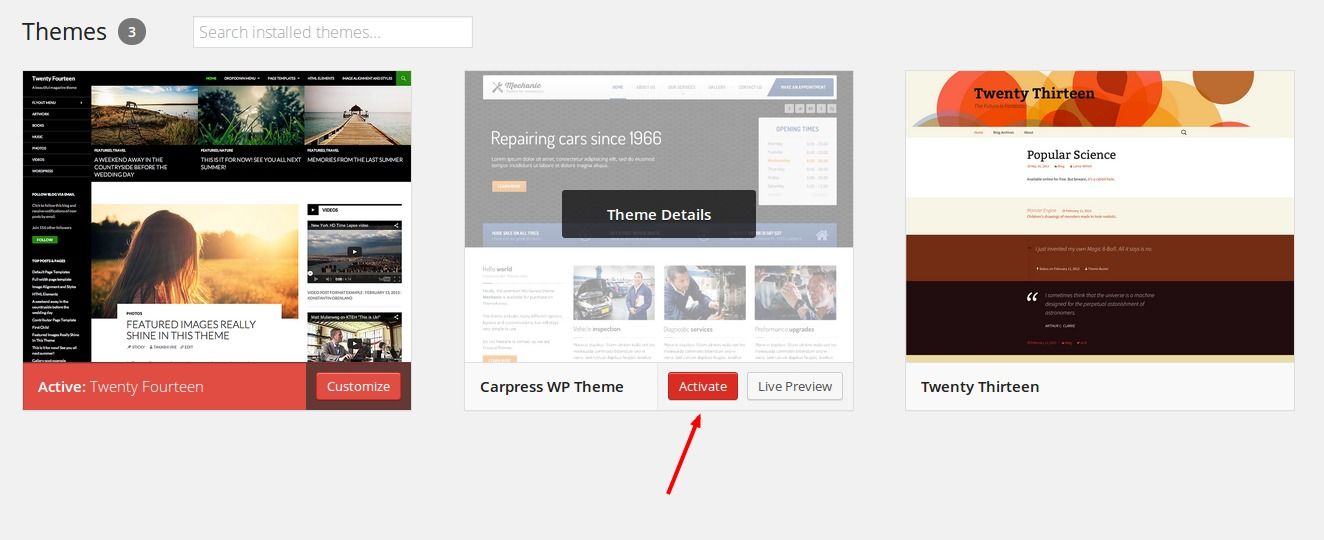
Congratulations! Now the Carpress WP Theme is installed.
Updates
Automatic updates
You can register the theme and receive automatic updates. Go to Appearance → Theme Registration and follow the instructions on that page. This will register your copy of the theme and you will get update notifications in the admin dashboard whenever an update is available.
If you have any issues with the automatic updates, please go to you wp-admin to Dashboard → Updates and click on the Check Again button, to refresh the update data.
Manual update
You can also update the theme manually.
Theme Options
The theme uses Option Three plugin with custom options which you can customize in Appearance → Theme Options:

When you change any of your settings, make sure you save the changes clicking on the Save Changes button on the top or at the bottom of the page.
Customize the Appearance
You can fully customize the appearance of the CarPress Theme. Go to the Appearance → Themes and click on the Customize button:
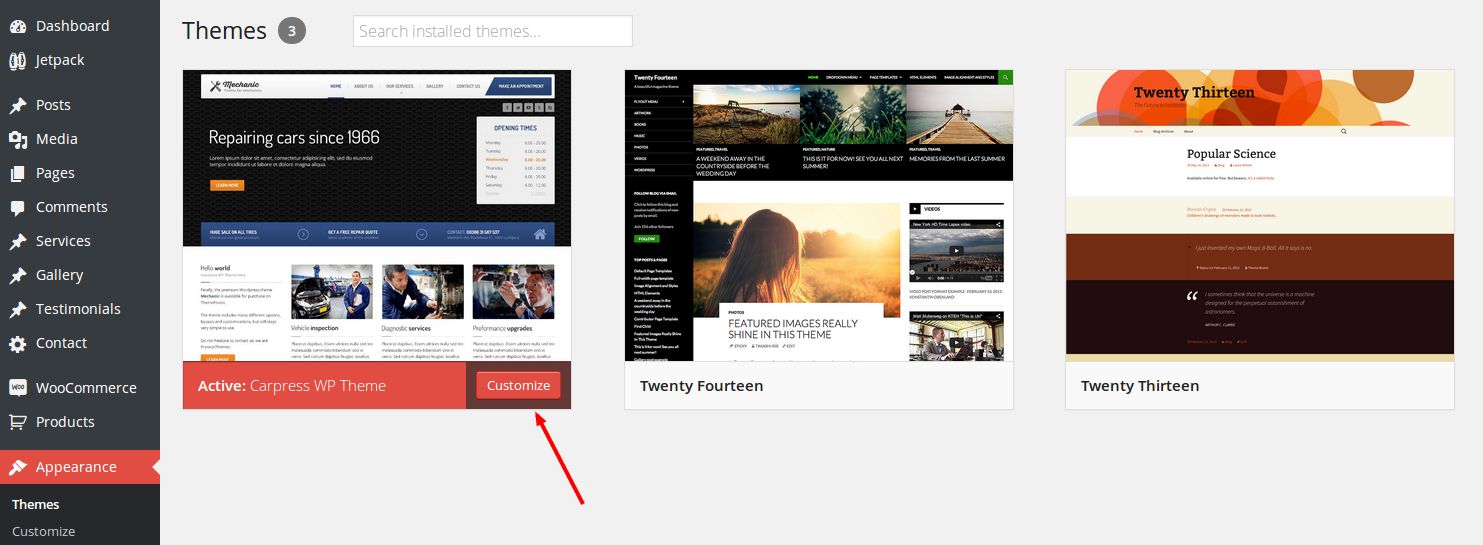
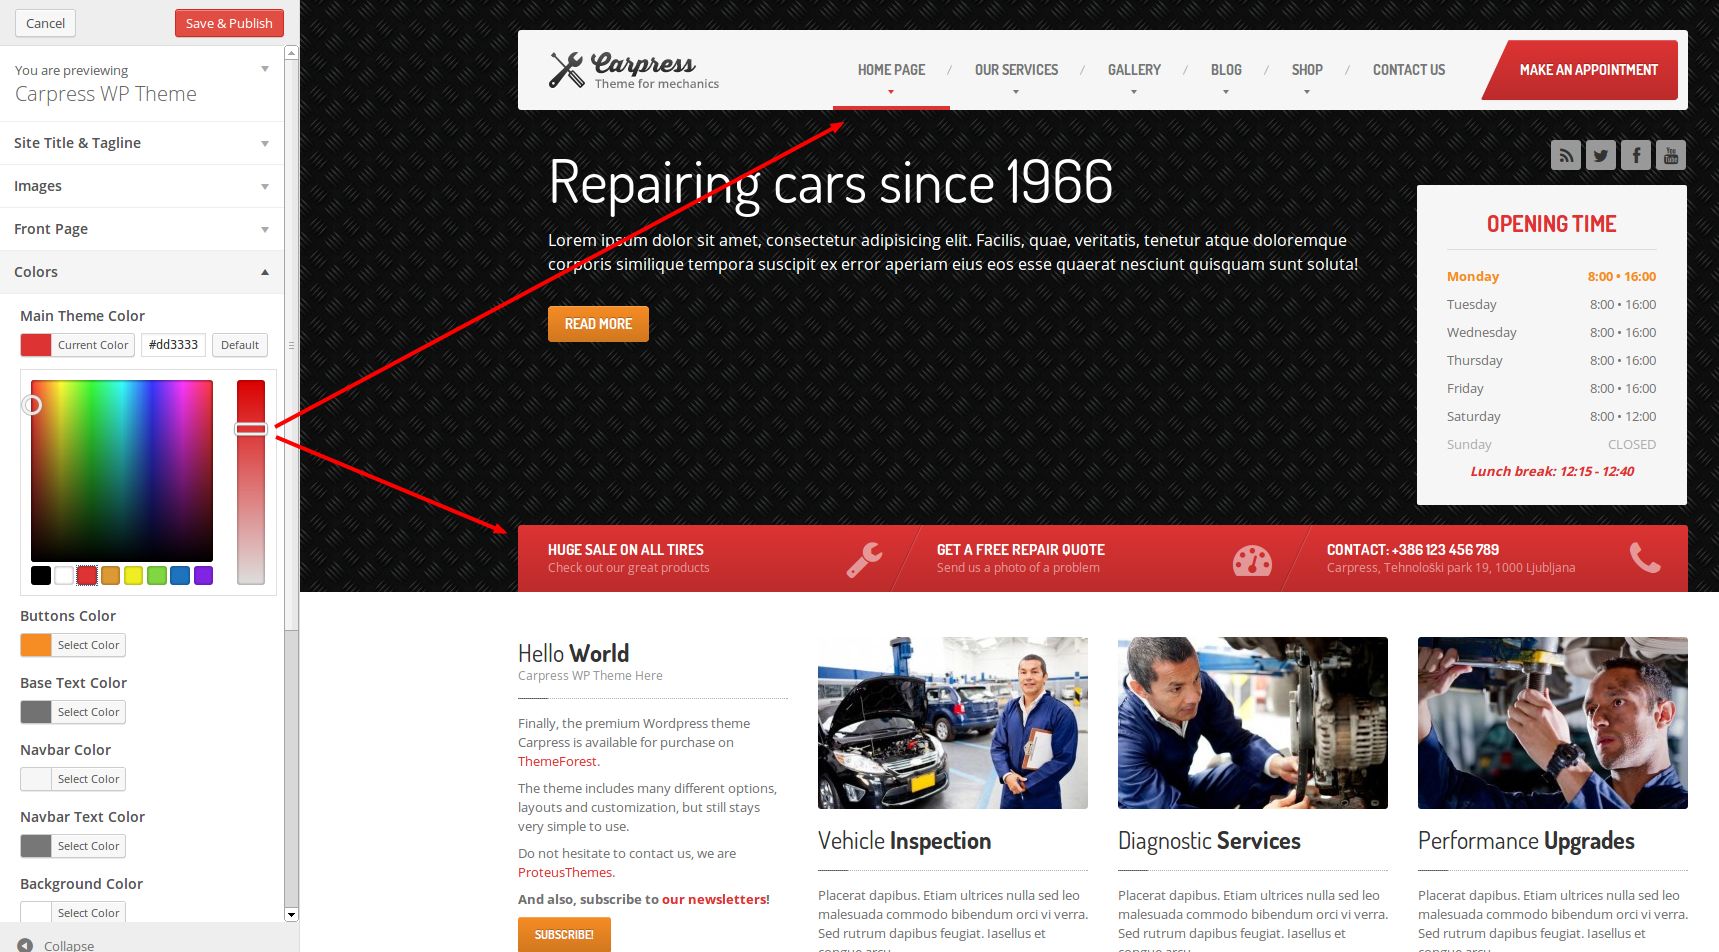
The new window appears and you can now customize the appearance of your theme - upload your custom logo, change the base color theme and color for theme buttons etc.
Custom Post Types
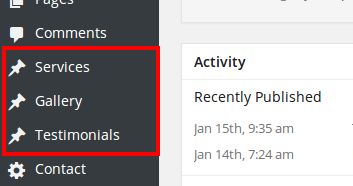
The theme comes with 3 different custom post types installed:
Services
Create a new service to display it in the Services Widget on the front page and in the list of all services which is available (by default) at https://www.yourdomain.com/services
Gallery
The post type created to display the galleries, create a new gallery with a build-in WP gallery builder. Like Services and Team, the list of all galleries will be available at https://www.yourdomain.com/gallery
Testimonials
List of the testimonials for the front page.
Special Notice
Google Maps API key needed!
Google recently changed the way that Google Maps works. Since June 22 2016 they do not allow map requests without an API key, so you will have to add a key to the theme.
Please follow the instructions from this article.Demo Content
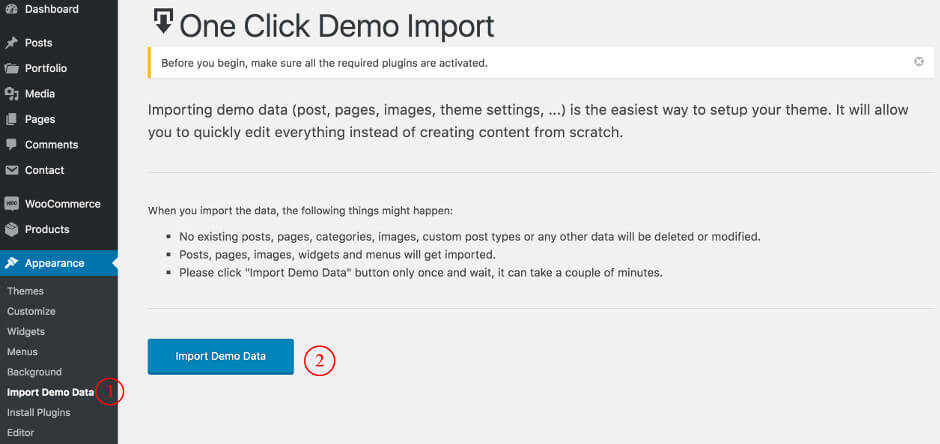
One Click Demo Install
You can import demo content from our demo site (with blurred licensed images) with a single click of a button. Go to Appearance → Import Demo Data and click on the import button.
When setting up a content with your new theme, put special focus on the page speed optimization, especially on the image optimization process. This way you can save on your bandwidth, reduce the bounce rate on your website, and make your users happy. Our themes are created with the speed in mind but large, non-optimized images can and will ruin this experience.
Import XML File
If you want to import the demo content the old-fashioned way, you can get a fresh copy of the XML file on our server at this URL: https://artifacts.proteusthemes.com/xml-exports/carpress-latest.xml. Don't forget to activate all required plugins before importing demo data. To import the demo data go to Tools → Import, click on WordPress (install the WordPress Importer plugin if not already installed) and upload/import the previously saved xml file (don't forget to enable the Download and import file attachments checkbox to also import the images).
Demo Widgets
After you import the demo content, you can also import widgets the old-fashioned way. The file for widget import is also located on our server: https://artifacts.proteusthemes.com/json-widgets/carpress.json. Rename this file to carpress.wie (mind the file extension) and use it in the plugin Widget Importer & Exporter. Go to Tools → Widget Import/Export and import the file.
After import setup
After you have imported the demo data and widgets, you should also setup these things:
- go to Settings → Reading, set the the Front page displays to a static page and select the front page and the blog page in the appropriate dropdowns,
- go to Appearance → Menus, select the main menu from the dropdown at the top and click on Select. Scroll to the bottom and set the Theme location to Main Menu (if there are more locations you can also assign other menus to those locations),
- go to Appearance → Widgets, and set Custom menu widgets, by selecting the correct menu (in footer and our services sidebars),
- optionally set other things (like logo, colors, ...). These settings can be found in Appearance → Customize.
If for some reason these URLs are not available, then all you need to do is download the All files & documentation zip from ThemeForest and you will find the content.xml and widgets.json file in the extras folder.
Post Types
Every post type has its own features. Let's take a look at them:
Page
The WP build-in page post types benefit two features:
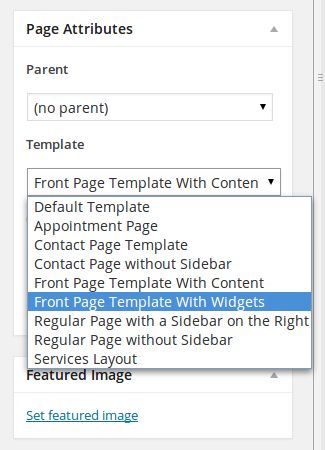
Page Templates
One can select from several different page templates layouts available for the regular theme. The default template has the sidebar on the left:
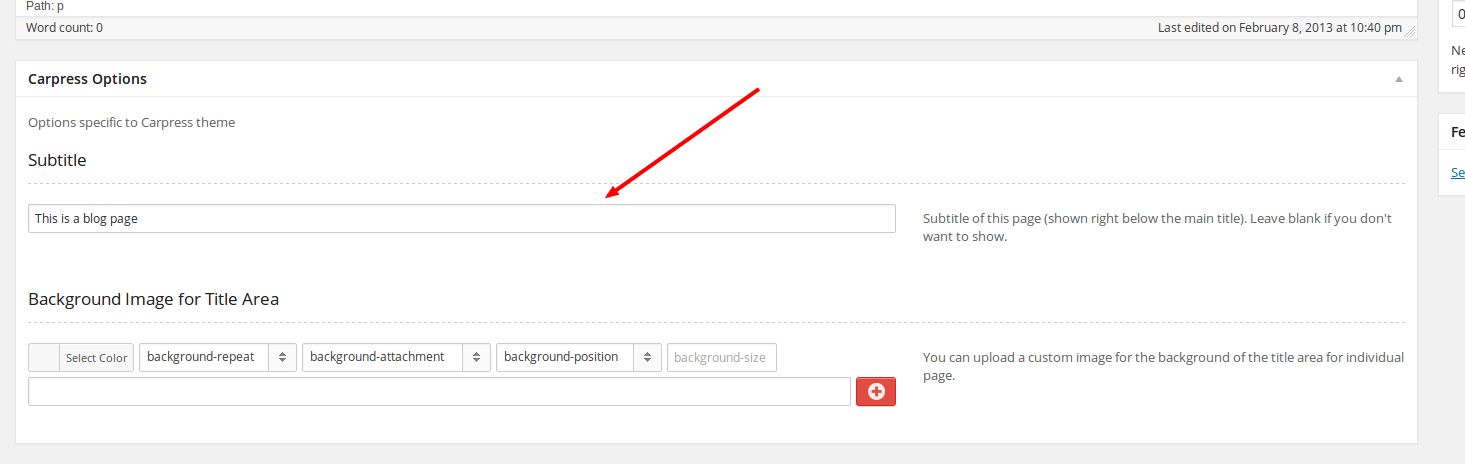
CarPress Options Meta Box
To every page it is possible to add the Subtitle. The subtitle is displayed right below the main title of the page:
Slider
This post type is used to add slides to the front page with slider.
The optimal image sizes for the slider are 1920 (width) x 592 (height) px. If the uploaded image is larger, the WP automatically resizes it.
The image used must be uploaded as the Featured Image.
More settings for the slider (interval, text background color and opacity) can be found in the Appearance → Customize → Front page and Banners.
Services
CarPress Options Meta Box
There are two options in the Carpress Options Meta Box for the Services. You can define the subtitle for the service (like for the page) and in addition you can select if you wish that this service is displayed on the front page in the Services Widget.
Attributes

The order of the services is controlled by the Order under Attributes:
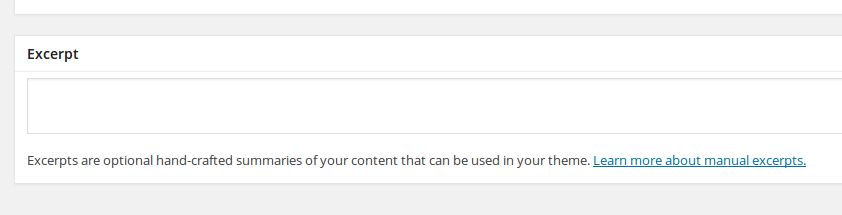
Excerpt
The text displayed on the front page can be altered using the Excerpt textarea:
Gallery
We made adding the galleries much easier for the end user. Everything is done using the WP build-in gallery builder, when adding a new media. Like for the Services you can also change subtitle.
Testimonials
The title of the author of the testimonials can be added in the Testimonial Options.
The Order attribute will be used to order the testimonials. Lower numbers will display faster.
Shortcodes
Columns
For displaying the columns you will need to use two shortcodes.
To start the columns area one can use the [colcontainer] shortcode, followed by [span] shortcode. The [span] accepts one parameter, for example n="5". The Carpress is build on top of the Twitter Bootstrap framework, using the 12 columns grid, which means the theme is vertically divided into 12 columns - the full width of the website. If there is the sidebar present in the page, it already takes 3 spans, so to create the 3 columns on the page with sidebar (no matter left or right) you may use shortcodes like this:
[colcontainer][span n=3]Lorem Ipsum[/span][span n=3]Sit Dolor[/span][span n=3]Amet.[/span][/colcontainer]
This ends up at the 3 (sidebar) + 3*3 (for 3 columns with span 3) = 12 cols = full width of the website.
However, if this page has no sidebar, you should use [span n=4] three times to create three columns.
Maybe this approach seems little too difficult compared to the standard "One Half", "One Third" etc. way, but it is extremely more powerful - it allows you to create just any number of columns you would like and any width you would like, for example something like this:

Buttons
The shortcode [button]Your content[/button] is available for the buttons to insert the buttons into your content.
The options for the buttons:
- Rounded
-
How many pixels you would like to have your button rounded?
Possible values:
- empty - the default state, rounded 3 pixels
- rounded="2" - rounded 2 pixels
- rounded="6" - rounded 6 pixels
- rounded="10" - rounded 10 pixels
- rounded="rounded" - fully rounded
Example
[button rounded="10"]Button title[/button]
- Link
-
Where would you like your button points to?
Possible values:
- empty - no link
- link="https://www.example.com" - link to the website https://www.example.com
Example
[button link="https://themeforest.net/"]Link to ThemeForest[/button]
- Target
-
Open a link in a new window/tab?
Possible values:
- empty - opens up a link in the same window
- target="blank" - opens up a link in a new window/tab
Example
[button link="https://themeforest.net/" target="blank"]Link to ThemeForest[/button]
- Type
-
There are different types of the buttons available, including the ones from Twitter Bootstrap.
Possible values:
- empty - default button Button
- type="theme" - the current theme color
- type="primary" - dark blue color Button
- type="info" - light blue color Button
- type="success" - green color Button
- type="warning" - yellow color Button
- type="danger" - red color Button
- type="inverse" - black color Button
Example
[button type="success"]Success Button[/button]
All the options combined:
[button type="theme" link="https://www.proteusthemes.com" rounded="rounded"]My Power Button[/button]
Content Dividers
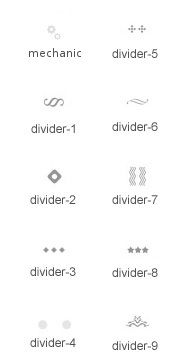
Ted different color dividers come with the theme. The default one you select in the Theme Options, but you can always use any of them in the content.
The [divider] accepts one parameter, the type:
- type="theme" - the default theme divider, from Theme Options
- type="mechanic"
- type="divider-1"
- type="divider-2"
- type="divider-3"
- type="divider-4"
- type="divider-5"
- type="divider-6"
- type="divider-7"
- type="divider-8"
- type="divider-9"
Example:
[divider type="divider-1"]
Accordion
The [accordion] shortcode is available as well for the accordions. It accepts two parameters, title, which is the title of the tab and opened, which determines if the the accordion is opened by default. Example:
[accordion title="Accordion title" opened="true"]
					  Here comes the content of the accordion
					[/accordion]
Pricing Tables
Pricing tables in fact aren't shortcode, but you can edit them directly in Text editing mode:
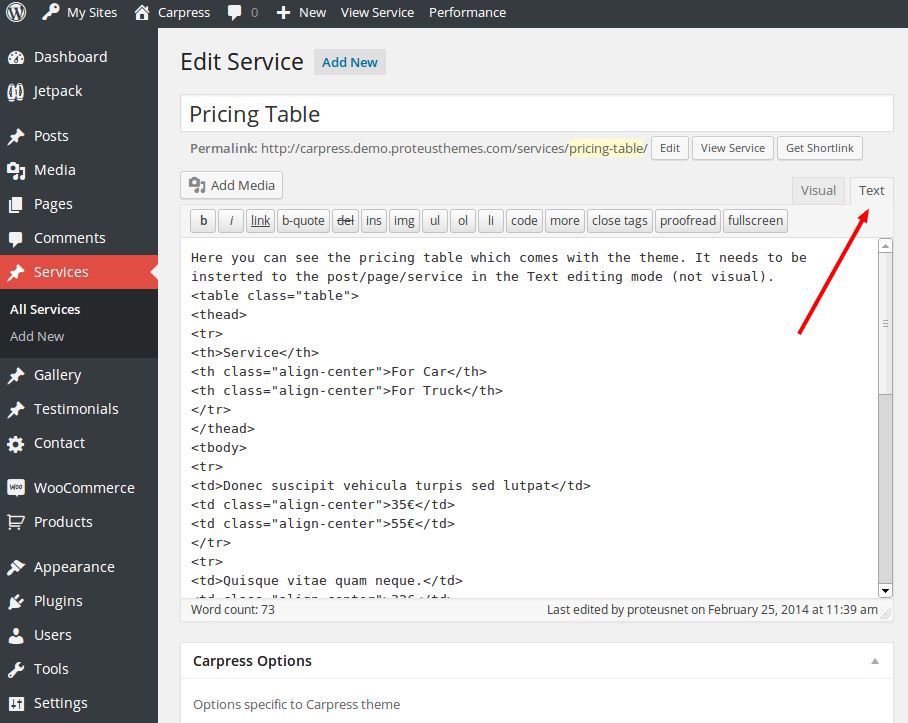
Just go to the text editing mode and copy/paste the following code there:
<table class="table">
					  <thead>
					    <tr>
					      <th>Service</th>
					      <th class="align-center">For Car</th>
					      <th class="align-center">For Truck</th>
					    </tr>
					  </thead>
					  <tbody>
					    <tr>
					      <td>Donec suscipit vehicula turpis sed lutpat</td>
					      <td class="align-center">35€</td>
					      <td class="align-center">55€</td>
					    </tr>
					    <tr>
					      <td>Quisque vitae quam neque.</td>
					      <td class="align-center">32€</td>
					      <td class="align-center">42€</td>
					    </tr>
					    <tr>
					      <td>Morbi cilisis placerat dapibus.</td>
					      <td class="align-center">44€</td>
					      <td class="align-center">31€</td>
					    </tr>
					    <tr class="active">
					      <td>Etiam ultrices nulla ed leo malesuada</td>
					      <td class="align-center">48€</td>
					      <td class="align-center">34€</td>
					    </tr>
					    <tr>
					      <td>Commodo bibendum orci vi verra ;</td>
					      <td class="align-center">22€</td>
					      <td class="align-center">33€</td>
					    </tr>
					    <tr>
					      <td>alesua commodo malesuada commodo</td>
					      <td class="align-center">16€</td>
					      <td class="align-center">7€</td>
					    </tr>
					  </tbody>
					</table>
Each <tr> indicates its own line. One has a class="active", this one will be highlighted.
Once you inserted the table in Text editing mode you can also switch back to the Visual mode and edit the text and prices there.
Widgets
There are several widgets you can use with the Carpress WP Theme:
- Carpress: Custom Width Text For Home Page - you decide how much space the text widget will take, from 1/12 of the page to the full width of the page
- Carpress: Divider - for divider on the front page
- Carpress: Facebook - for FB like box in the footer
- Carpress: Latest Galleries - to display latest galleries
- Carpress: Latest News - to display latest news / blogposts
- Carpress: Opening time - to display timetable / opening time of the business - can be used above the slider
- Carpress: Our Services - to display the services on the front page
- Carpress: Testimonials - to display testimonials on the front page
- Carpress: Text with link
- Carpress: Title with Icon - Widget for the front page in the head
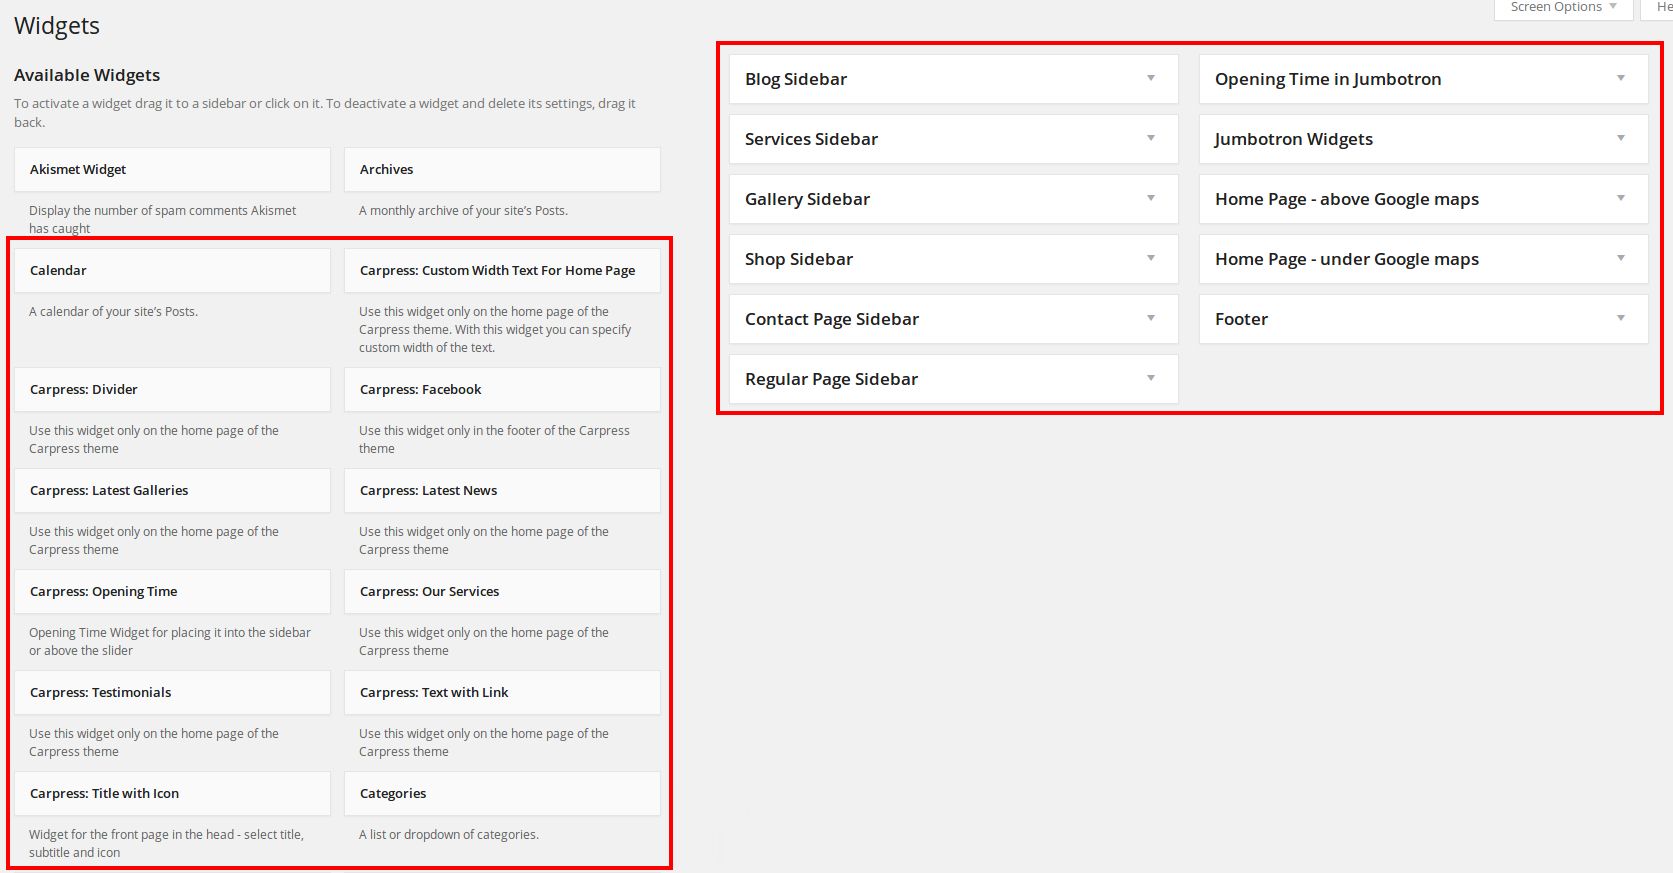
There are 10 different sidebars associated with the theme (look at the image above), so you can easily decide how the different layout types will look like.
All the widgets can have the subtitle too. In the "Title" field just add the double forward slash // and the text after the double slash will be used as the subtitle. Example: Widget main title // This is a subtitle.
Free Repair Quote Widget
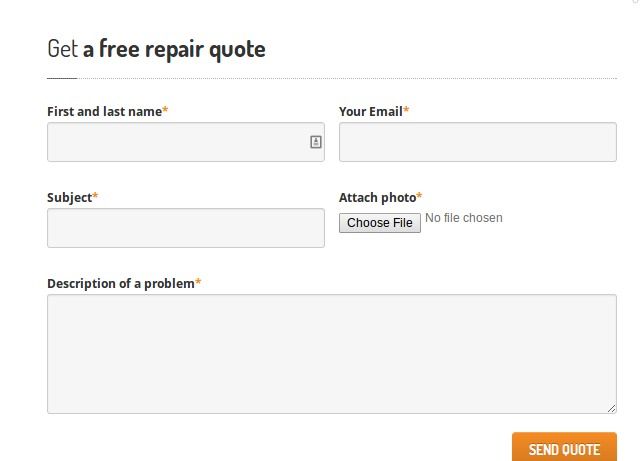
The contact form widget as seen on demo page is in fact the Contact Form 7 shortcode in the widget Custom Width Text For Home Page.
- Go to the Contact Form 7 Plugin and create a new form
- In the field Form paste the following code:
<div class="row-fluid">
					<p class="span6"><label>First and last name<span class="orange-clr">*</span></label><br />
					    [text* your-name] </p>

					<p class="span6"><label>Your Email<span class="orange-clr">*</span></label><br />
					    [email* your-email] </p>
					</div>

					<div class="row-fluid">
					<p class="span6"><label>Subject<span class="orange-clr">*</span></label><br />
					    [text* your-subject] </p>

					<p class="span6"><label>Attach photo<span class="orange-clr">*</span></label><br />
					     [file file-239]</p>
					</div>

					<p><label>Description of a problem<span class="orange-clr">*</span></label><br />
					    [textarea* your-message x5] </p>

					<p>[submit class:btn class:btn-warning "Send Quote"]</p>
- In the field Message body paste the following code:
From: [your-name] <[your-email]>
					Subject: [your-subject]

					Message Body:
					[your-message]

					File: [file-239]

					--
					This e-mail was sent from a contact form on Mechanic
- Do not forget to change the other fields, especially where to send the email too.
- Copy the code (which will look like
[contact-form-7 id="1381" title="Widget on the front page"]) and paste in the widget called Custom Width Text For Home Page and set the number of columns to 6 - That's it!
Plugins
We also use and support some of the best plugins for WordPress.
Required and Recommended Plugins
You can install and activate these plugins by going to wp-admin → Appearance → Install Plugins.
The list of required and recommended plugins used in this theme:
- Contact Form 7
- FancyBox for WordPress
- Jetpack by WordPress.com
- WordPress Importer
- Widget Importer & Exporter
- WooCommerce
- Easy Google Fonts
WooCommerce
This theme supports basic WooCommerce integration.
Once WooCommerce is activated you will see this notice:
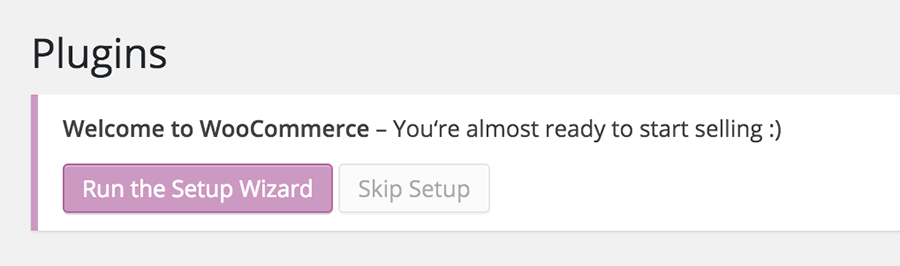
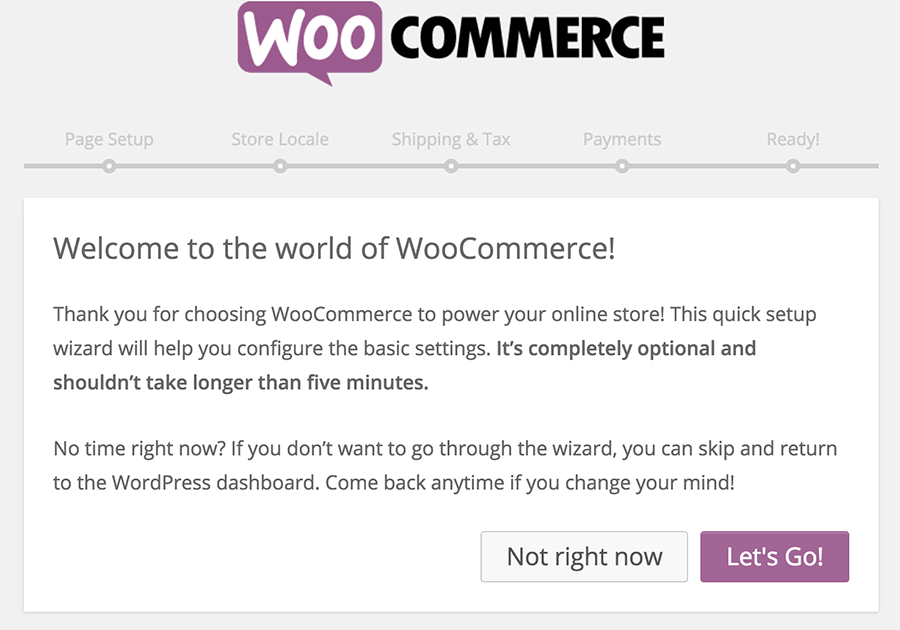
Click on Run the Setup Wizard button to begin the WooCommerce install. That will start the setup wizard, where you can set things like shop pages, store locale, shipping & tax and payments.
If you want to change some settings, you can change them in WooCommerce → Settings. There are many tabs at the top, you can configure to fit your needs.
Most of our themes come with our own demo products for the WooCommerce store and will be imported automatically when you import the demo content using our industry-leading One Click Demo Import plugin. You need to make sure that WooCommerce is activated at the time that you import the demo data.
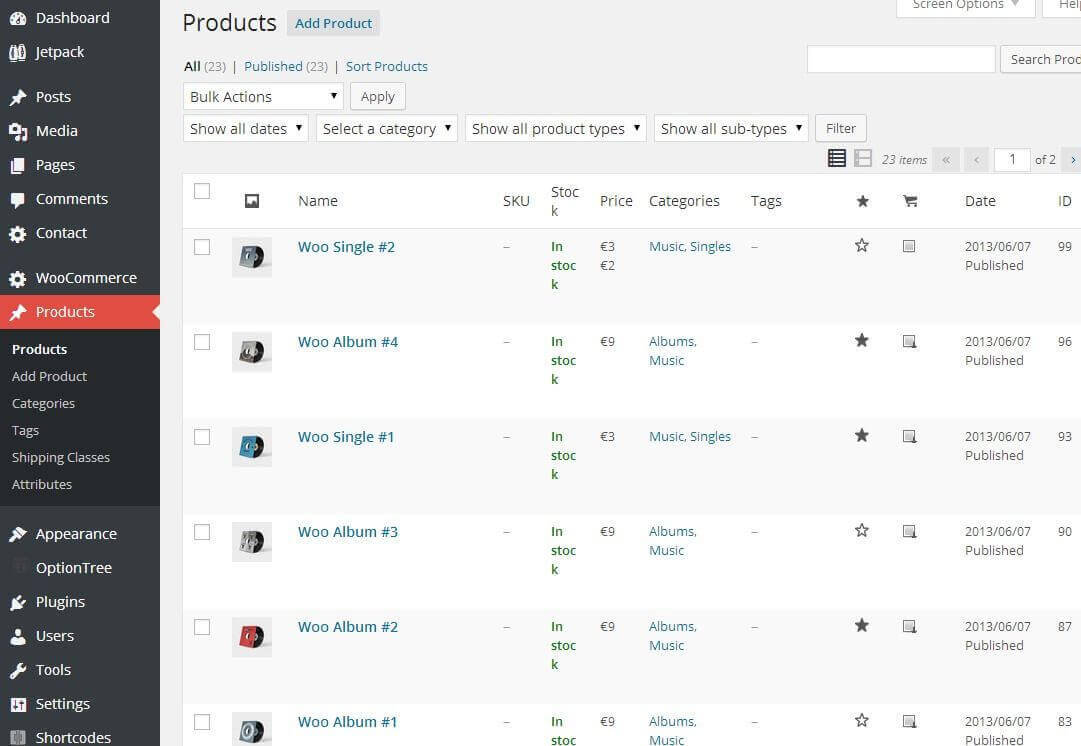
However, you can (optionally) install the additional demo products by WooCommerce. Go to Tools → Import → WordPress and import the demo XML file which can be found in the folder where WooCommerce was installed on your server. Usually this is in wp-content/plugins/woocommerce/dummy-data/dummy-data.xml. Also check the Download and import file attachments checkbox, so that all product images will be downloaded as well.
When you're done, you should see the products:
When you are done with the settings, go to Appearance → Widgets.
Drag & Drop the WooCommerce widgets that start with "WooCommerce" to the sidebar called Shop Sidebar.
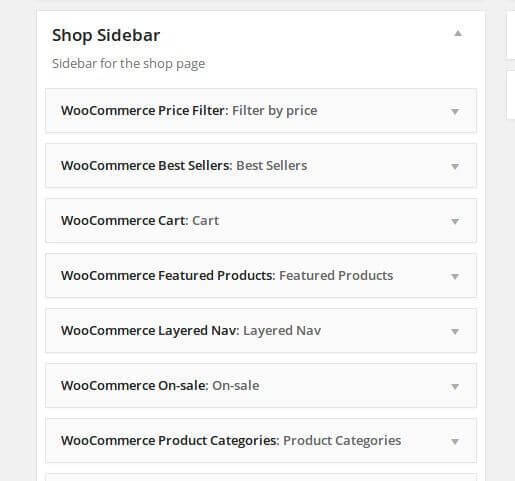
That's all, your WooCommerce shop is now ready!
Contact Page
The Contact Us form and Make an Appointment form on the website are made live using the Contact Form 7 WP Plugin: https://wordpress.org/extend/plugins/contact-form-7/.
Here is the code for the Contact Form 7 WP plugin for a contact us page:
Form:
<div class="row">

					<div class="span3">
					<label>First and Last Name<span class="theme-clr">*</span></label>
					[text* your-name class:span3]
					</div>

					<div class="span3">
					<label>Phone Number</label>
					[text your-phone class:span3]
					</div>

					<div class="span3">
					<label>E-mail address<span class="theme-clr">*</span></label>
					[text* your-email class:span3]
					</div>

					</div>
					<div class="row">

					<div class="span9">
					<label>Your message<span class="theme-clr">*</span></label>
					[textarea* your-message x5 class:span9]
					</div>

					</div>
					<div class="row">
					<div class="span9">
					[submit class:btn class:btn-theme class:no-bevel class:pull-right "Send"]
					</div>
					</div>
Message body:
From: [your-name] <[your-email]>
					Phone: [your-phone]

					Message Body:
					[your-message]
After that just place the plugin's shortcode to your contact us page.
Here is the code for the Contact Form 7 WP plugin for a Make an Appointment page:
Form:
<div class="row">

					<div class="span3">
					<label>First and Last Name<span class="theme-clr">*</span></label>
					[text* your-name class:span3]
					</div>

					<div class="span3">
					<label>Phone Number</label>
					[text your-phone class:span3]
					</div>

					<div class="span3">
					<label>E-mail address<span class="theme-clr">*</span></label>
					[text* your-email class:span3]
					</div>

					<div class="span3">
					<label>Date<span class="theme-clr">*</span></label>
					[text* appointment-date class:add-datepicker] <a class="add-datepicker-icon" href="#"><span class="icon icons-calendar"></span></a>
					</div>

					</div>
					<div class="row">

					<div class="span9">
					<label>Type here if you have some special requirements:</label>
					[textarea* your-message x5 class:span9]
					</div>

					</div>
					<div class="row">
					<div class="span9">
					[submit class:btn class:btn-theme class:no-bevel class:pull-right "Send"]
					</div>
					</div>
Message body:
From: [your-name] <[your-email]>
					Phone: [your-phone]
					Date: [appointment-date]

					Message Body:
					[your-message]
After that just place the plugin's shortcode to your make an appointment page.
FancyBox Gallery Effect
Download and activate the FancyBox for WordPress: https://wordpress.org/plugins/fancybox-for-wordpress/. And that's all.
Twitter Widget
This widget can be included everywhere - in page builder and in a normal sidebar. For that widget we use a normal WordPress Text Widget.
First, go on https://twitter.com/settings/widgets and click Create new.
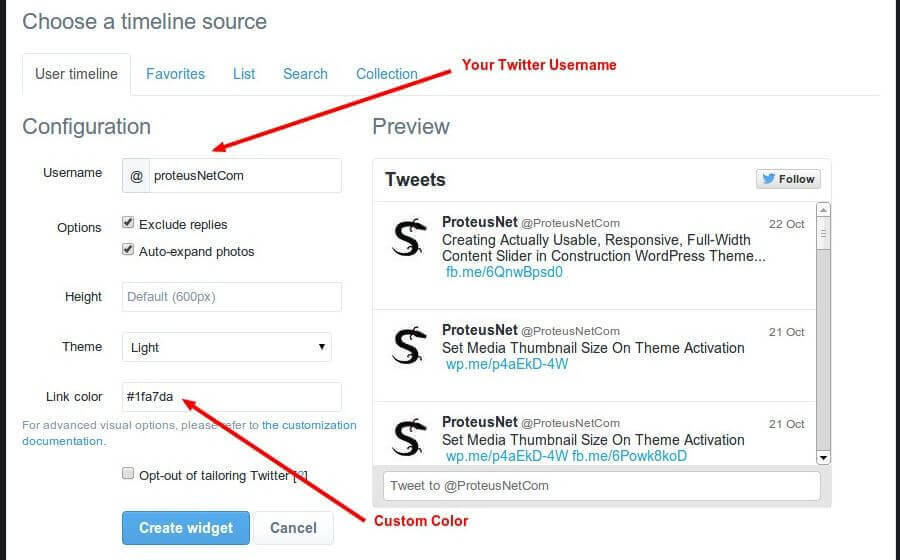
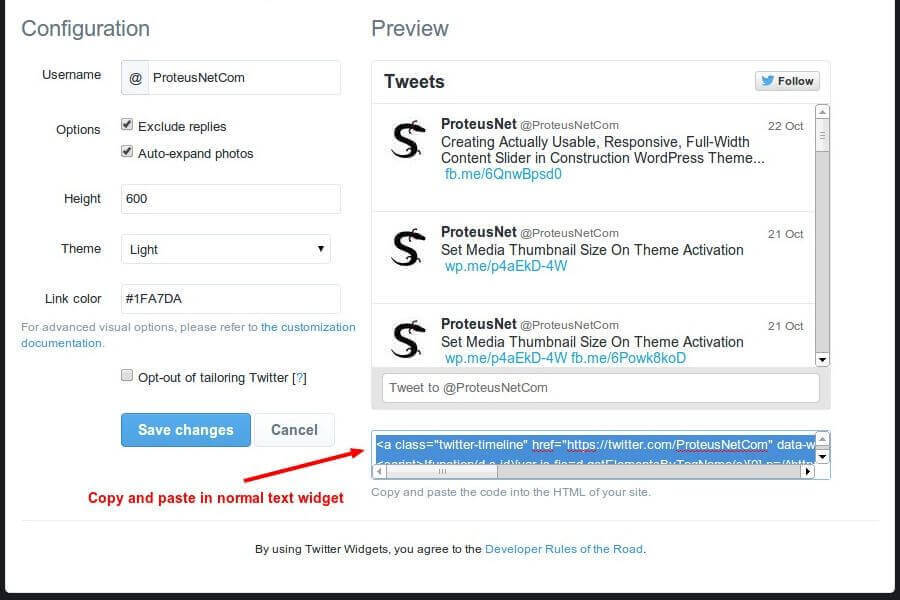
Now choose your Username, height of the widget, Theme and Link color. When you are happy with your widget click on Create widget button. You will get the code which you copy and paste in the Text Widget in your WordPress site.
Slider
Carpress has very simple but powerfull slider. For adding new slide just click on the Slider and Add New button.
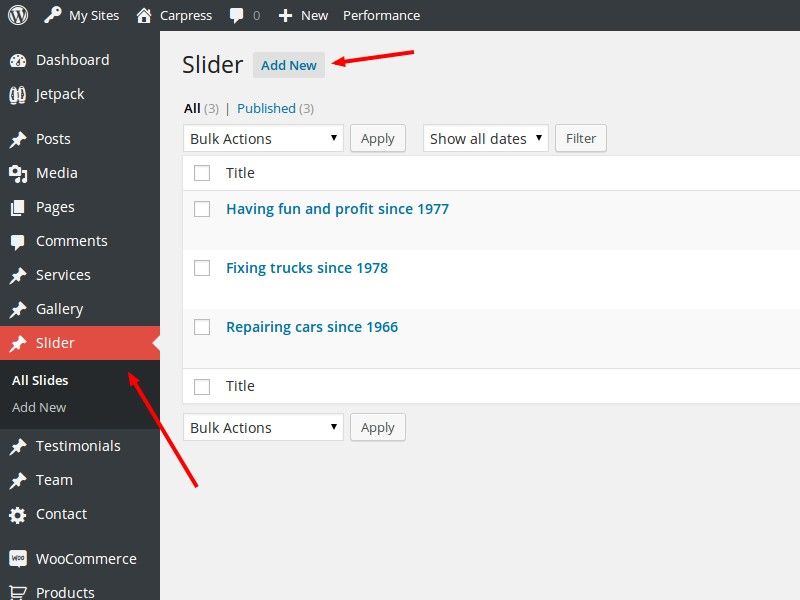
Here you can add title for slider, some content and slider image. When you're happy with resoults click on the Update button and slider is already showing your slide.
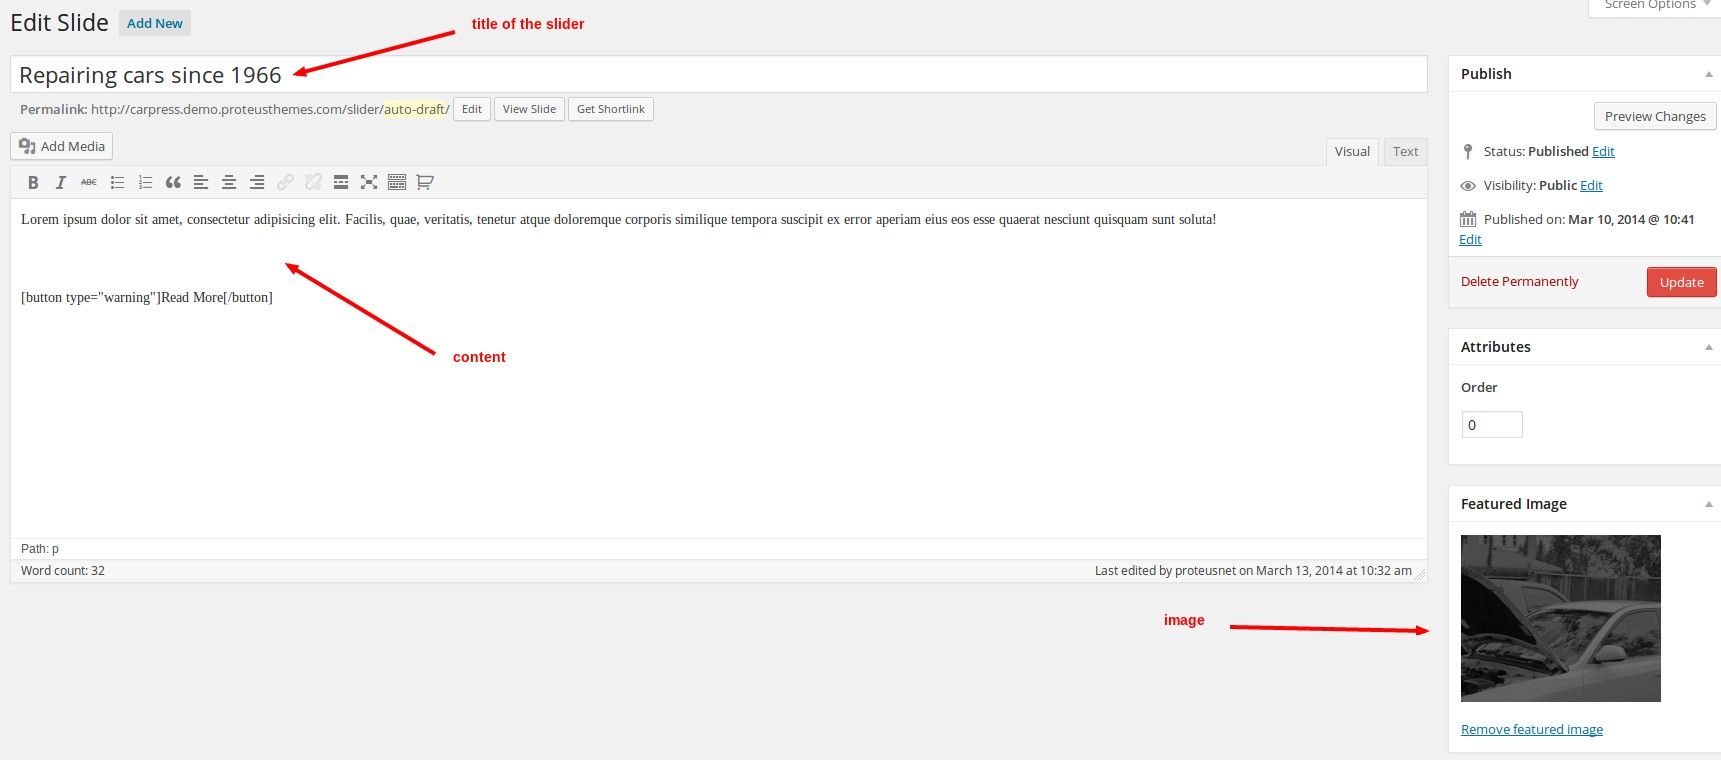
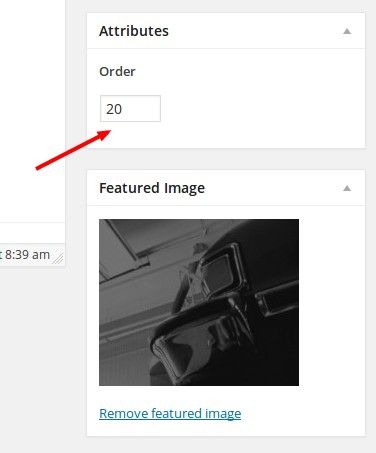
You can add as many slides as you want. To keep all that slides organized you can manage them with order of numbers.
Few more settings can be found in customizer under Front Page & Banners. Here you can change the speed of carousel (slider) interval, background color of the content in slider and opacity of that background.
Revolution Slider
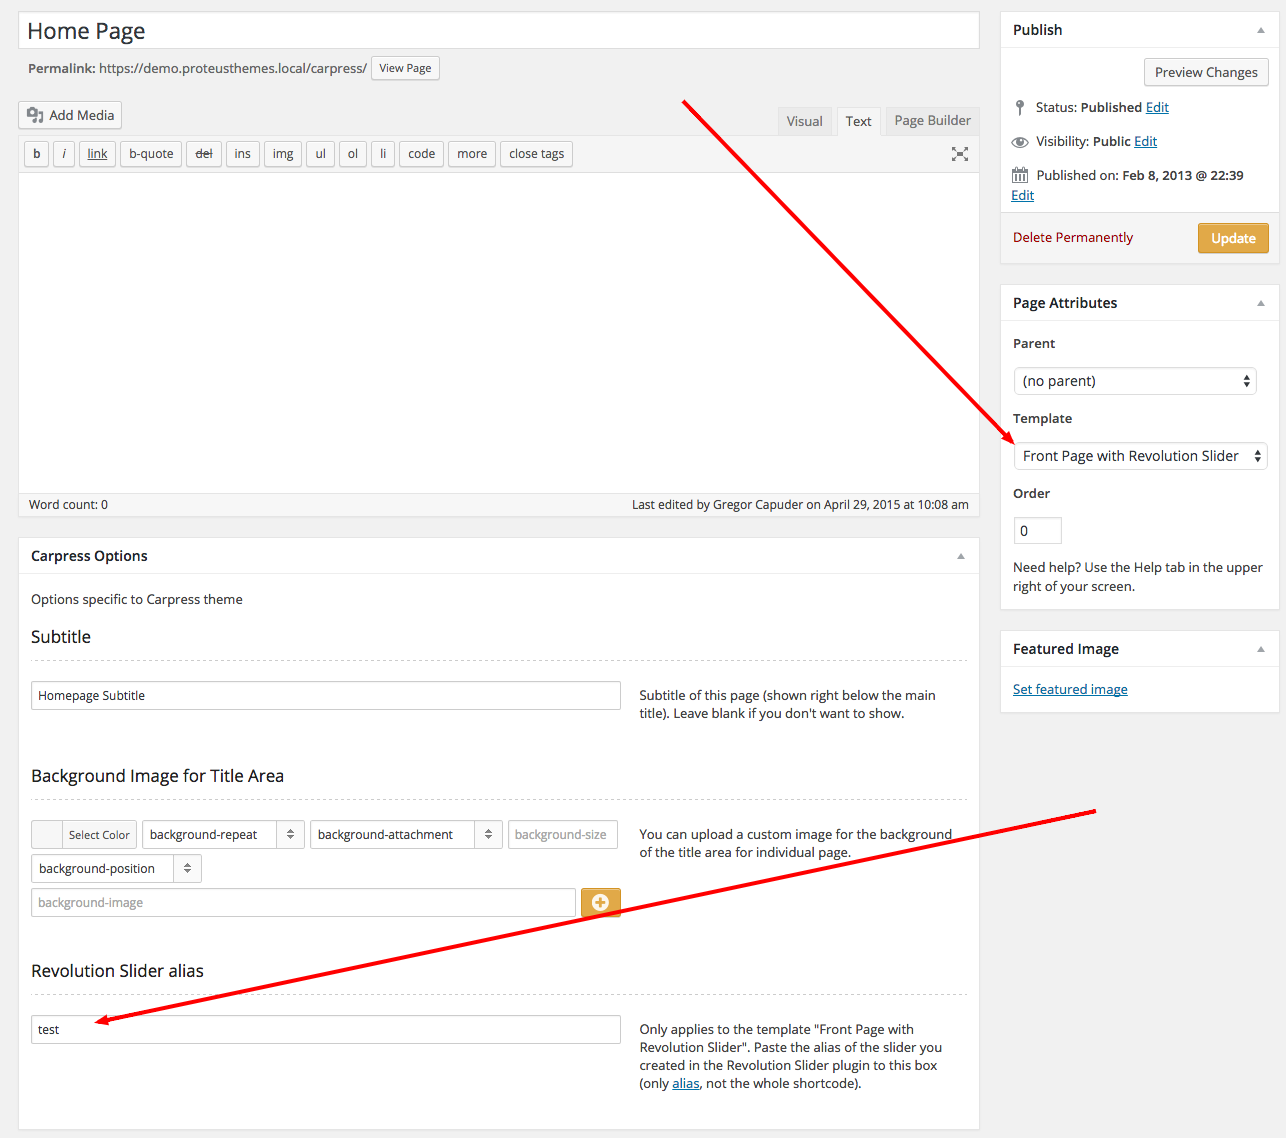
If you prefer to work with the Revolution slider plugin, then you can use it with our Front page with Revolution Slider page template.
All you need to do is:
- Create a slider in the Revolutions Slider plugin and copy the alias of the slider,
- Change the page template of your homepage to Front page with Revolution Slider and set the Revolution Slider alias in the Carpress Options metabox:
Translations
Manual translation
From version 1.6.0 Carpress WP theme is translated out of the box to the following languages:
- English
- German
- Spanish
- French
- Dutch
- Russian
- Slovenian
We have an article with a video on how to translate our themes.
When you translate the theme to any new language, you can share the po/mo files with the rest of the community. Please send us a .po file so can we include it in the next theme update. By doing so, you get a big THANK YOU from us — we make your name immortal in the wall of fame on the CarPress item page, with a link to your profile/blog/website.
WPML for Multilingual sites
This theme officially supports WPML. Head over to the WPML website, buy the subscription, then install the main plugin — likely the OTGS Installer Plugin. When prompted to download, install, and activate specific WPML plugins, make sure to install and activate these:
- WPML Multilingual CMS
- String Translation
- Media Translation
WPML’s setup wizard will also prompt you to install other plugins if it thinks you need them. For example, if this theme includes a WooCommerce-based site, WPML will prompt you to install WooCommerce Multilingual & Multicurrency. Install whatever WPML suggests installing.
Extras
Demo Images
Images for the slider are free and can be found in the /extras/slider/ directory.
The rest of the images in the demo aren’t included in the One Click Demo Import because of the licenses, but you can buy them at photodune.net:
Customizations
If you need advanced customizations for this theme, we can do that. See our Theme Customization page for details.
Changelog
View the Carpress WP changelog.
Support
If you need more help after all, you can write to us.