You can take a look at the following instruction video, or you can follow along with the steps below.
The first thing you will need to do is to download the theme installation zip file.
If you bought the theme on our ProteusThemes Shop, you should have received an email with the list of themes you have access to. You can click on the theme link with file name ending with -installable.zip or you can log in to your ProteusThemes account and download the installable zip file from there.
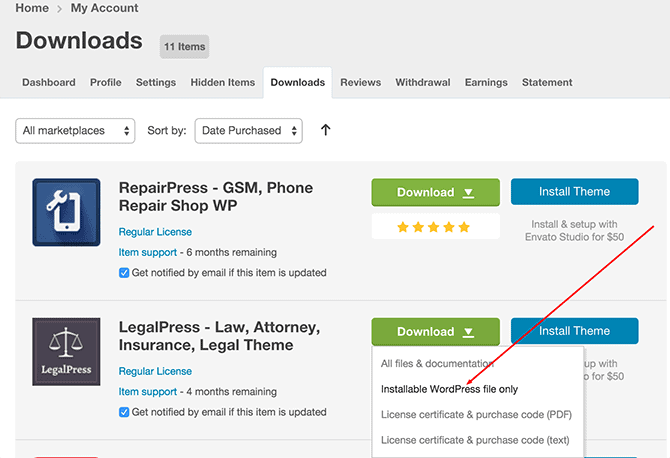
If you bought the theme on ThemeForest, then you have to download the “installable WordPress files only” zip file from the ThemeForest download section:
- Go to Appearance → Themes → Add New → Upload Theme. Choose the zip file that you just downloaded and click on Install now.
- When the theme is installed, click on Activate.
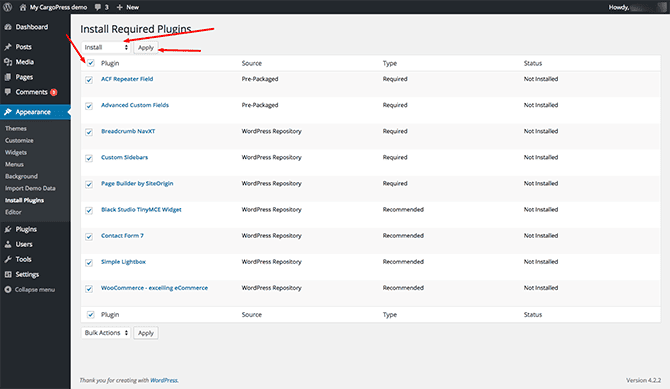
- Go to Appearance → Install Plugins. Select all plugins, then select the Install action from the dropdown menu and click on Apply:
- After the plugins install, click on the Return to Required Plugins Installer link at the bottom of the page or go to Appearance → Install plugins.
- Now, select all plugins. Then, select the Activate action and click on Apply.
- The WooCommerce plugin will intercept your next action and display the “setup wizard”. For now you can just click on Not right now, because we will get back to the WooCommerce setup a bit later.
- After clicking the button, the error “You do not have sufficient permissions to access this page” might show up. This is because of the WooCommerce forced setup wizard. All you need to do is go to your WordPress admin dashboard URL at
/wp-admin/. - Go to Appearance → Import Demo Data and click on the Import Demo Data button. This will import all content, widgets and also set some default options. This procedure might take a few minutes.
- The next step is to set the Custom Menu widgets:
- Go to Appearance → Widgets.
- Click on the Our Services sidebar.
- Open the Custom Menu widget.
- Select the Service Menu from the drop-down and save the widget.
- Do the same for the two Custom Menu widgets in the Footer sidebar.
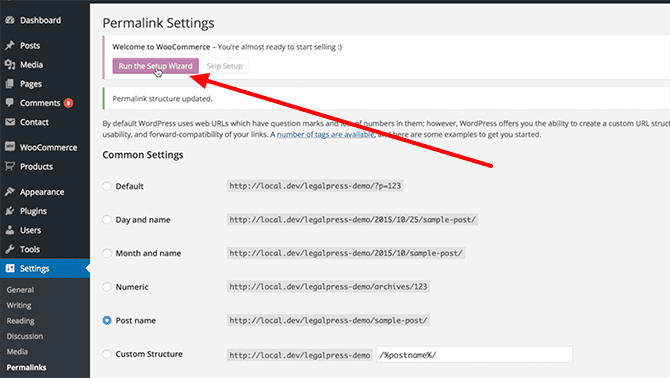
- Go to Settings → Permalinks. Select the Post name option and save the changes.
- Finally, click on the Run the Setup Wizard button and follow the steps in the wizard to set up the WooCommerce plugin:
That’s it! 🙂
You now have an exact copy of our demo site (only the images are blurred because of copyright).
