WordPress ecosystem is full of great looking free and premium themes, but finding a perfect theme for your needs, the one that would tick all the boxes, is very hard. Luckily, WordPress has a solution to this problem, called child themes. So, don’t worry, you can use a child theme to apply the changes to create your almost-perfect theme.
WordPress child themes can be as simple as a bit of custom CSS code or they can overwrite existing parent theme templates and modify or add additional theme functionality. I will explain everything you need to know about child themes in this article, so let’s get straight to it.
What Is a Child Theme?
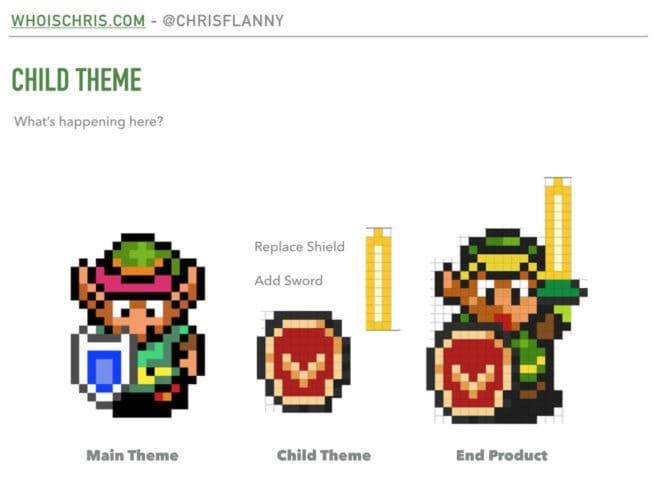
A child theme is a theme, that inherits the functionality and styling of another theme, called the parent theme. Child themes are the recommended way of modifying an existing theme.
The official WordPress definition above is great, but let’s look at what this means more closely. A starter (barebone) child theme will look and function exactly the same as the parent theme. I will show you how to create a starter child theme soon, but for now, a starter theme is a minimal child theme, that will inherit everything from the parent theme. You can then add files and code to the child theme, which will modify or enhance the look and functionality of the parent theme, making it a separate unique theme.
There are a lot of benefits and no real downsides for using a child theme, so let’s take a look at why you should use a child theme.
Why Should I Use a Child Theme?
Even better question: why wouldn’t you use a child theme? I actually can’t think of a good reason not to use it, but I know a few great reasons why you should use a child theme.
Theme updates – if you modify the theme code directly and you update that theme in the future, all these modifications will be lost. I think this reason alone is good enough, to start using child themes. We had a few clients, who were editing the theme files directly and then opened a support ticket, saying our theme update has destroyed their work. If they used a child theme, everything would be ok. Do you even need theme updates? Yes! For example: What if the theme update includes a security fix and by not updating the theme, your WP site could become a potential target for hackers?
Code organization – since all changes are placed in a child theme folder, you can clearly see, which changes have been made and how they have been made. If you need to change anything in the future, you will know exactly where to find these changes and this will save you a lot of time.
Faster development – extending or overriding parent theme style and functionality in a child theme, is a much better option, than maintaining a modified theme codebase, which can get overwritten with theme updates (and we have already established, that updates are important :)).
As I mentioned before, I can’t think of a single reason why not to use a child theme, so I would suggest, that you set up a starter child theme as soon as possible. When installing a new theme, you should also create a starter child theme and use it instead, even if you don’t have any immediate plans to customize the parent theme. Believe me, down the road, when you will need to make a few changes, you will be glad that you’re using a child theme.
As a side note: WordPress 4.7 introduced the Additional CSS editor in the customizer, where you can add custom CSS code. So, if you are sure, that your only theme modification will be a bit of custom CSS code, then you don’t need a child theme. You can use the Additional CSS editor to add your CSS code and that’s it. But are you sure you will not make any additional changes to the theme in the future? Are you? 🙂
How To Create a Starter Child Theme?
Now that we know the what and the why, let’s look at the how. As we have already mentioned, a starter child theme is a very minimal child theme. It will look and function exactly the same as the parent theme, but it will be a starting point for your modifications and improvements.
For our example, we will create a starter child theme for the Adrenaline parent theme:
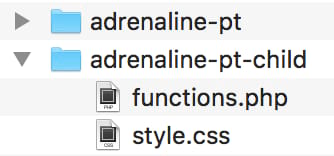
- Create a folder and name it adrenaline-pt-child. The best practice is to use the parent theme folder name (adrenaline-pt) and append the ‘-child’ at the end of it, so it’s obvious which theme is the child theme and which the parent.
- Create a
style.cssfile in the child theme folder. Open thestyle.cssfile and paste this code into it (this code must be at the top of the file):
/* Theme Name: Adrenaline Child Theme Theme URI: https://www.proteusthemes.com/wordpress-themes/adrenaline Description: Child theme for the Adrenaline theme Author: ProteusThemes Author URI: https://www.proteusthemes.com Template: adrenaline-pt Version: 1.0.0 License: GNU General Public License v2 or later License URI: http://www.gnu.org/licenses/gpl-2.0.html Tags: grid-layout, custom-background, custom-colors, custom-menu, featured-images, footer-widgets, full-width-template, microformats, sticky-post, theme-options, blog, e-commerce, entertainment, holiday Text Domain: adrenaline-pt-child */ /* Write your custom CSS code below */ - Create a
functions.phpfile in the child theme folder. Open thefunctions.phpfile and paste this code into it:
<?php add_action( 'wp_enqueue_scripts', 'enqueue_parent_theme_style' ); function enqueue_parent_theme_style() { wp_enqueue_style( 'parent-style', get_template_directory_uri() . '/style.css' ); } - Optionally, you can add a screenshot.png (or .jpg) to your child theme folder, which will display in the Appearance -> Themes section as a preview image (the screenshot image should be 1200x900px big).
That’s the basic starter child theme. To install it, you should place this folder in the wp-content/themes/ directory, next to the parent theme folder. Or you can also create a zip file from this child theme folder and install it as a regular WP theme through WP admin dashboard in Appearance -> Themes.
Let’s explain the code in the above snippets.
style.css – The only fields that are “required” are Theme Name (the name of your child theme) and Template (the folder name of your parent theme). Other fields are optional and the child theme will work without them. However, these meta fields: Theme URI, Description, Author, … are “nice to have” and they will show up in WP admin -> Appearance -> Themes, which will make the child theme more “complete”.
functions.php – in order for the child theme to have the same style as the parent theme, we need to enqueue the parent theme CSS file. The recommended way to do this, is to use the wp_enqueue_scripts action hook. In the callback function, we enqueue the parent theme CSS file with the wp_enqueue_style function. If the parent theme is using multiple CSS files (not just style.css), then you might need to enqueue them as well, depending on the parent theme enqueueing technique.
In our Adrenaline theme, we are also using the custom WooCommerce CSS file, so it’s best to enqueue it in the child theme as well. We have to be careful here, because we need to name the handle parameter of the wp_enqueue_style function the same as it is in the parent theme (in our example: adrenaline-woocommerce). This way, our child theme CSS file will be enqueued last and we will be able to overwrite any parent theme styles without any problem. Here is the updated functions.php file for our Adrenaline theme:
<?php

add_action( 'wp_enqueue_scripts', 'enqueue_parent_theme_style' );
function enqueue_parent_theme_style() {
  wp_enqueue_style( 'parent-style', get_template_directory_uri() . '/style.css' );

  /**
   * Enqueue additional parent theme CSS files.
   * Watch out to name the "handle" parameter the same as it is named
   * in the parent theme, otherwise the file might be enqueued twice.
   * In this example the parent handle name for this CSS file was
   * "adrenaline-woocommerce"
   */
  wp_enqueue_style( 'adrenaline-woocommerce', get_template_directory_uri() . '/woocommerce.css' );
}
At this point I would like to mention, that the old way of adding the parent styles to the child theme, was with the CSS @import rule. If you are using a child theme, which uses the @import rule in the style.css to import the parent theme CSS file, then I suggest you switch to the example above, where the parent theme CSS file is enqueued in the functions.php file (and remove the @import rule from style.css). The problem with the @import rule is, that it’s much slower than enqueueing the parent CSS file via the wp_enqueue_scripts hook. You can read more about this issue here.
You might be thinking: “There must be a plugin for creating child themes…” Yes, there is. We will take a look at this plugin in the section called Switching to a child theme on an already configured parent theme.
How Do Parent and Child Theme Template Files Work?
Before we continue with examples on how to customize your child theme, we will take a quick look at how the WordPress templates hierarchy works.
WordPress uses template files to build the actual HTML pages that your website visitors see. Some of the more known WordPress template files are: header.php, footer.php, index.php, single.php, page.php, … For example, if a blog page is visited, the index.php template file is being used to display the list of blog posts. Some of the template files are modular and reusable. header.php, for example, is usually used on every WordPress page.
Some of the template files are more specific than others and are regarded as higher priority by WordPress. For example, if a theme has a singular.php and a page.php templates, and a visitor views a regular WordPress page, the page.php template will be used to generate the page. This happens because the page.php template file is more specific than the singular.php template in the WordPress template hierarchy. If we removed the page.php file from the theme, then the singular.php template would be used. You should take a look at the WordPress template hierarchy documentation, where this topic is described in more detail and has a few examples.
Another resource you should check out is the interactive visualization of WordPress template hierarchy.
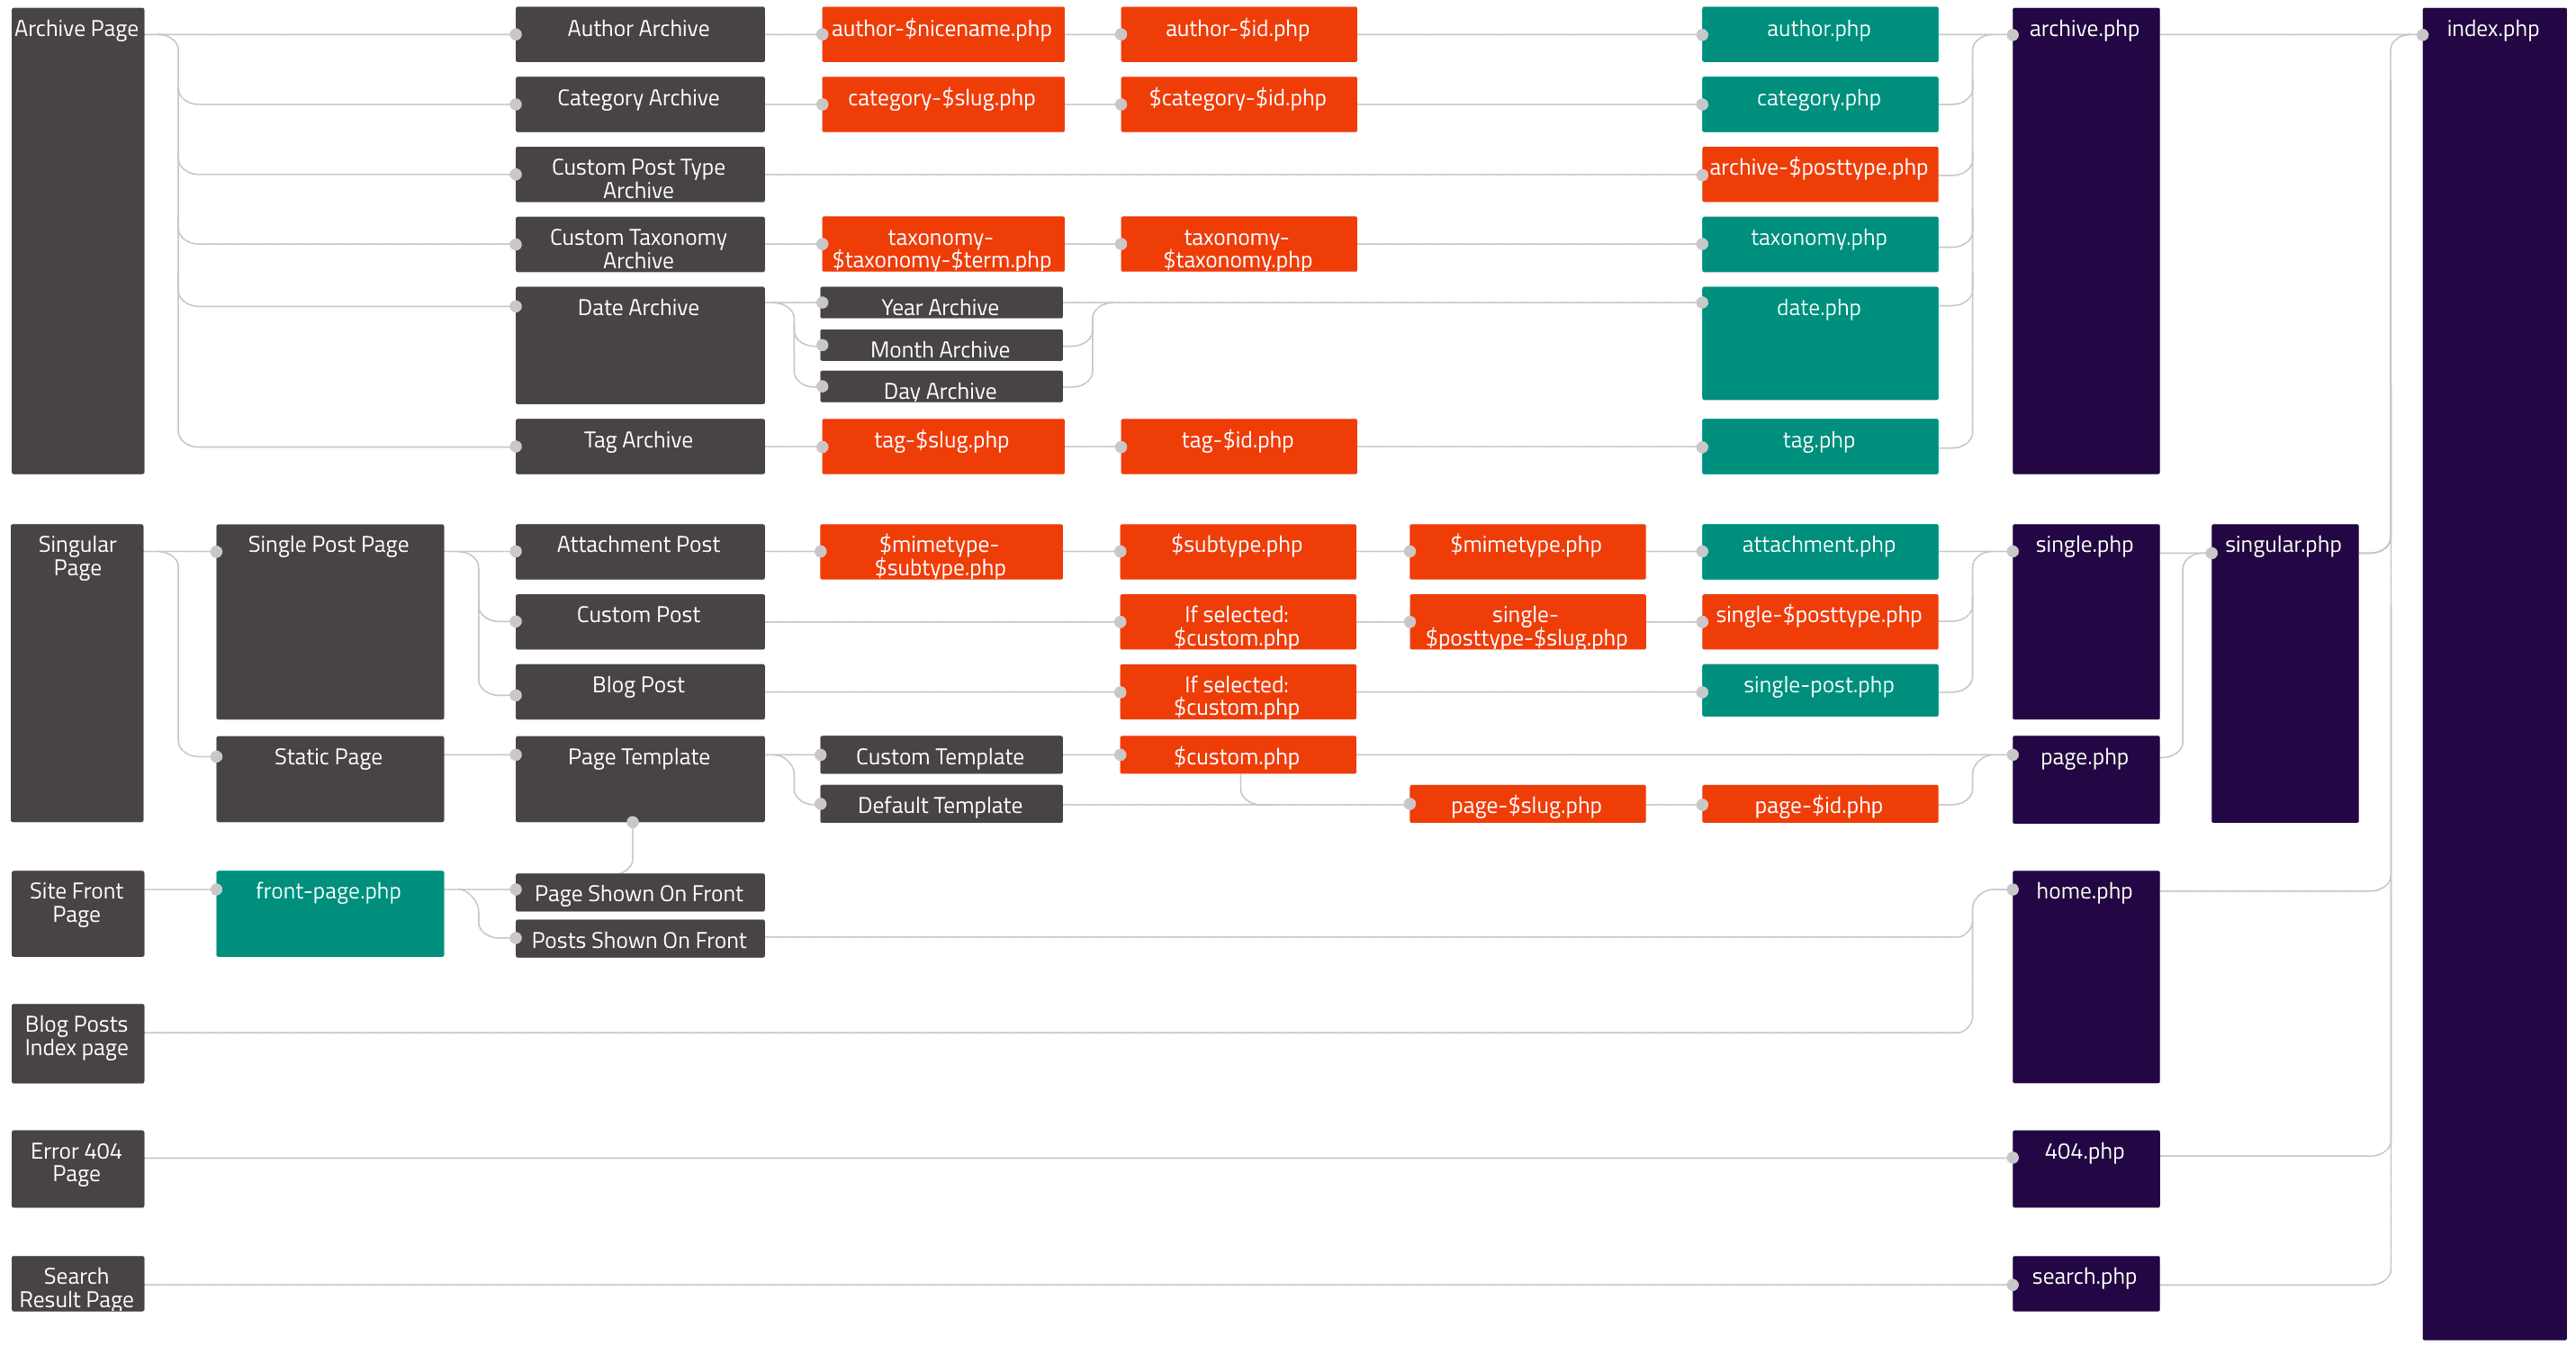
So, depending on which type of page is visited, different template files are used to generate the page that the visitor sees. This is important, because this helps you to figure out, which template file you need to change or add in your child theme to customize your site.
WordPress will always use the most relevant template file that it can find, depending on the template hierarchy. If we are using a child theme, it will look for these template files in the child theme first and then fall back to the parent theme, if the template file does not exist in the child theme. Also, if a child theme is using a more specific template file (in the WordPress template hierarchy) than the parent theme, it will use that file instead.
How To Customize Your Child Theme?
Let us continue with our Adrenaline child theme example and look at how we can customize it. We will cover these use cases:
- adding custom styles and overwriting the parent styles,
- adding custom functionality and overwriting the parent functionality,
- adding new functionality,
- overwriting parent functionality,
- adding new template files,
- overwriting parent template files
Adding Custom Styles and Overwriting the Parent Styles
All custom CSS code should be added to the style.css file in the child theme.
Let’s say we want to add a warning style for some text into our child theme. We have a div HTML element with a class of warning together with some text on a WordPress page and we want to add appropriate styling for this element. The custom CSS code that we write for this example, must be placed in the style.css file, below the child theme header comment (which is always at the top of the file). The style.css file with the custom CSS code would look like this:
/*
Theme Name:  Adrenaline Child Theme
Theme URI:   https://www.proteusthemes.com/wordpress-themes/adrenaline
Description: Child theme for the Adrenaline theme
Author:      ProteusThemes
Author URI:  https://www.proteusthemes.com
Template:    adrenaline-pt
Version:     1.0.0
License:     GNU General Public License v2 or later
License URI: http://www.gnu.org/licenses/gpl-2.0.html
Tags:        grid-layout, custom-background, custom-colors, custom-menu, featured-images, footer-widgets, full-width-template, microformats, sticky-post, theme-options, blog, e-commerce, entertainment, holiday
Text Domain: adrenaline-pt-child
*/

.warning {
  margin: 1rem 0;
  background-color: #fcf8e3;
  border-color: #faf2cc;
  color: #8a6d3b;
  padding: 0.75rem 1.25rem;
  border: 1px solid transparent;
  border-radius: 0.25rem;
}
More important than adding custom CSS code to your child theme, is overwriting the parent theme styles. Maybe you like the overall look of the parent theme, but you want to change a few things, like the color of an icon. We will overwrite the shopping cart icon color in the Adrenaline home page header as an example. This icon color changes with the customizer settings of a primary color, but let’s say we want to give it a unique color.
In order to overwrite this parent theme style, you have to find the CSS selector in the parent theme, that is setting the color for this icon. You can find the CSS selectors with Chrome development tools. Here is a simple video tutorial on how to do that. Once you have the correct CSS selector, in our example it is .header-info__link .fa, you have to place the code in the style.css file in the child theme. The child theme style.css file with this overwrite, would look like this:
/*
Theme Name:  Adrenaline Child Theme
Theme URI:   https://www.proteusthemes.com/wordpress-themes/adrenaline
Description: Child theme for the Adrenaline theme
Author:      ProteusThemes
Author URI:  https://www.proteusthemes.com
Template:    adrenaline-pt
Version:     1.0.0
License:     GNU General Public License v2 or later
License URI: http://www.gnu.org/licenses/gpl-2.0.html
Tags:        grid-layout, custom-background, custom-colors, custom-menu, featured-images, footer-widgets, full-width-template, microformats, sticky-post, theme-options, blog, e-commerce, entertainment, holiday
Text Domain: adrenaline-pt-child
*/

.header-info__link .fa {
  color: #2ebd61;
}
The hardest part is finding the correct CSS selector to target, once that is done, it’s only a matter of applying the correct CSS rules.
Great! We just applied some custom styles to our child theme. You can add as much custom CSS code to the child theme style.css file as you want.
Now let’s see how we can add some functionality to the child theme.
Adding Custom Functionality and Overwriting the Parent Functionality
This is the part, where things get interesting, where you can improve your child theme with additional functionality or overwrite the parent theme functionality that you want to change.
There are a couple of ways on how your customizations can be realized, so let’s take a look at them:
- adding new functionality,
- overwriting parent functionality,
- adding new template files,
- overwriting parent template files
Adding New Functionality
Any new functionality in a form of PHP code that you might want to add to your child theme, has to be placed into the functions.php file. If you are adding a lot of PHP code, then you should extract the code into multiple PHP files and then require these files into the functions.php file, for better organization of your code.
For example, if you add a shortcode to your child theme, you might create a file, called shortcodes.php and add the appropriate code into that file. Then you would require the file in functions.php, like so: require_once get_stylesheet_directory() . ‘/shortcodes.php’
Overwriting Parent Functionality
You might need to modify some of the parent theme functions, but since we are not allowed to edit the parent theme code directly, we need to somehow make this happen in the child theme. Don’t worry, WordPress has a system in place just for that.
There are two ways to modify parent functionality, the first one is with WordPress action and filter hooks and the second one is with pluggable functions.
WordPress action and filter hooks – If you are using a well coded parent theme, then you should be able to find custom WP actions and filters throughout the theme, to which you can hook into and change the behaviour of the theme. You should search your parent theme for do_action and apply_filters functions. For example, in the Twenty Seventeen theme you can find this custom filter: twentyseventeen_front_page_sections, which has a default value of 4. This value represents how many sections are defined on the front page of this theme. If we were to create a Twenty Seventeen child theme and wanted to have only 2 sections, then we would place this bit of code in the child theme functions.php file:
<?php

add_action( 'wp_enqueue_scripts', 'enqueue_parent_theme_style' );
function enqueue_parent_theme_style() {
  wp_enqueue_style( 'parent-style', get_template_directory_uri() . '/style.css' );
}

// Custom Twenty Seventeen front page sections filter example.
add_filter( 'twentyseventeen_front_page_sections', 'twentyseventeen_child_front_page_sections' );
function twentyseventeen_child_front_page_sections() {
  return 2;
}
Pluggable functions – What are pluggable functions? They are normal PHP functions, but wrapped in an if statement, to check, if the function with this name already exists. They look like this:
<?php

if ( ! function_exists( 'some_function_name' ) ) {
  function some_function_name() {
    // Function code goes here.
  }
}
If your theme is using these pluggable functions, then you can overwrite their code in your child theme by defining a function with the same name and changed code in the child function.php file. In WordPress bootstrap process the child theme functions.php file loads before the parent theme functions.php file, that’s why this pluggable functions method is possible. Also, if the parent theme function is not pluggable, then you can’t overwrite it because two functions with the same name will throw a critical PHP error.
Pluggable functions were used in WordPress core in the early days and were replaced by filters.
Adding New Template Files
Adding a new WordPress template file (which the parent theme does not have) to the child theme is easy. All you need to do, is place the template file in the root of your child theme.
For example, if your parent theme does not have a category.php template file, which is responsible for displaying posts of particular categories, then you can add the category.php template file to the root of your child theme folder (next to functions.php). WordPress will now use this category.php file to display your category pages.
You can also add more specific template files in your child theme to take over a smaller segment of the respective pages.
For example, if your parent theme has an archive.php template, which is a parent template file for displaying author, category, taxonomy, date and tag pages, but does not have an author.php template, which is a more specific template in the WordPress template hierarchy, then you can add this author.php template to your child theme and change the layout of the author pages. This way, you leave the layout and display of the category, taxonomy, date and tag pages the same and only change the author pages.
Overwriting Parent Template Files
The last and probably the most common use of overwriting the parent theme functionality, is to overwrite the parent theme template files.
If we would like to change something on the page template in the Adrenaline child theme we created earlier, we would need to copy the page.php file from the parent theme to our child theme folder and make the desired changes.
If we would like to change the author and date displayed on the single post, we would copy the single.php file to the child theme and make the changes in that file.
Overwriting parent theme templates is very powerful, because you can change anything you want with a few modifications to the existing parent theme template files, but keeping the parent theme intact and safe for updates.
Switching To a Child Theme On An Already Configured Parent Theme
If you have an existing WordPress site without a child theme and want to start using a child theme, then there are a few things to note.
You can create a child theme automatically with a plugin or you can do it manually. Right now, you are probably thinking: “Yes, a plugin! Who would want to do anything manually, if it can be done automatically?” Well, you’re not wrong, but because you want to learn more about child themes, we will look at the manual steps first 🙂
Manual Switch To a Child Theme
Firstly, create a child theme for your parent theme and extract any modifications or additions you made directly in the parent theme’s code to the child theme. This will make your parent theme safe for updates and your custom code will be neatly tucked away in the child theme.
Now, after you activate the child theme, some things might look strange or even broken, if you look at your front page. The reason behind this mess is, that WordPress sees a child theme as a new separate theme and so all theme settings are reset to the default values. This results in widgets switching sidebar locations (widget from the footer sidebar might end up in the header section and so on) and the customizer settings are reset to theme defaults.
Widgets – to fix the widgets issue, go to Appearance -> Widgets and reposition (drag&drop) the widgets in the correct sidebars.
Customizer settings – there is an easy way to migrate the customizer settings that you have already set in the parent theme. The Customizer Export/Import plugin is very easy to use and it will import the parent theme customizer settings, so you don’t need to set them manually. Follow these instructions to migrate the customizer settings to your child theme.
If your theme is using any other theme options framework, then you might need to re-configure them as well.
Once you do these things, the child theme should look just like your parent theme did, but you are ready for further modifications and regular parent theme updates.
Now, that we understand what the problems are, when switching to a child theme and how to solve them, let’s look at the easier way to make the switch to a child theme, with the help of a plugin.
Automatic Switch To a Child Theme (With a Plugin)
The word “automatic” might be a bit too much here, since we’ll still need to do a few things in order to switch to a child theme, but it’s way easier and faster than doing it manually.
The best child theme generator plugin I tested, is the Child Theme Configurator plugin. It will allow us to create a child theme and migrate all theme settings from the parent theme in one go. That’s awesome!
Here is a quick tutorial on how to make the switch to a child theme with this plugin:
- install and activate the Child Theme Configurator plugin on your WP site,
- go to Tools -> Child Themes,
- for the first step, select the “CREATE a new Child Theme” option, make sure you have the correct parent theme selected and click on Analyze button,
- after the plugin has finished analyzing, you can look at all additional options that come up and make adjustments, depending on your parent theme, but the default settings are usually ok,
- you can click on the Show/Hide Child Theme Attributes button and change the child theme name and other metadata,
- in the Copy Menus, Widgets and other Customizer Settings from the Parent Theme to the Child Theme option, you should enable the checkbox, so that the widgets and customizer settings will be migrated from your existing parent theme to this newly created child theme,
- click on the Create New Child Theme button.
That’s it!
For a full tutorial on child theme creation and examples for this plugin, I suggest that you view the videos posted on the Child Theme Configurator plugin page.
I tested this plugin on our Adrenaline theme and it worked great. The child theme was created successfully and the widgets and customizer settings were migrated to it as well, so I definitely recommend this plugin.
Summary
Child themes are the recommended way to modify WordPress themes. They allow users to make the theme their own, with minor or major modifications, but at the same time leave the parent theme intact.
We looked at everything child themes have to offer and if you think I left something uncovered, please share that with us in the comments section below and I will add it to this guide.
I hope you will use a child theme for every future WordPress project, because there is basically no downside, only benefits; if nothing else, your parent theme can receive regular updates.