
Introduction & Installation
Introduction
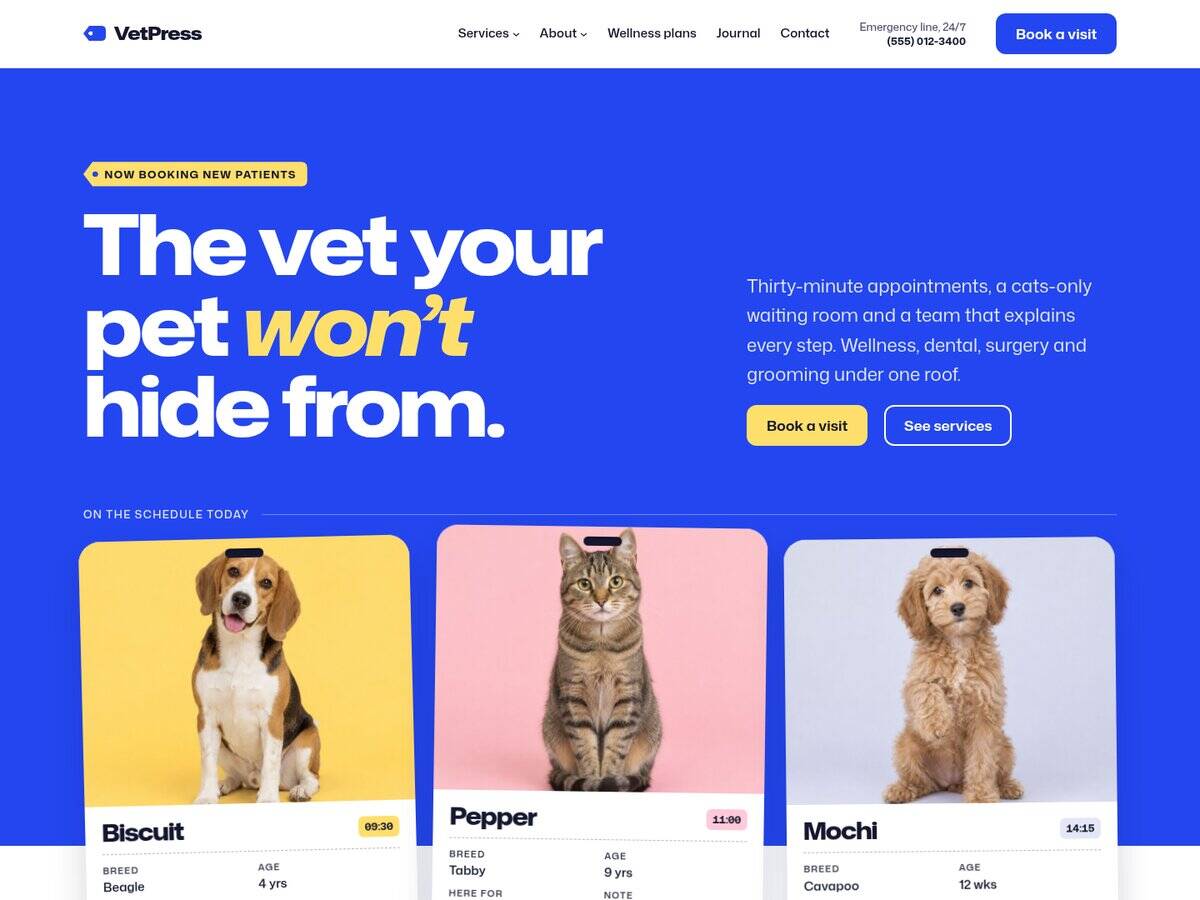
VetPress is a block theme for veterinary clinics, groomers and pet daycares, built for the WordPress Site Editor. Its details come from a clinic's own paperwork: kennel cards, collar ID tags, staff badges on lanyards, price tags on strings and a posted fee board. Every section is an editable pattern, and colors, fonts and spacing live in Styles, so a change there applies across the whole site. Four style variations give you a cobalt default, a calm clinic, a hot-pink groom room and a dark night shift.
Installation
Requirements: VetPress needs WordPress 7.1 or newer and PHP 8.3 or newer. You can check both in Tools > Site Health > Info: the WordPress version is under WordPress and the PHP version under Server. If your PHP version is lower, change it in your hosting control panel or ask your host to do it. WordPress won't install the theme on an older version.
I assume you already have a fresh copy of WordPress installed on your server.
Download the theme zip file
The first thing you will need to do is to download the theme installation zip file.
If you bought the theme on our ProteusThemes Shop, you should have received an email with the list of themes you have access to. You can click on the theme link with file name ending: -installable.zip or you can login to your account and download the installable zip file from there.
If you bought the theme on ThemeForest, then you have to download the installable WordPress files only zip file from the ThemeForest download section.
Install the theme
You can install VetPress in two different ways:
- Upload a zip file - preferred method
When you are logged in your WordPress dashboard go to Appearance → Themes → Add Theme → Upload Theme, select the theme installation zip file you downloaded and click the Install Now button. - FTP upload
Unzip the contents of the theme installation zip file and upload the extracted folder to your server towp-content/themes/folder using a FTP client.
Once your theme is on the server, activate it by clicking the Activate button below the preview image in Appearance → Themes
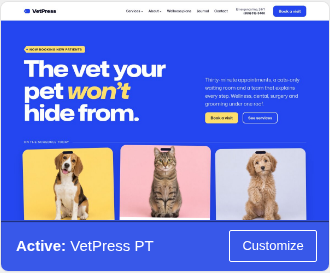
Congratulations! VetPress is now installed.
Registration and Updates
After you activate VetPress, WordPress opens Appearance > Theme Registration. Register with the license key from your ProteusThemes account, or with the purchase code from your ThemeForest download, as the registration page explains.
Register before you use One Click Demo Import: the import stays locked until you do. Registration also lets the ProteusThemes Support plugin send us your site report.
Automatic updates: once you're registered, new VetPress versions show in Dashboard > Updates and install from there. For a ThemeForest purchase, also create and save the Envato token the registration page asks for. It is separate from your purchase code.
If an update you expect isn't showing, open Dashboard > Updates and click Check Again. Your content and your Site Editor changes are kept when you update.
Updating manually
You can also install a new version yourself, for example when an update from the dashboard fails.
Before you update:
- Back up your site's files and database.
- Check that your server still meets the requirements.
- Your pages, posts, menus, styles and Site Editor changes are stored in the database, so they are kept. Changes made directly to the theme's files are overwritten. Changes in a child theme are kept.
Download the latest version. If you bought the theme on ThemeForest, open your ThemeForest downloads, click Download next to the theme and choose Installable WordPress file only. The "All files & documentation" package can't be installed as it is. If you bought it in our shop, download it from your ProteusThemes account.
Updating with Upload Theme:
- Go to Appearance > Themes > Add Theme > Upload Theme, choose the zip and click Install Now.
- WordPress shows the installed and uploaded versions side by side. Click Replace installed with uploaded.
- If the theme asks you to install or update plugins, follow its notice.
Updating with FTP or your host's file manager:
- Unzip the theme zip on your computer. Inside is the theme folder, the one with
style.cssin it. - On your server, open
wp-content/themes/and download a copy of the current theme folder as a backup. - Upload the new theme folder into
wp-content/themes/, replacing the existing files. Many host file managers let you upload the zip, extract it there and overwrite all files.
Customize the Appearance
VetPress is a block theme, so you customize it in the Site Editor instead of the Customizer. Go to Appearance > Editor:
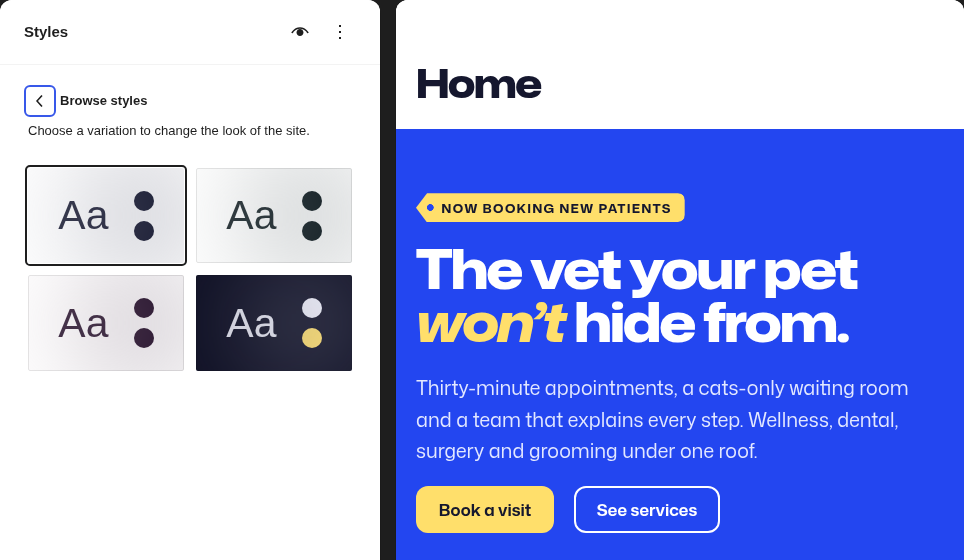
- Styles changes colors, fonts, spacing and the look of each block across the whole site, and switches between the style variations under Browse styles.
- Templates and Patterns change the layout of each kind of page and the shared header and footer. See Site Editor.
- Pages opens your pages, where each section is a pattern you can edit, move or delete. See Pages & Patterns.
Demo Content
The demo content adds the demo's pages, posts, menu and booking form, so your site starts out looking like the VetPress demo. Import it on a new site: it adds to the content already there and doesn't replace it.
One Click Demo Install
- Go to Appearance > Install Plugins and install and activate ProteusThemes Support, One Click Demo Import and Contact Form 7.
- Register the theme. The import stays locked until you do.
- Go to Appearance > Import Demo Data and click Import Demo Data, then Continue & Import.
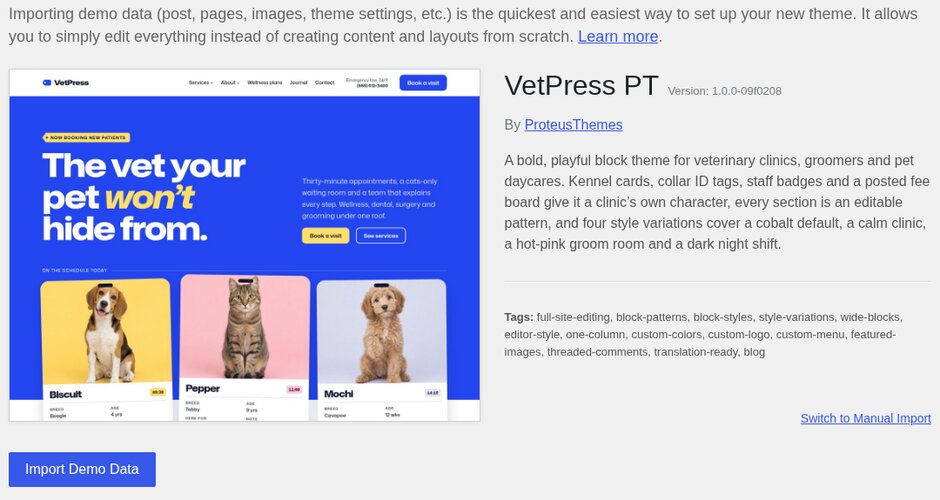
The import usually takes under a minute. It also sets the Home page as your homepage and the Journal page as your posts page in Settings > Reading, and points the theme's buttons and links at the imported pages. If your site already had a page at one of the demo's addresses, such as /book/, the imported page gets a new address, such as /book-2/, and the links follow it.
The import also turns off comments and pingbacks for new posts. To allow them, go to Settings > Discussion.
When setting up a content with your new theme, put special focus on the page speed optimization, especially on the image optimization process. This way you can save on your bandwidth, reduce the bounce rate on your website, and make your users happy. Our themes are created with the speed in mind but large, non-optimized images can and will ruin this experience.
Import XML File
If the one-click import can't download the demo file, download it yourself and upload it to the same importer:
- Download the XML file from https://artifacts.proteusthemes.com/xml-exports/vetpress-latest.xml, or find it in the
extrasfolder of the All files & documentation zip from ThemeForest. - Make sure One Click Demo Import and Contact Form 7 are active and the theme is registered, as in the steps above. Without Contact Form 7, the import skips the booking form.
- Go to Appearance > Import Demo Data and click Switch to Manual Import.
- Under Import Content, click Select a File and choose the XML file. Then click Continue & Import.
The manual import sets up your site the same way as the one-click import: it sets the homepage and posts page, and points the buttons, links and menu at the imported pages.
Demo Photos
The photos on the demo site are for the preview only. The import downloads blurred copies of them, so you can see where photos go, and you replace them with your own. The theme's patterns show a placeholder in each photo spot instead. To replace a photo, select the image block and click Replace in its toolbar.
Site Editor
Everything outside your page content, such as the header, footer and the layout of posts and archives, is edited in Appearance > Editor. Changes there apply on every page that uses them.
Templates
Templates set the layout of each kind of page. Open Appearance > Editor > Templates to edit them:
- Pages: the default page layout, with the page title above the content.
- Landing (no title): a page without the title area, used by the demo's pages. Pick it in the page's Template setting, and start the page with a hero or the Page header pattern.
- Blog Home: the posts page, the demo's Journal.
- Single Posts, All Archives, Search Results, Page: 404 and Index.
Header & Footer
The header and footer are template parts, shared by every template. Open them in Appearance > Editor > Patterns, under Template parts, or click them inside any template.
- The header holds your logo and site title, the main menu, the emergency phone line and the Book a visit button.
- The footer holds your logo, a short description, your address, phone and email, your opening hours, a list of links and the copyright line.
Logo & Site Icon
The header and footer both have a Site Logo block next to the site title. Select it, click the upload button and choose your logo. The logo is the same everywhere, so setting it once updates both. To show only the logo, select the Site Title block and delete it.
The site title comes from Settings > General > Site Title. Set the small icon shown in browser tabs in Settings > General > Site Icon.
Navigation
The header's Navigation block shows your main menu. Until you create a menu, it lists your pages. Edit menus in Appearance > Editor > Navigation, or select the Navigation block in the header and add, remove or drag its links. To show a different menu, select the block and choose the menu in the block settings.
On phones, the menu folds into a menu button that opens it full screen. The footer's Explore links are a separate Navigation block, edited the same way.
Pages & Patterns
Every section of a VetPress page is a block pattern: a ready-made group of blocks you insert, then edit like any other content. You can change its text and photos, move it up or down, restyle it or delete it.
Building a Page
- Go to Pages > Add New Page. Click the + button at the top left, open the Patterns tab, choose VetPress pages and click the page you want. If WordPress opens a list of starting patterns for the new page, you can pick the page there instead.
- In the page settings, set Template to Landing (no title). The page patterns bring their own title area, so they look right only with this template.
- Replace the demo text and the photo placeholders with your own, then publish.
To use a page as your homepage, go to Settings > Reading, choose A static page and select it as the homepage. Select the page that should list your posts as the posts page.
To add a section to any page, click the + button at the top left of the editor, open the Patterns tab and drag a pattern into the page.
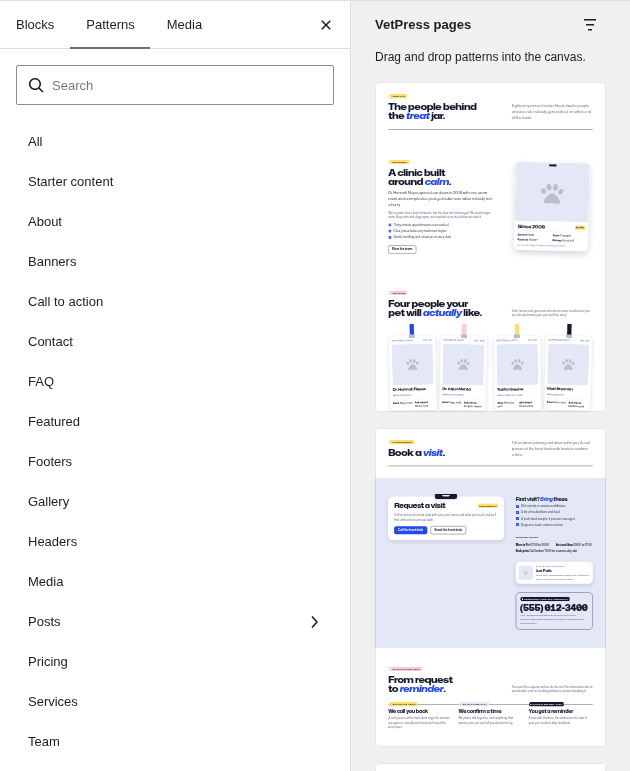
Page Patterns
The VetPress pages category has a whole page for each page of the demo:
- Home page: today's patients, the services fee board, a first visit timeline, the team, wellness plans, reviews, the journal and questions.
- About page: the clinic's story, the team, patients of the month and testimonials.
- Services page: the fee board, a first visit by the clock, questions and a booking call to action.
- Service page: one service in depth, written for dental care, with what the fee covers, the day by the clock and a written estimate.
- Grooming and daycare page: a salon hero, the grooming menu priced by dog size, a daycare day by the clock, report cards and daycare passes.
- Team page: every staff badge, plus an open role pinned up as a blank badge.
- Staff profile page: one team member's badge and bio, their week from the appointment book and their own pets.
- Wellness plans page: plans, questions and a booking call to action.
- Book a visit page: a request card for your booking form beside what to bring, opening hours, the emergency line and what happens next.
- Contact page: contact cards, opening hours and directions.
Section Patterns
The single sections are in the usual pattern categories:
- Banners: three heroes (today's patients as kennel cards, a leaping dog, and grooming and daycare) and the page header for Landing pages.
- Services and Pricing: the services fee board, the grooming menu, wellness plans and daycare passes.
- About: a founder's card, clinic facts, a first visit timeline and a day at daycare.
- Team: four team badges, or the full roster of eight.
- Testimonials, Gallery and FAQ: reviews, daycare report cards, patients of the month and questions.
- Contact and Call to action: contact cards, hours and location, the emergency line and the booking call to action.
- Posts: the latest posts from your journal.
Each photo spot shows a placeholder until you replace it. Select the image and click Replace in its toolbar. Remember to describe your photo in the image's Alternative text setting.
Page Links
The theme's buttons and links point to the demo's page addresses, so create pages at the same addresses to keep them working:
- The Book a visit buttons link to
/book/. Build that page from the Book a visit page pattern and add your booking form to its request card. See Contact Form 7. - The fee board links each service to a page under
/services/, and grooming and daycare to/grooming-and-daycare/. - Other buttons and the footer links go to
/team/,/contact/and the other demo addresses. - The journal links go to your posts page.
To point a button somewhere else, select it and edit its link. After a demo import, these links go to the imported pages, wherever they were saved.
Styles
Colors, fonts, font sizes and spacing are set once in Appearance > Editor > Styles and used by every pattern, so a change there restyles the whole site. Open Colors to change the palette, Typography to change fonts and sizes, and Blocks to change the look of one kind of block everywhere.
Style Variations
VetPress comes with four looks. Go to Appearance > Editor > Styles, open Browse styles, click the one you want and then Save:
- Default: cobalt, butter and blush.
- Clinic: calm ink and mint.
- Groom Room: hot pink.
- Night Shift: a dark look.
A variation changes colors across the site, including the patterns you've already placed. Changes you make in Styles afterwards are added on top of the variation you picked.
Section Styles
Section styles color a whole section with matching text, links and buttons, in the colors of the current variation. Select a Group, Columns, Column or Cover block and pick one under Styles in the block settings:
- Bold, Bright, Soft, Soft alt and Inverse for full-width bands.
- Card, for a group or column, makes a raised card.
Block Styles
These styles give blocks the look of the clinic's paperwork. Pick them the same way, under Styles in the block settings:
- Paragraph: Tag and Chip, small labels like the ones above headings and on the plan cards.
- Heading: Label, a small heading in capitals.
- Group: Kennel card, Staff badge, Hang tag, Timeline and Report card.
- List: Checks, with a tick before each item, and Record fields, for label and value pairs.
- Table: Estimate, a written estimate. Turn on the table's footer row in the block settings for the total.
The easiest way to use them is to start from a pattern that already has them, such as Team badges for staff badges or the Service page for the estimate, and edit it.
Plugins
Required and Recommended Plugins
Install and activate these plugins in Appearance > Install Plugins:
- ProteusThemes Support (required, bundled with the theme): creates the site report you send us when you need help.
- One Click Demo Import (required): imports the demo content.
- Contact Form 7 (recommended): the booking form. VetPress styles its forms to match the theme.
- ClevrBot (recommended): an AI chat assistant that answers your visitors' questions from your site's content.
Contact Form 7
The demo import adds the Book a visit form and places it on the Book a visit page. It sends each request to the email address in Settings > General > Administration Email Address. To send requests elsewhere, open Contact > Contact Forms > Book a visit and change To on the Mail tab.
To build a form yourself:
- Go to Contact > Add Contact Form, give the form a name and add the fields you need, such as your client's name, phone, email, pet's name and the reason for the visit.
- On the Mail tab, set To to the address the requests should go to.
- Open your Book a visit page, select the request card and add a Contact Form 7 block, then choose your form.
Translations
The theme's own text, such as the pattern copy, block style names and the 404 page, comes translated into Czech, Danish, Dutch, French, German, Italian, Polish, Portuguese (Portugal), Russian, Slovenian, Spanish (Spain), Swedish and Turkish. WordPress uses the translation that matches the language in Settings > General > Site Language.
A pattern is translated when you insert it, into the language of your WordPress dashboard, so set the language before you build your pages. Your header and footer follow the site language until you edit them. The demo content stays in English, because its pages, menu and booking form come from the demo site.
To change a translation or add another language, use a plugin such as Loco Translate. We have an article with a video on how to translate our themes.
Extras
Customizations
If you need advanced customizations for this theme, we can do that. See our Theme Customization page for details.
To change the theme's code yourself, use a child theme, so your changes survive updates. If you bought the theme on ThemeForest, you'll find one in the extras folder of the All files & documentation zip. Otherwise, create one as described in our child theme guide.
Changelog
Support
If you need more help after all, you can write to us.
Include a site report in your request. It shows us your WordPress, PHP, theme and plugin versions, server settings and recent PHP errors, so we can troubleshoot without asking for a login. The ProteusThemes Support plugin creates it. It comes with the theme as a required plugin, so if Tools > ProteusThemes Support is missing, install and activate it from Appearance > Install Plugins first:
- Register the theme. Sending a report needs your registration.
- Open Tools > ProteusThemes Support, review the report and click Send site report.
- Write to us and include this site's URL in your request.
Nothing is sent until you click the button, and the report does not give us access to your site. If sending fails, click Copy site report and paste the report into your request. Read more about site reports.