Do you want to migrate your WordPress site, but you don’t want to manually follow the painful official WordPress migration instructions? Great! Then this guide is for you.
There are a lot of free and premium plugins that offer easy migration, but our favorite migration plugin is the Duplicator plugin. It works great and it’s free!
Note: before you migrate your site to the new domain, you have to deactivate the theme on the old domain. After you migrate the site, you will have to register the theme on the new domain.
The WordPress site migration process with the Duplicator plugin consists of two steps:
- exporting your existing site
- importing your site into your new destination
Let’s take a look at these two steps.
Site export
- First, install and activate the Duplicator plugin.
- In the wp-admin dashboard, click on the Duplicator menu item.
- On the Duplicator packages page, click on the Create New button, which will initialize the site export wizard.
- In the first stage, called “setup”, the plugin checks if your WordPress installation has the requirements to actually export the site. You can also configure some settings for the export package, but in general you can just click on Next.
- In the second stage, the plugin scans your site and prepares the needed data for the site export. The plugin will also display warnings or errors that you might have to solve before the plugin can export your site. If there are no errors, you can proceed by clicking on the Build button.
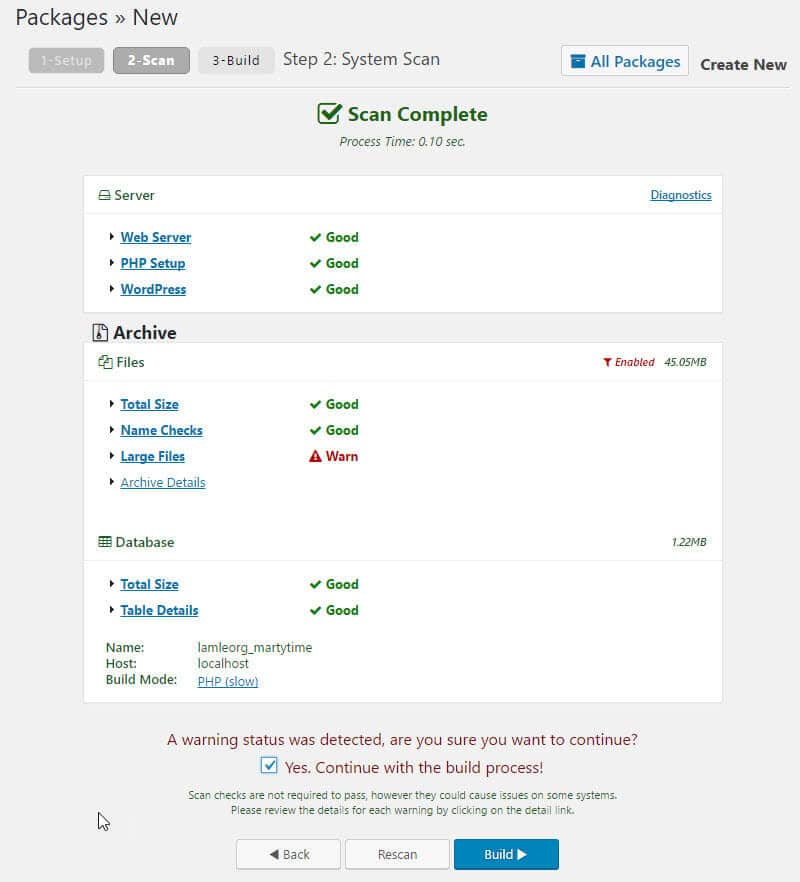
- The plugin will take some time (depending on the size of your site) to create the export files you need.
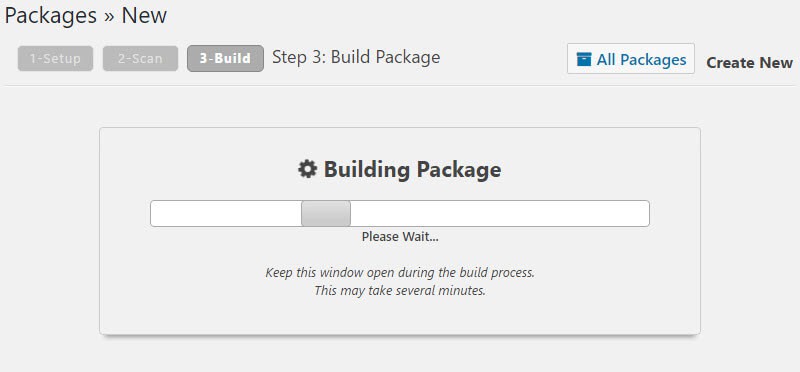 When it’s finished building the export files, you have to download two files, both the Installer and the Archive.
 - The site export step is now done and we are ready to migrate (import) the site to your new location.
Site import
- Upload both the installer and the archive files to your domain folder on your hosting server via FTP (where you want to migrate the site to).
- Go to the installer.php url, where you uploaded the files, example: http://your_domain_goes_here.com/installer.php.
- You will see the installer script where you have to input your database details for your WordPress site. If you don’t know how to create a new MySQL database on your hosting platform, I suggest contacting your hosting support and they will help you out. Make sure you input the correct information here for a new MySQL database, since the installer will clear this database when you run the deployment.
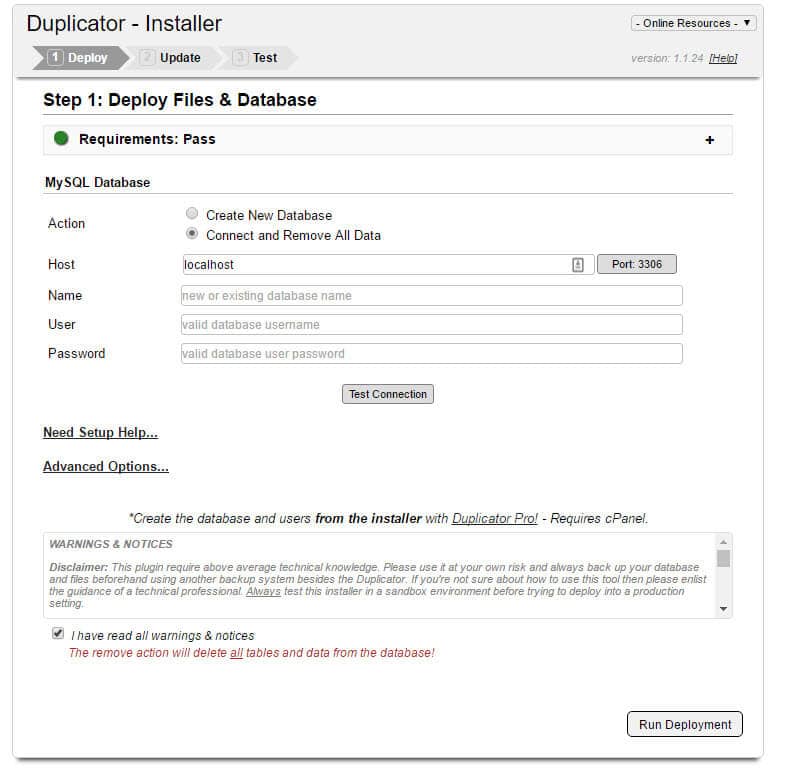
- When you are done inputting the correct MySQL database details, you should click on Run Deploy. This will copy all the files and the database to your new site destination.
- After deployment is done (it may take a while), you can create a new admin account or set any advanced options for the update process, but leaving everything at the defaults is OK. Click on Run Update.
- In the last step, you have to verify that everything is working ok, so follow the instructions on the plugin screen:
- Log in to your new site and save the permalinks (wp-admin → Settings → Permalinks; click on Save Settings).
- Go through all pages and verify that everything migrated successfully.
- If everything is OK, run the file cleanup action to clean all unneeded duplicator files.
I hope your WordPress site migration was quick and successful 🙂
You should also check out the quick video demo on the Duplicator plugin’s homepage.
