When it comes to your online store, product images are one of the most important assets. Your product photography is directly tied to the number of sales your WooCommerce store makes so it’s essential your e-Commerce images are optimized.
In this post, we’ll talk about 3 reasons why you need to master image optimization and share 8 e-Commerce image optimization tips that will help you drive more traffic from Google and make more profit from your WooCommerce store.
Top 3 Reasons To Master Image Optimization
Optimized images can instantly improve any type of website but when it comes to e-Commerce sites, image optimization is paramount. Here are the top three reasons why you should master image optimization.
Attract More Shoppers
Product images, as well as any other photos on your website, get indexed by Google. They can then show up in search engine results for images when users search for relevant terms.
When you take time to optimize your product images, they will look better in the search engine results which will help attract more shoppers to your online store.
Improve Page Loading Times
Images are one of the main culprits for slow loading times. That’s usually due to a large file size since a large image file takes longer to download and display in the browser. Slow loading times have a negative impact on your conversion rate as visitors get frustrated and leave instead of waiting for your product page to finish loading.
Optimized images have their file size reduced which means they will take less time to download. This in turn, will improve how fast your WooCommerce store loads. In the long run, you won’t be losing visitors and sales because your store didn’t load fast enough.
Rank Better In Search Engines
Lastly, optimized images will not only improve your page loading times and attract more shoppers to your store, they will also help you rank better in search engines. This is directly tied to your page loading times discussed above as well as a few other image optimization techniques we will discuss below.
8 E-Commerce Image Optimization Tips to Drive More Traffic From Google
Now that you have a better understanding why image optimization matters, it’s time to dive into the tips that will help you optimize your product images so you can drive more traffic from Google and other search engines.
Understand Image Types
First and foremost: it’s important to understand different image formats so you can save them in the most appropriate one. This will ensure that your images aren’t blurry and it will also help with the overall file size.
The three most common formats for uploading images to your store are JPG, PNG, and GIF.
JPG is one of the oldest image formats and most commonly associated with the web. They contain millions of colors and are a great choice when you want to display portraits, landscapes, and product photos. Another benefit of JPG images is that they can be compressed considerably, resulting in a smaller file size without significant loss of quality.
PNG format is most often used for images that require transparency. Think your store logo or a product image with white or transparent backgrounds. PNG images are also used for background images such as patterns or solid color backgrounds. The downside is that they often produce a large file size but also result in a higher-quality image.
GIF images have lower quality than JPG images and are usually used for icons or animated images. They are a great choice when you need to add a smaller image that uses only a few colors. They don’t work well with large product photos as they will produce a large file size which will slow down your site considerably.
With that in mind, the main takeaways when it comes to image formats are:
- Use JPG images for the majority of your product photos
- Reserve PNG images for your logo or if you need a product photo with a transparent background or if image quality is more important than the file size
- Save GIFs for icons or if you want to animate an image.
Always Add Alt Text
You should always add alt text to your images. There are three reasons why you should add alt text to your images:
- Alt text provides additional context for the search engine bots
- Alt text is another way assistive technologies interpret the photos found online.
- Alt text also displays when an image can’t load properly and tells the browser what’s supposed to be there.
As such, you should use alt text to provide more detail about the image. It’s another opportunity to include a product keyword which can help that product image to show up in image results page and lead to an increase in organic traffic.
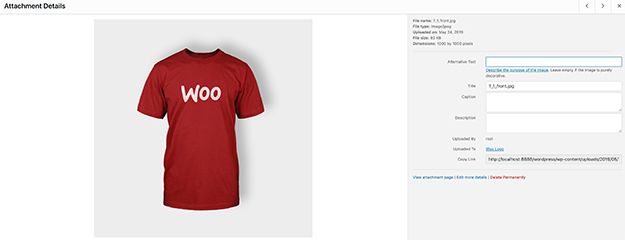
Adding alt text is easy in WordPress. It can be done when you upload your product photo to your WooCommerce store as well as later on. All you have to do is click on the pencil icon to edit the image and enter your alt text in the appropriate box.
Use Appropriate Image Dimensions
Another important tip when it comes to image optimization is to use appropriate image dimensions. Your final image dimensions, the width and height, should be determined by your theme requirements.
For example, if your theme requires images to be 1200px wide and 1800px tall, that means you should resize your image manually to those dimensions before uploading it to your WooCommerce store. This will help ensure that your product image displays as it should instead of being cut off at a weird angle by your theme. It will also help reduce the final file size of the image.
You can easily resize your product images to appropriate dimensions using Photoshop. Alternatively, consider using a free program like Gimp or Picmonkey.
Name Images Descriptively
Your images should be named descriptively, instead of using the default name assigned by your camera. The easiest way to achieve this is to describe the product as is.
For example, your product image could be named Men’s Red Polo Shirt or Black Crossbody Leather Bag. Not only will this help search engines understand better what your image is about, it will also help shoppers who are using assistive technologies to understand what the image is showing.
On top of that, a descriptive name will also help you incorporate a keyword associated with your product which makes the entire photo more relevant to the search engines.
Make Use of Image Sitemaps
By now, you probably know that submitting a sitemap helps search engines crawl all the pages on your site and get a better understanding of the site structure. However, if you want to optimize your product images to drive more organic traffic, it’s imperative that your sitemap includes images on top of other content.
A good place to start is to use Yoast SEO plugin. Not only does it come with a WooCommerce addon which will help you improve other SEO aspects of your store, it also adds your images and videos to your site sitemap.
Show A Variety of Angles
Shopping online is convenient but it does have one drawback: your customers cannot physically touch, feel or turn the product around to get a good look at it. Because of this, it’s important to showcase a variety of angles with your product photos.
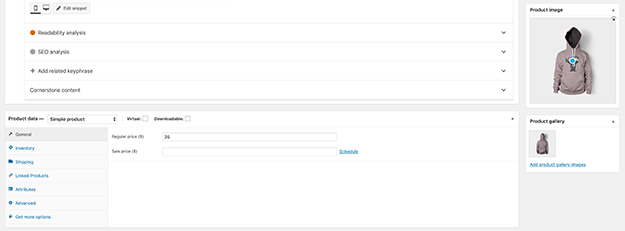
WooCommerce makes it easy to upload multiple images to each product and create a mini-product gallery. As you can see from the screenshot below, all you have to do is click on Add Product Gallery Images and select all the images associated with that product.
Keep in mind that while you have to display the product from multiple angles, you should still take care to resize them to the appropriate size. This will ensure that your product images look uniform which will create a more visually appealing look.
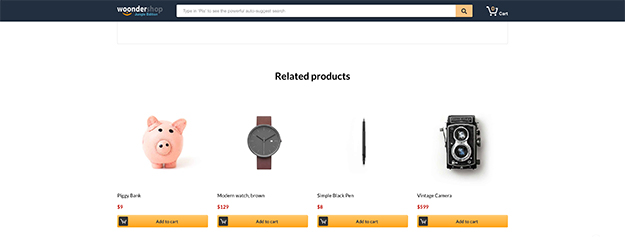
Make Use of Product Thumbnails
Make use of product thumbnails. Thumbnails usually appear as related product images and are a great way to increase the average order amount and sell more of your products.
Those product thumbnails are often displayed at the bottom of individual product pages and WooCommerce gives you great control over which products you want to display as upsells or cross-sells.
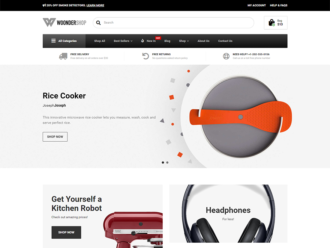
You can see an example of product thumbnails in use on our Woondershop theme product page:
Test Your Images
Our last tip is to continually optimize and test how your product images are performing. This could be a variation of A/B testing and a great way to help you determine how your product images influence your sales.
For example, you could experiment with adding multiple product images vs having a single product image. Or you could experiment with different image angles and see which ones result in more purchases.
There are numerous plugins that can help you A/B test your WooCommerce store. One such plugin is Nelio A/B Testing.
It’s fully compatible with WooCommerce and you can test not only images but also your product titles, product descriptions, and use your orders as conversion actions. Although this is a premium plugin that comes as a subscription service, it’s definitely an investment worth considering if you’re serious about improving your store conversions.
Final Thoughts
Optimizing your images is crucial if you want to see more sales in your WooCommerce store and rank better in search engines. Luckily, optimizing images is not that difficult once you know what it entails. With the tips shared in this article, you’ll be well on your way to optimizing your images and getting more organic traffic from Google.