WordPress hasn’t been “just a blogging” platform for quite some time now. One of the key features that helped it transform into a proper content management system (CMS) is Custom Post Types.
This is the first article of a 3-part series on the topic of custom post types (CPT). These are the topics we will discuss in the next two :
- Custom Taxonomies
- Displaying custom post types (templates and querying)
But for now, let’s take a closer look at custom post types and how to set them up.
What is a custom post type?
By default WordPress uses these post types:
- Post
- Page
- Attachment
- Revision
- Menu item
So, what is a custom post type? A custom post type is basically a WordPress post with custom defined parameters (custom fields, custom category/tag structure, …). The classic examples of custom post types are: books, reviews, testimonials, team members, portfolios and so on. But you can use it for anything that indicates the type of content you create.
Why would you use one?
You could just use regular WP posts and use categories and tags, to separate the different “post types”. But this isn’t ideal and can lead to complications down the road. Here are a few reasons why you might want to use a custom post type:
- If you want to separate some content from other available post types in WordPress
- You need some custom fields that are exclusive to the content you want to post
- You need to display the content differently than other post types (like posts or pages)
Let’s say you are writing a food blog. You usually post restaurant critiques, but you would also like to post your own recipes. Recipes would make a perfect custom post type, because you would probably need to have a different layout than a regular post. Maybe also some custom fields, like ingredients, for example. With the introduction of a recipe CPT, the blog section would only contain your normal post, and your recipes would have their own section (own recipe archive page). This would make it easier for visitors that only want to look at your recipes.
In this article series, we will create the testimonials CPT for our Shaka theme. Let’s say a user wants to have a page where they can display every client testimonial. He wants to add a few custom fields to this custom post type and he also wants a different layout to display these testimonials. Let’s first take a look at how to register a custom post type.
How can you create a custom post type?
There are two ways to create a new custom post type.
The first option is to use a plugin that will register the custom post type for you. This method is good for users who are unfamiliar with PHP code. You only input the details needed and the plugin does the rest.
The second method is to register the custom post type manually. That means that you have to write some code, but don’t panic, it’s fairly simple and I will also show you a neat trick.
Create a custom post type with a plugin – the easy way
If you want to quickly and easily add a custom post type to your site, then you should use a plugin that offers such functionality. Probably the most popular plugin to do that is Custom Post Type UI, it’s free and easy to use. Let’s set it up:
- Install and activate the Custom Post Type UI plugin from your wp-admin dashboard,
- Once you activate the plugin, the CPT UI admin menu item will be available. Go to CPT UI -> Add/Edit Post Types,
- Here you will find a lot of settings which you can apply to customize your CPT. We will not go through them all in detail in this article. But there is a tooltip icon next to each setting label to explain what each setting does. Let’s set the things we need for our use case (testimonial CPT),
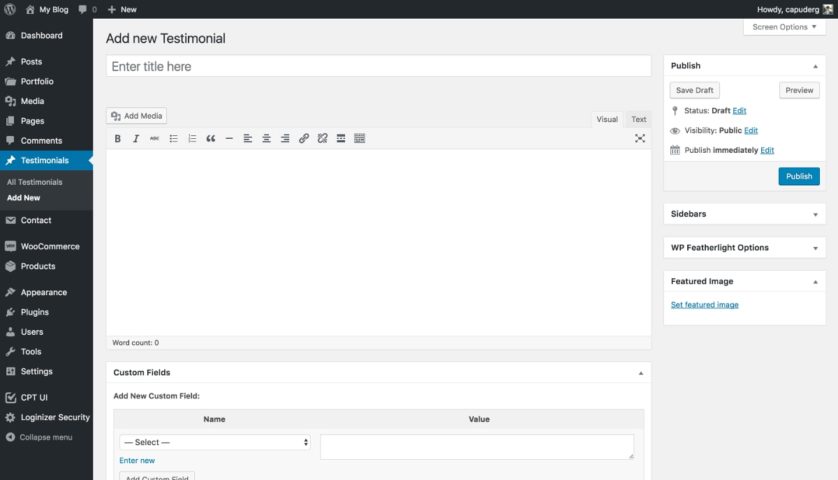
- Input the slug: testimonials, plural label: Testimonials and the singular label: Testimonial,
- You can click on the Edit additional labels button to set more accurate labels. But we can skip this and come back if we see a problem later on,
- All default settings are ok for our use case, we will just add the Support for Custom Fields (select the Custom Fields checkbox in the Supports section),
- Click on Add Post Type, to create the custom post type.
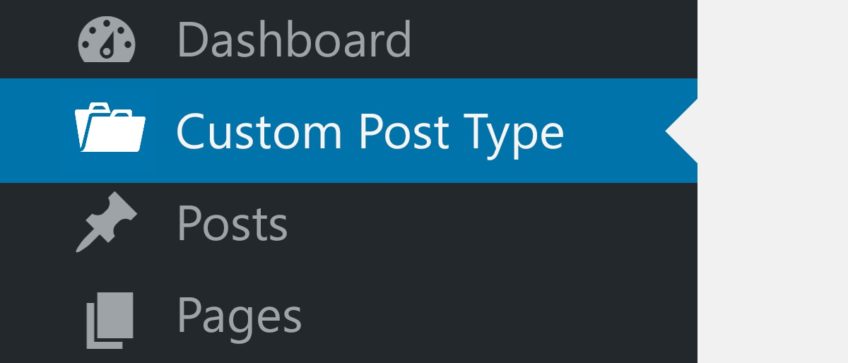
As soon as we create the custom post type a new Testimonials wp-admin dashboard menu item appears. We can now create new testimonials with all of the fields that were selected when we created the custom post type (Title, Editor, Featured image and Custom fields).
We could also set a taxonomy to this custom post type, but we will cover that in the next article.
Create a custom post type manually – coding involved
You might ask yourself: If you can create a custom post type with a plugin, why would anyone want to create it manually, with code?
The ability to create one with a plugin is certainly very convenient, but there are cases that you would want to do it via code. For example, if you are developing a site for your client and you do not want the client to be able to change these settings, or if you do not want to install one more plugin to his site. Also, if you wish to create a theme (or a child theme) for use on multiple sites, it’s easier to have the custom post type registered in code than to repeat the plugin steps for every site. There are some pros and cons for each method, so you have to decide what’s best in your case.
The code to create a custom post type can be placed directly in a theme (in functions.php). Or, you can create a new plugin and put the CPT code there. This is also a divisive question in the WordPress community. One side says that it should be located in the plugin, so that if you change the theme, the data of the CPT stays (but the output is unstyled and does not look good in the new theme). And the other side thinks that it’s better to put the CPT code directly in the theme, because it’s theme specific and is also styled specifically for this theme.
Personally, I think that it’s always better to separate style (theme) from functionality (plugins) and so creating a new plugin for CPT registration is a better option. It’s easier to add styling to the new theme to make the CPT output look good than to lose the data of the CPT because of switching to a new theme.
Register a custom post type with code
I did promise a neat trick, didn’t I? Well, you actually don’t need to write code to be able to register a custom post type via code. This might sound strange, but it’s true. You can use this tool at generatewp.com to generate the code needed for CPT registration. All you must do is input some data and generate the code. I did this for our testimonials use case and this is what came out:
// Register Custom Post Type
function custom_post_type_testimonials() {
	$labels = array(
		'name'                  => _x( 'Testimonials', 'Post Type General Name', 'text_domain' ),
		'singular_name'         => _x( 'Testimonial', 'Post Type Singular Name', 'text_domain' ),
		'menu_name'             => __( 'Testimonials', 'text_domain' ),
		'name_admin_bar'        => __( 'Testimonials', 'text_domain' ),
		'archives'              => __( 'Item Archives', 'text_domain' ),
		'parent_item_colon'     => __( 'Parent Item:', 'text_domain' ),
		'all_items'             => __( 'All Items', 'text_domain' ),
		'add_new_item'          => __( 'Add New Item', 'text_domain' ),
		'add_new'               => __( 'Add New', 'text_domain' ),
		'new_item'              => __( 'New Item', 'text_domain' ),
		'edit_item'             => __( 'Edit Item', 'text_domain' ),
		'update_item'           => __( 'Update Item', 'text_domain' ),
		'view_item'             => __( 'View Item', 'text_domain' ),
		'search_items'          => __( 'Search Item', 'text_domain' ),
		'not_found'             => __( 'Not found', 'text_domain' ),
		'not_found_in_trash'    => __( 'Not found in Trash', 'text_domain' ),
		'featured_image'        => __( 'Featured Image', 'text_domain' ),
		'set_featured_image'    => __( 'Set featured image', 'text_domain' ),
		'remove_featured_image' => __( 'Remove featured image', 'text_domain' ),
		'use_featured_image'    => __( 'Use as featured image', 'text_domain' ),
		'insert_into_item'      => __( 'Insert into item', 'text_domain' ),
		'uploaded_to_this_item' => __( 'Uploaded to this item', 'text_domain' ),
		'items_list'            => __( 'Items list', 'text_domain' ),
		'items_list_navigation' => __( 'Items list navigation', 'text_domain' ),
		'filter_items_list'     => __( 'Filter items list', 'text_domain' ),
	);

	$args = array(
		'label'                 => __( 'Testimonials', 'text_domain' ),
		'labels'                => $labels,
		'supports'              => array( 'title', 'editor', 'thumbnail', 'custom-fields' ),
		'hierarchical'          => false,
		'public'                => true,
		'show_ui'               => true,
		'show_in_menu'          => true,
		'menu_position'         => 5,
		'show_in_admin_bar'     => true,
		'show_in_nav_menus'     => true,
		'can_export'            => true,
		'has_archive'           => true,
		'exclude_from_search'   => false,
		'publicly_queryable'    => true,
		'capability_type'       => 'page',
	);

	register_post_type( 'testimonials', $args );

}
add_action( 'init', 'custom_post_type_testimonials' );
… A perfectly valid PHP code that you can use in your projects. As discussed before, you can put this code in a newly created plugin, or you can put it in the theme’s functions.php file. For the sake of simplicity I opted for the latter. I put this code in the functions.php file of the theme, and the Testimonials wp-admin menu appeared and I can now create new testimonials (just like in the plugin method above).
You can also set a different icon for your custom post type, which will be displayed in the wp-admin menu. You just need to add this line in the $args array: 'menu_icon' => 'dashicons-businessman'. You can find a list of all possible icons here: WordPress Dashicons. (Thanks to Alexander for this tip).
Let’s take a closer look at the code:
- The whole CPT registration process is encapsulated in the
custom_post_type_testimonial()function, which is hooked into theinitWP hook at the end of the snippet with this line of code:add_action( 'init', 'custom_post_type_testimonials' );. Thisadd_actioncall is the final call that sets everything in motion and makes WordPress do it’s magic. - The first block of code inside the function is an array of data called
$labels, which holds the translation strings for this custom post type. - The second block is an array of arguments used for the CPT registration, here you can define all settings for the CPT. Which fields the CPT should support, should it be publicly visible, the position of the wp-admin menu, should it have an archive page and so on. To see the complete set of options, please visit this WP codex page.
- The final line of the function is
register_post_type( 'testimonials', $args );. This will register the ‘testimonials’ custom post type with the settings we specified in the$argsabove.
That’s it! We have registered a custom post type with a bit of PHP code.
The only improvement that I would change in the generated code would be to use escaping internationalization functions. So instead of _x() and __() I would use esc_html_x() and esc_html__(). It’s always good to escape output values – even translation strings – but that’s a topic for another blog post.
Next article in the series: How to Create a Custom Taxonomy.