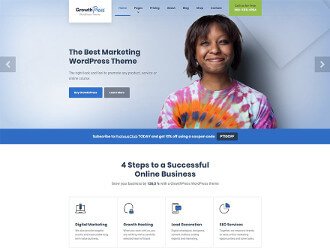
*UPDATE: Since so many of you found this article interesting, we at ProteusThemes decided to save you all the hassle and created GrowthPress WordPress theme, which includes among other things, highly convertible lead generation landing page.
Have you been struggling setting up landing pages with your existing WordPress theme? Follow this simple tutorial and create your own WP landing page today!
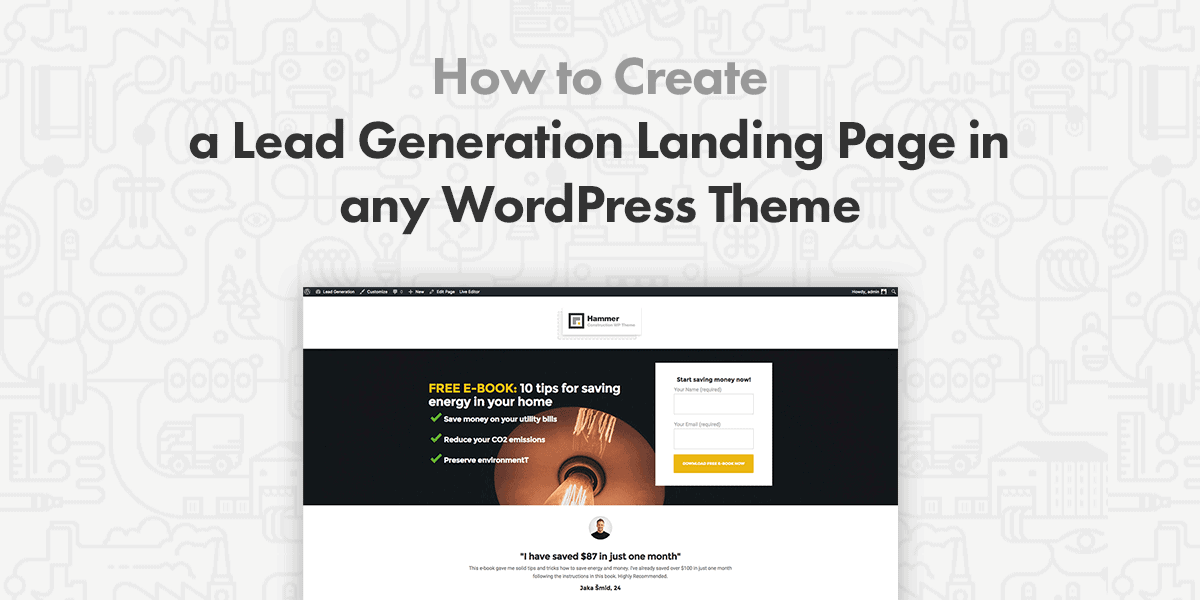
In this tutorial, I’m going to show you how you can create a simple lead generation landing page in basically any WordPress theme using Page Builder by SiteOrigin.
Page Builder by SiteOrigin is the most popular free page builder WordPress plugin and it is in the top 20 WordPress plugins of all time, with over 1 million active installs. It’s the same page builder we are using in our WordPress themes and we have a firm belief, that it’s the best page builder solution on the market.
There are two purposes of writing this tutorial. Firstly, to show you, how you can create a lead generation landing page, even though your theme doesn’t include a pre-built layout for that, and secondly, to show you, how Page Builder by SiteOrigin is powerful yet easy to use.
What is Lead Generation Landing Page?
A landing page is a standalone web page designed for one sole purpose – turning site visitors to take a particular action. The user journey looks like this. You bring highly targeted user from paid advertising or social media to your landing page. On the landing page, you give the user something with a high value and low risk, e.g. a free e-book, so he is willing to give you his contact information in return. Later on, you contact him and try to sell him premium content or product.
A Brief History or Lead Generation Landing Pages
Lead generation landing pages are a commonplace nowadays. You’d be hard-pressed to browse the Internet without ever coming across a lead generation landing page. Nowadays, they look polished and sophisticated, however, back in the early days of the Internet, that wasn’t always the case.
Lead generation landing pages can thank Microsoft for their existence. In the early 2000s, Microsoft was trying to increase the sales of their core product, Office. As the process of creating a landing page was quite time-consuming back then, it wasn’t long before solutions like Instapage and Unbounce were born.
With the appearance of such tools, lead generation landing pages have become more sophisticated and today, they integrate with other tools such as email marketing platforms and CRM tools.
How and When to Use Lead Generation Landing Pages
Lead generation landing pages are also called squeeze pages as they are often meant to “squeeze” your visitors into handing over their email address.
Since the primary goal of a lead generation landing page is to increase the number of leads, the simple answer is to use it whenever you run a promotional campaign. Here are a few examples that will help you implement landing pages in your own business.
Promote a Single Product or Service
A lead generation landing page is a great choice when you want to promote a single product or a service. It works well because there are no other distractions so your visitors can easily focus on all the benefits a specific product or a service provides. You can also acquire leads by offering a free or low-cost offer that’s related to the product or service you want to promote. You can then use email marketing to warm them up for higher-ticket purchases.
Increase Webinar Signups
Lead generation landing pages are a great choice when you have an upcoming webinar you want to promote. A webinar is often used to pitch a high-ticket product or service so using a lead generation landing page that invites visitors to register for the webinar increases the number of leads who will see your offer and be primed to buy it during the webinar.
Promote Your Newsletter
If you don’t have a product or a service yet, a lead generation landing page can be used to promote your newsletter. This allows you to acquire leads that are interested in your brand and you can continue nurturing them while you work on your offer.
Segment Your Audience
Lead generation landing pages can be used to segment your existing audience. For example, if you have an email list, chances are not all of your subscribers are interested in all the things you offer.
You can create a landing page for each core offer or product and send the links to all those landing pages in an email campaign. In the email, ask your subscribers to click the link that interests them the most so they can get more relevant emails from you from now on.
By doing so, you will have a more effective email marketing strategy and higher conversion rates as email subscribers who are interested in a specific offer will be more inclined to purchase it when they receive relevant promo messages.
Cater to Different Traffic Sources
Lastly, you can use the lead generation landing pages to segment visitors who come from different social media networks and other traffic sources.
For example, a new follower from Twitter might not be as familiar with your brand as someone who clicked through to your landing page from your email.
As such, those coming from Twitter would need more persuading to sign up for your offer than someone who already knows and trusts you.
You can also use them to promote different offers based on the social network you’re trying to drive traffic from.
In our case, this will look like this. We are going to bring the user from social media where he will click on the ad saying “Are you spending too much money on your utility bills?”. When he clicks on the ad, he will be redirected to our landing page. There we will convince him to give us his contact information, in exchange for a free e-book with energy saving tips. Later on, we will contact him and try to sell him energy saving bulbs. Because we know he wants to save money on energy.
A Good Landing Page Should Have:
- highly targeted copy that focuses on the benefits of the offer you’re promoting on your landing page
- high value in the form of an e-book or a newsletter that can be implemented over a short period of time for a sense of instant gratification
- single clear call-to-action (CTA) that makes it easy to understand what action they need to take to get your offer
- social proof (e.g. testimonials of satisfied customers, the number of sales) so you can build trust and remove objections which will improve the number of signups you receive
A good landing page shouldn’t have:
- main navigation or footer navigation as this will allow visitors to navigate away from the lead generation landing page and go to other pages on your site
- any other outgoing links as outgoing links will take the visitors away from your site and result in losing leads instead of acquiring them
- more than one call-to-action (CTA) as multiple CTAs will achieve the opposite and drive the visitors away
So now that we’ve covered what a lead generation page is, how they came about, and the basic principles for using lead generation landing pages, let’s take a look at how to easily create one.
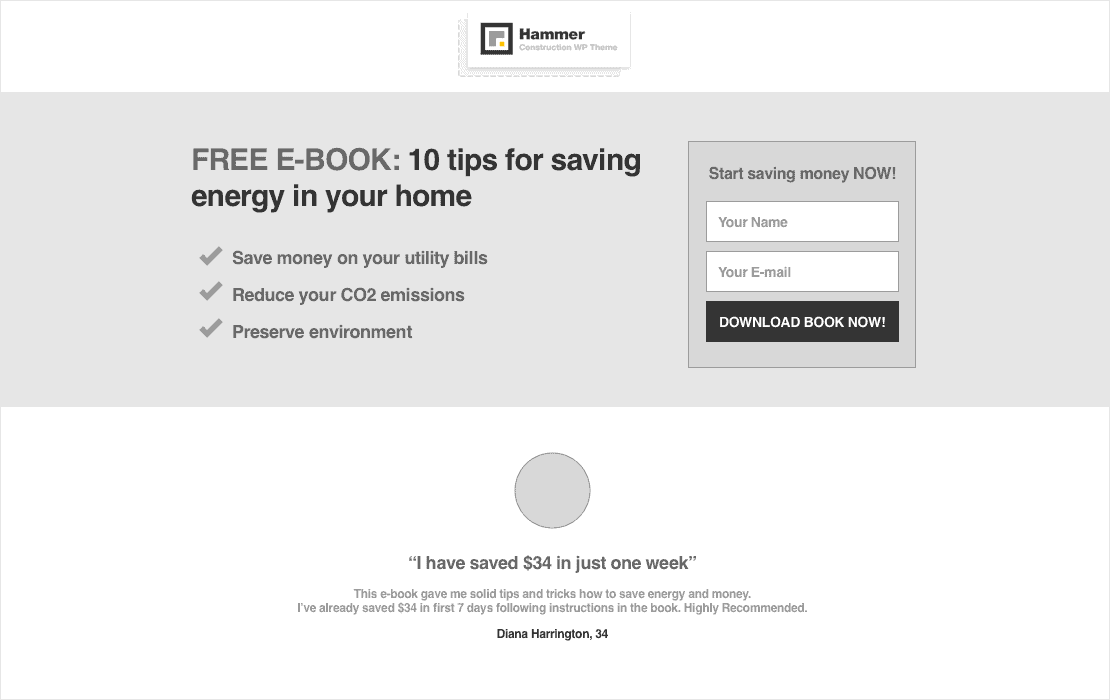
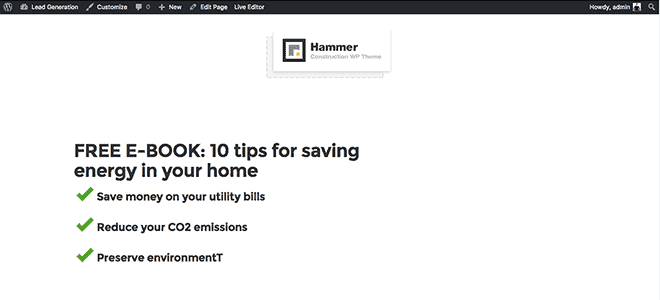
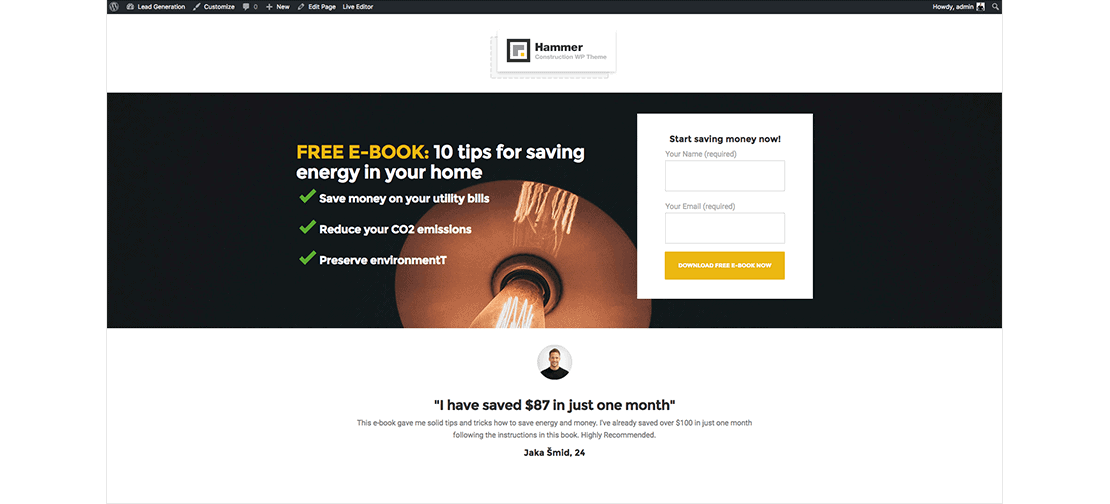
I made a quick wireframe how the landing page will look. At the top is a non-linkable logo, on the right side below is a big strong headline, representing what you will get. Under the headline are three main benefits, which you will get by downloading a book. On the left side is a form, with two input fields and CTA. On the bottom of the page, you can find a testimonial section for social proof.
Let’s Get Started
First of all, you will need to go into your WordPress Admin area and create a New Page. There are three ways to add a new page.
- Click New in the WP admin top toolbar.
- Go to Pages and click Add New in the sidebar.
- Or click Add New button on top of the Pages.
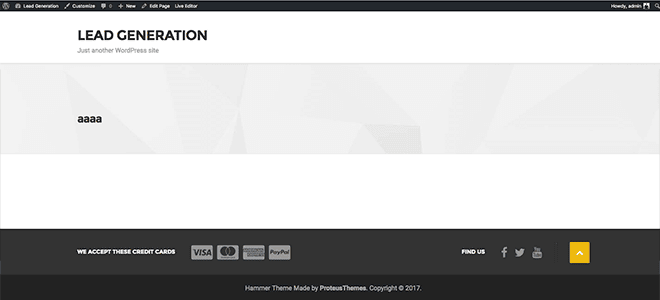
After you create a new page, you will need to go to that page and hide all the default elements from it. Therefore, a visitor won’t be able to leave your site that easy. The only way to leave your landing page will be to click on the “X” in the browser tab. This is the number #1 trick when designing a landing page.
Hide All Elements of the Current WordPress Page
First of all, check, if your theme already has an available page template without a header and a footer. If you are lucky, you can skip this part of the article.
If your theme doesn’t have a page template without a header and a footer, you should make a child theme and create your own page template without a header and a footer. That would be the right way, but for the sake of simplicity, I will show you an easier way on how to hide a header and a footer.
To hide default elements like header, footer, and sidebar on your WordPress site, use CSS property display: none; for all elements, which are already shown on your newly created page.
In my case, I need to hide two header elements and two footer elements. This is the code I pasted to Additional CSS in WP Customizer (Appearance > Customise > Additional CSS).
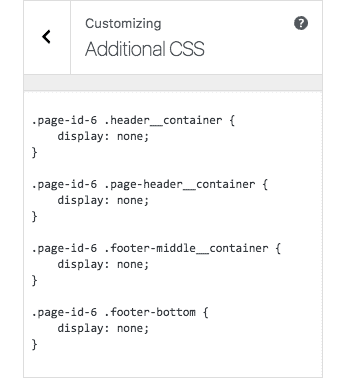
I also needed to put the page ID in front of all the classes, so the header and footer disappear only on that particular page and not sitewide.
How Do You Find Classes of the Elements You Want to Hide?
It’s not that hard, especially if you ever saw an Inspect tool in your browser. To find the names of the classes, you will need to go to your newly created Landing page > Mouse Over the element you want to hide > Right click > Inspect, and then in dev tools, try to find the parent div of the element you want to hide.
When you find the parent div of the element you want to hide, just copy/paste the name of the class to your Customizer. In my case, that name is header__container.
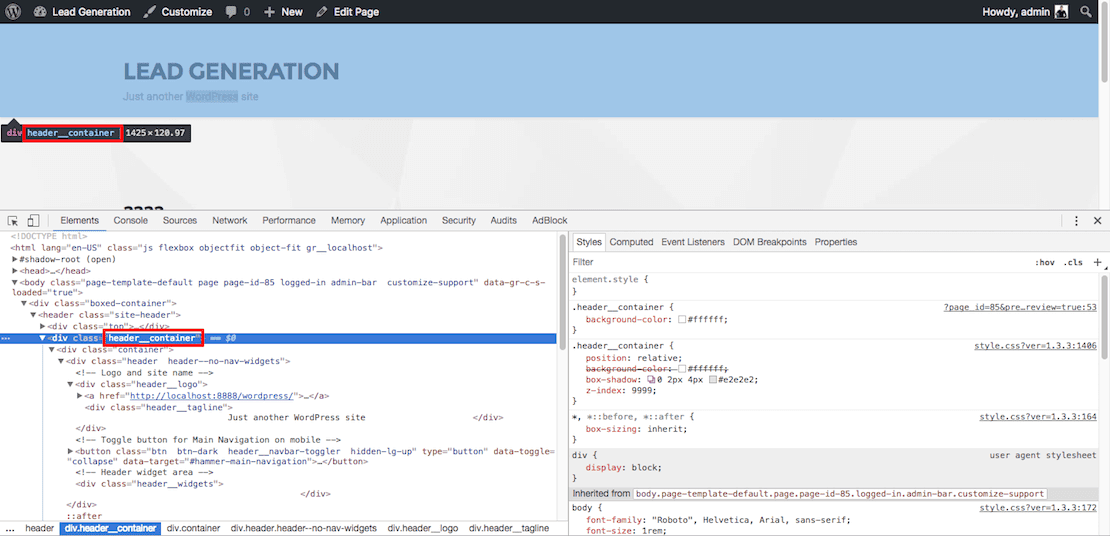
*Element on the top highlights, when you mouseover the lines of the code below. *If you have troubles finding the right class, watch this short video tutorial.
How Do You Find Page ID in WordPress?
Go to WP Admin > Pages > Your landing page and you will see something like this in the URL of that page:
![]()
Once again, your additional CSS should look like this where you changed the classes and the page ID with your own.
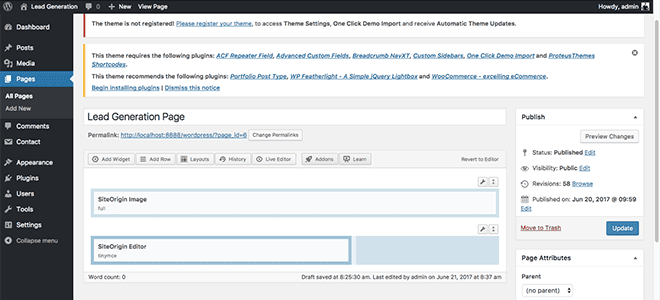
Now that we have a clean white page without anything we can start building our landing page. For a start, install the plugin called Page Builder by SiteOrigin and SiteOrigin Widgets Bundle (Plugins > Add New > Search Plugins)
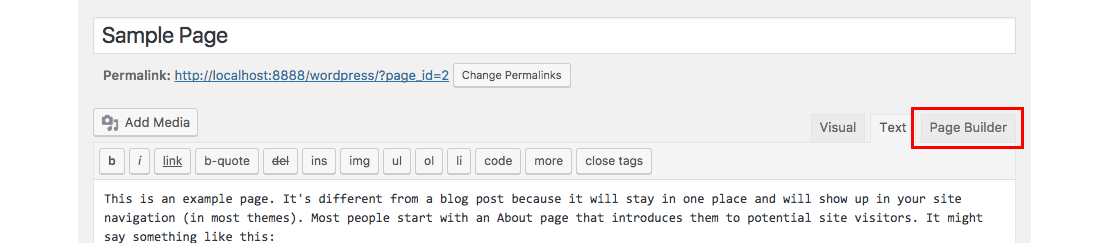
Then go to your site (Pages > All Pages > Your Page) and click on the tab Page Builder.
Then click on the button Add Widget, and choose the SiteOrigin Image widget. The new widget should appear below. We will insert our logo into this widget. To do that, you need to click on the Widget > Choose Media and choose your logo. If you haven’t uploaded your logo yet, upload it now. When you are done, click Set Media.
Since we want our logo to be centered, click on the Image Alignment and choose Center. When you are ready, click Done.
*Note: If you go to the live preview and see, that your logo is still not aligned, the reason for that could be, that your page is showing the (empty) sidebar. Try changing the page template in the right sidebar when editing the page. If you are lucky, your theme has a pre-made template without sidebar. Yes, all ProteusThemes themes have this feature included 🙂
![]()
Now It’s Time for the Hero Area.
We want to have two columns here, so we are going back to the editing page.
Click on the Add row, set a two columns row with the ratio 65% – 35% and click Insert. Now we made an empty row with two columns.
The next step is to insert the headline and three bullet points. We click on the left column, so it highlights, then we click on Add widget and then we add the widget called SiteOrigin Editor. For me, this is the most useful widget because of its flexibility.
We click on the newly created widget and start inserting the content.
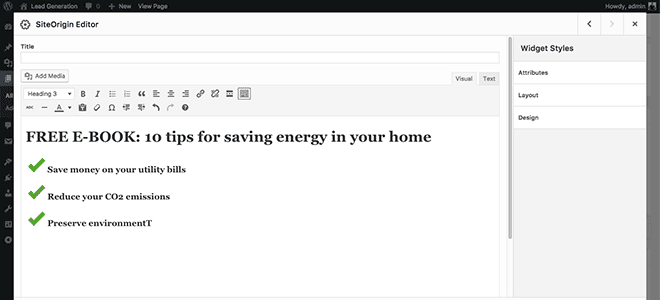
*If you don’t have check icon, you can download mine. Excellent resource for icons is also IconFinder, but please check the licenses before using the icons.
Let’s Create a Lead Generation Form.
To do that, we are going to use Contact Form 7 plugin. If you don’t have it installed and activated yet, please do it now. The process of installing the Contact Form 7 plugin is the same as we did above with the Page Builder plugin.
When you have CF7 plugin installed and activated, go to WP Admin > Contact > Add New and enter the name of the contact form.
Since we will be collecting only user’s name and e-mail, your code for the form should look like this:
<label> Your Name (required)
[text* your-name] </label>
<label> Your Email (required)
[email* your-email] </label>
[submit class:btn class:btn-primary "Download FREE E-book NOW"]
Since I don’t want to have a non-styled button, I inserted two extra pre-defined classes to my button. In my case, that is class:btn and class:btn-primary. If you would like to do the same and you don’t know the name of the class of the button, I’m sure you will find it in the theme documentation.
Now go to the second tab Mail and set up all the fields you want the user to get in the confirmation mail. Here we need to include the link to the e-book or e-book itself since this will be the only reason why the user is giving us his email. When you are done, click Save at the bottom.
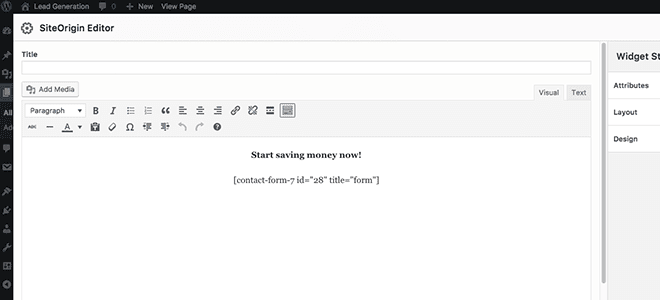
Then copy the shortcode that pops-up on the blue background at the top of the page. In my case, the shortcode looks like this: [ contact-form-7 id="28" title="form" ]. Then go back to edit the page and paste it in the right SiteOrigin Editor widget and click Done.
*I highly recommend you to click Update every once in a while because you will never know when you will accidentally close the browser.
Because we want this hero area to be highly visible, we are going to change the background. You can do that by clicking the ![]() Wrench icon at the top right corner of the two column row and then click Edit Row.
Wrench icon at the top right corner of the two column row and then click Edit Row.
Then you need to click the Design in the right sidebar and set the background image. I’m going to use an image from author Raul Petri founded on Unsplash.
*Don’t forget to optimize your images for better performance. My colleague Marko wrote a great article about image optimization.
Because I want to have this background image full-width, I set the layout to Full Width (Layout > Row Layout > Full width).
If you go to the live preview, you will see that now you have a dark text on a dark background. To change the text color, go to the left widget with the content and click on the last icon in a row, called Toolbar Toggle.
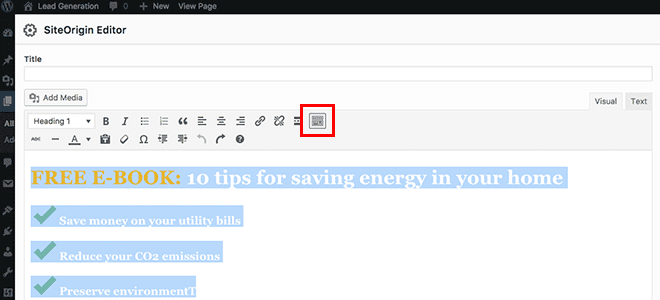
Now you get a few more options, including text color. Select all the text and color it to white.
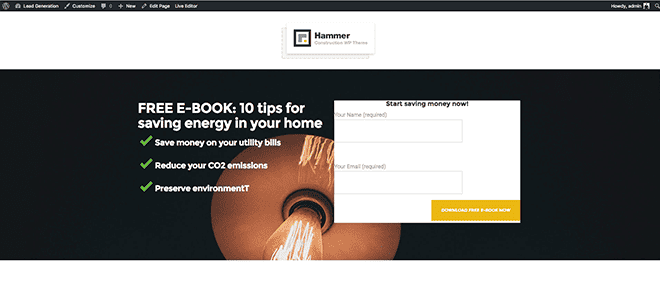
We want the contact form to stand out a little more, so we are going to change the background color of the left widget too. Again, click on the Widget > Design and there set the background color to white.

As you can see in the screenshot above, the spacings are not right at all. First of all, I don’t like that my form is touching the top border of the image. To change that, we should click on the ![]() Wrench Icon of the hero row and then Edit Row. In the sidebar on the right, we click on Layout and set the paddings. I set padding on
Wrench Icon of the hero row and then Edit Row. In the sidebar on the right, we click on Layout and set the paddings. I set padding on 45px 90px 45px 90px. Here is the result:
The next thing I don’t like is the inner padding of the widget. To change that, we go to that widget, we again choose the Layout in the right sidebar and set the inner padding. I set them to 45px 60px 0px 60px.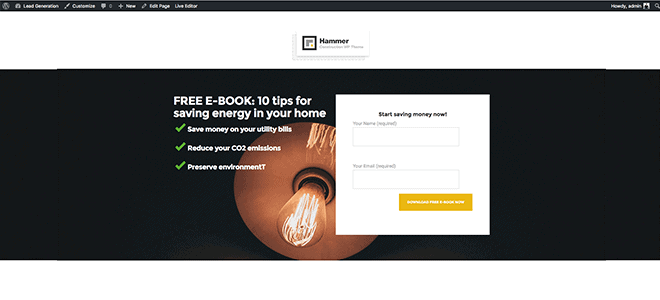
As you can see, our landing page looks better and better. I repeat the procedure above ‘till all the paddings and spacings are as they should be.
When you are satisfied with your result and the landing’s look on a desktop, it’s time to see the mobile view.
? This is the moment when it is allowed to pray a little.
If you are lucky (or if the theme author has done his job), there are only a couple of spacings broken. To fix them, go again to ![]() Wrench Icon > Edit Row or Edit Widget > Layout and change the values of Mobile Paddings.
Wrench Icon > Edit Row or Edit Widget > Layout and change the values of Mobile Paddings.
Adding Testimonial to Our Landing Page
Now that you know how the Page Builder works, I’m going to speed up the process in the last part, where I’m going to create a testimonial section. I’m going to add a new single row on the bottom, add a SiteOrigin Editor widget and put a photo, a quote, the testimonial itself and the name of the reviewer inside. I’m going to use pre-defined headings to get different font sizes.
If you don’t like the pre-defined font sizes, you can always add your own with inline CSS. To do that, click on Text tab on the right top corner (when you are inside the widget) and add font-size: property. Example, where I change the default h5 font-size to 28px:
Example, where I change the default h5 font-size to 28px:
<h5 style="font-size: 28px;">Lorem Ipsum dolor site</h5>
Here is the final result of our lead generation landing page:
*Pro tip: don’t put too much time into designing the lead generation landing page. The design is just one part of a good landing page. Focus on other important things, such as copy and the actual value you give your users. Content matters the most!
How to Nurture Your Leads
Now that your landing page is complete, you’re ready to start driving traffic to it so you can start acquiring targeted leads. Once they join your email list, you will need to spend some time nurturing them so they can convert into buyers and clients. Below are a few tips that will help you achieve just that.
Focus on Providing Value
A lead generation landing pages usually focuses on a free offer. It goes without saying that the offer itself should be valuable, however, you need to continue providing value after you get the contact details from your visitors.
By providing value, you will build trust with your leads and position yourself as the authority in your niche. This will then make your leads more inclined to buy from you. This brings me to my next point which is to…
Implement a Welcome Sequence
A welcome sequence is the best way to provide value to your new leads. A good welcome sequence usually consists of 5-7 emails (and it can be longer) which nurture your leads further.
Your welcome sequence should elaborate on your free offer as well as introduce you and your business. You can share your origin story, your brand’s or company values, your mission, and educate your leads on how you can help them.
Pay Attention to the Timing
Timing is everything. Get it wrong and you won’t see any sales nor get a good ROI on your lead generation landing page. Get it right and your leads will turn into buyers and loyal brand ambassadors that will help you get even more leads and customers.
As such, your welcome sequence should be timed in such a way that keeps you top of mind for your leads without annoying them and leading them to push that Unsubscribe button.
It’s generally recommended to stagger the welcome sequence so your newly acquired leads get a new email from you once every day over a period of 5 or 7 days. However, if that seems too much for you, you can also decrease the frequency and send an email every two days which then makes your welcome sequence too long.
This will require some trial and error on your part but most email marketing providers allow you to adjust how often your welcome emails should go out. You can start off with one email per day and pay attention to your engagement rates as well as your unsubscribe rate and then adjust as needed.
Wait Before You Ask for the Sale
While it might be tempting to ask for the sale immediately after someone hands you over their email address or other contact details, you need to wait before you ask for the sale.
According to research, users need to come into contact with your brand at least 7 times before they are ready to buy and your welcome sequence is the perfect way to make sure those 7 touch points actually happen.
Consider Using Scarcity
As you’re getting close to the end of your welcome sequence, you should start introducing your offer. One way to get sales is to apply the principle of scarcity marketing and make the offer available for a limited time or in limited quantity. Scarcity works well because it operates on the assumption that we immediately want something more if we know that we might not get it.
For example, our energy saving light bulbs might come with a 20% discount but only if they buy during the next 48 hours. Or you might offer your high-end one-on-one program but limit it to 20 participants only.
While scarcity is a popular marketing tactic that can yield great results, a word of caution is needed: only use it if your offer truly is limited. If you advertise something as available for a limited time or in a limited quantity and your leads discover that’s not true, you will not only lose their trust but also hurt your brand reputation.
Don’t Give Up
Finally, don’t give up. Some leads will not ready to buy even after the initial welcome sequence, however, there is no reason to despair. Simply continue nurturing them and providing value to them before going for the sale again.
If your marketing software allows, considering tagging all the leads that haven’t purchased or adding them to a separate list so you can include them in the next promotional campaign and pitch your offer again.
Congratulations!
You made it to the end of the tutorial. Now you know how to create a simple landing page on basically every WordPress theme. I wish you many leads!
Want To Save Some Time?
If you want to recreate the landing page, but you don’t have time to make it, you can download my .json file and import layout into your Page Builder. To do that, create a New Page > click Layouts > Import/Export and then import the .json file.
*Even though you import the demo content, you will still need to install all the plugins, create a new contact form and hide the header and footer of the page.
P.S.:
Now that you have created your lead generation landing page don’t forget to make some A/B tests.
P.P.S.:
If there is something unclear, feel free to ask for help in the comment below.


